Symptoms: After some random amount of printing, the carriage would get stuck and just twitch instead of moving across the platen.
Testing: Using its internal test function, I let it print out until the problem ocurred.
Once the problem ocurred, the carriage would just kind of twitch back and forth. Grabbing it, it was obvious that the stepper motor was providing no effective power. Since this is usually indicative of a missing phase to the stepper motor, I immediately suspected either:
I then removed the cover to gain access to the circuit board and motor connections. It was necessary to defeat the cover interlock to get it to come one. Now, to get it to screw up again.
I left it printing out the ASCII character set and got a byte to eat. When I came back it was busy gouging a hole in the paper. So now for the critical test: Will pressing on the stepper motor connector cause a change? The answer is --- Yes! The carriage started moving again meaning that it is likely a bad connection.
Of course, to gain access to the underside of the circuit board required removing a zillion screws and the entire mechanical assembly. But once this was accomplished - immediate gratification. There were obvious bad solder joints around several pins of the stepper motor connector. I resoldered these and few others that were suspicious and inspected the rest of the board. If only I could remember which screws went where! Apparently, the continuous vibration of the assembly eventually caused the connections to fail. This is not likely a heat related problem though it could be just plain bad quality control.
Once reassembled, I left it happily printing out page after page of ACSII characters. Then, just to be sure, I connected an old laptop and printed a few pages of Repair Notes.
Comments: This is one of those dream problems since their solution is so obvious and so definitive. There is no doubt that the cure will last. Unfortunately, the tough 'dogs' are the ones you lose hair over.
Symptoms: The power supply had been identified as being bad by the seller.
Testing: I plugged it in - nothing as expected. This was to verify that all functions and display were dead.
I removed cover and found that the main fuse had been removed. Hmmm, this usually means catastrophic power supply problem. This is the typical Panasonic switching power supply. Well, I have completely rebuilt these, so no biggie. (Of course, there was one I blew up, but that is another story).
The hardest part was removing the power supply. It is buried underneath the bottom circuit board necessitating the removal of this board and the front panel. Do you think they design these things this way to discourage tampering? There was plastic in specific places to prevent removal from the top even though it would have been trivial to design for easy removal. I disconnected power supply from VCR. Fortunately, this was just a connector.
I tested across switchmode power transistor with ohmmeter - dead short C-B-E.
I looked in ECG for 2SC3890 - ECG379 with that infamous # indicating an electrical but not mechanical match.. Since I had some BU406s, I looked this number up in ECG guessing that the BU406 would be have similar ratings and be usable in a small switcher - guess what, ECG379. The difference is that the 2SC3890 is totally plastic while the BU406 is a metal tab TO220. OK, so I cut out a bit of mica to serve as an insulator and used a nylon screw. This is temporary as I intend to get the proper replacement (2SC3890 - $2.15 from MCM Electronics).
I also checked continuity from the main filter cap to the C and E leads of the transistor to rule out a blown fusable emitter resistor. I checked other semiconductors as well - all fine as far as my VOM was concerned. Fortunately, the only casualty seems to have been the transistor and the fuse was fast enough to prevent any damage due to its shorting.
To power up the supply, I initially used a Variac with a 25 W light bulb in series with the line. Note that since I do not have any 1.6 A fuses, the fuse is shorted. The light bulb will provide the current limiting for now. I use my dual outlet widget box plugging in the supply to one outlet and a lamp with the 25W light bulb into the other (the outlets are wired in series for exactly this sort of application). This whole rig was plugged into an isolation trasformer for safety.
I then identified the primary output and connected my VOM to this. It would be in the range 5-15 V, probably 12 V based on the filter capacitors (16 V).
All set? Crank up power. Output comes up to about 13 V at around 50 VAC in. Light Bulb hardly flickered. If it had not stopped in the 12 V range, this would either indicate that there was a problem in the regulation or that a load was needed. Had this happened, I would have put a 22 ohm 5W resistor on this output and retested. Cranking up the Variac to full voltage causes no noticeable change to output.
OK, connect VCR. Lights, VCR, power! Nothing. Light bulb is now glowing but there is no indication of life from front panel and no action from motors.
Hmmmm.
Examining the nameplate, the expected power consumption is 29 W which is way more then one can get through a 25 W light bulb. (Expect to be able to draw maybe half of the bulb's ratings). So I go hunting for a 60 W light bulb.
This time the motors twitch and the front panel comes alive. Inserting a tape and holding my breath - tape starts to load but then aborts with poweroff. Go for it! The Variac had been set at about 90 VAC, so I crank it up to 120. Now everything works. I go dig up a TV and verify that the basic functions are ok. Doesn't appear to even need much cleaning. Even the idler tire appears to be in good condition.
Add a 2SC3890 and box of 1.6 A fuses to my next MCM order.
Comments: this is the sort of repair that might not pay for a professional shop to undertake. The time to disassemble the VCR, identify the problem, replace the transistor and fuse, and verify correct operation could be excessive, or at least has the potential to be excessive. If it turned out to be more than a transistor and fuse or was beyond repair, they might have to eat the cost in time and materials. In addition, there is no real way to guarantee that other marginal components won't cause the problem to repeat a week or month in the future. Upgrade/repair kits are available for these supplies and would probably represent the lowest risk investment for a permenant repair. No doubt, the previous owner had taken it in for repair and been quoted a rediculous price to replace the entire power supply module.
Symptoms: Modem works in most respects but when it goes to dial, the tones are superimposed on the dialtone which never goes away.
Testing: I plugged it into an old laptop kept for the specific purpose of testing of random external peripherals. Indeed, the AT commands worked just fine but tone dialing did not work. Interestingly, pulse dialing would work 90% of the time but a connection was never completely established.
At this point, I put a scope on each side of the 600 ohm coupling transformer. A normal 2 or 3 volt p-p signal was present on the logic side of the transformer during dialing. However, a much attenuated signal was present on the phone line side - probably .2 V p-p or so. I probably could have used a set of crystal headphones to just listen to the relative amplitudes of the logic and phone line side signals instead of a scope. (Magnetic headphones would have too low an input impedance.)
On a hunch, I did try replacing the transformer with one from my junkbox but as expected, this produced no change.
The phone line is a nasty place for electronic components - 90 V ringing signal, lightning strikes, pickup of EMPs (from nuclear bombs), etc. The first place to look for fried components is therefore the phone line circuitry. For a modem and no schematics, with the possible exception of the power supply, it is also probably the only place where there is any real chance of finding a problem.
Since there are a manageable number of discrete parts that connect the phone line to the transformer, an ohmmeter check was in order. Unfortunately, many of them were really itty bitty surface mount parts. After a couple of go-arounds, this proved to bear fruit as an SO23 device marked on the circuit board as a diode turned out to be shorted though I seem to have missed it on my first pass. Carefully unsoldering the almost microscopic part confirmed that it had turned into a dead short.
Note: markings for these devices were not always complete. Nonetheless, basic ohmmeter checks could be made with enough confidence to tentatively eliminate all except the single shorted diode.
Removing the diode and retesting proved that dialout was possible and that normal communications at 14.4 K baud was normal. The markings on the diode did not permit me to identify whether it was a simple diode or a zener. I still do not know what function the diode actually served.
I replaced it with a 1N4148. The modem has been tested to confirm that it is not damaged by the ringing voltage. Since the application does not require dial-in access, I do not know if there is still a problem with this mode.
Comments: Where a problem can be narrowed down to a small section of circuitry, ohmmeter tests can prove successful in identifying parts that have failed shorted or open. This may be the only option when confronted with a device for which obtaining a schematic would be difficult or impossible - or not worth the effort. While we might consider a modem to be a throwaway item these days, the time need to do basic testing of the phone line side components is minimal and, as in this case, may be all that is needed.
Symptoms: Dead. Located fuse - blown due to short (not overload). Blackened inside glass. Note: appearance of blown fuses is very significant.
Testing: Replaced fuse. This was in hindsight a mistake without using a series light bulb to limit the current. The new fuse did not blow but the lights dimmed momentarily. Apparently a fusable resistor had sacrificed itself to protect the fuse.
Without schematics, I decided to trace the AC line circuits. These were partially buried inside a metal box with some big fat resistors on a separate board.
Measuring across the power resistors revealed that one 2.7 ohm resistor was now open. That explained the new failure. Some further searching located a TO3 power transistor inside the metal shield. Measuring C-E came up 0 ohms. This was not the horizontal output transistor but was rather in the power supply - a flyback switching supply separate from the deflection circuits.
The transistor was marked with an RCA part number. My handy dandy ECG Semiconductor Master Substitution guide listed it as a typical 350/800 volt switching transistor. I did not have an exact replacement but figured that a horizontal output transistor would probably work at least temporarily in this application, so I used my favorite BU208A in its place.
As a temporary substitute for the fusable 2.7 ohm resistor, I put in a regular power resistor with the understanding that a safe replacement would be installed before the TV was buttoned up.
Now for the test. This would be classic use for a series light bulb and/or variac for the initial power on. However, for whatever reasons, I did not bother - and lucked out in this case. The TV came on just fine. The only adjustments needed were to focus and horizontal position - totally unrelated to the original problem.
The recommended ECG replacement for the chopper transistor was an ECG385, a 350 V 10 A switching transistor. I elected to put in an ECG386 to give myself a little extra margin. The ECG386 is rated at 500 V and 20 A. Other specifications were similar or superior.
Comments: Since most modern consumer electronics are powered all the time even if the power switch is off, it is always a good idea to unplug everything during a lightning storm or if a blackout occurs. A nearby lightning strike can easily impose huge transients on the AC line. When power is restored following a failure, the initial power-on may not be clean including mini-brownouts, spikes, multiple cycles, etc. These are all hard on switching supply based equipment. Now, I fully realize that few of ua actually follow this advise. (Of course, other screwups can result in similar damage. I once was given a bag of dead stuff from a friend of a friend who had been doing a little wiring in his house. Somehow he managed to connect 240 V to a 120 V circuit - only for a second....)
This is one example where a failure with the most catastrophic impact on performance (it was dead, after all) has among a very simple solution (transistor, resistor, fuse). I much prefer these to the 'color noise on channels in the UHF band' variety.
Symptoms: Disc is loaded from cassette, disc spins at various speeds for about 5 seconds, then it gives up, unloads this disc and loads next until there are no more.
Testing: Testing consisted of removing cover and observing behavior. Everything appears to happen normally except that disc directory is never read.
This is one of those problems that has an obvious cause and solution once experienced, diagnosed, and repaired the first time. I will outline my approach the first time I came across this one describing this particular case history from the perspective of the novice wannabe repair expert.
Since the disc is loaded and spins, it is likely that the laser and focus servo are functioning (though perhaps no guarantee, but I hope to get to that in another episode).
At first, I suspected (incorrectly) that an adjustment was needed, so I did what I always now warn against - turning any of the internal controls. I thought that they had been returned to the original settings but was not positive.
Pioneer CD players usually include a test function - a button on the main circuit board marked 'TEST'. Normally, test functions are invoked either by simply depressing the button or by holding it depressed when power is turned on. In this case I discovered that if this button were depressed when the unit was switched on, the display would change and certain front panel buttons would now function controlling the servo circuits directly.
(Note that the approximate duration of the previous paragraph was about 1 year as I put the thing aside unable to make any headway during the first go-around.)
After some experimentation with the front panel controls, I came to the conclusion that:
All this was leading nowhere until I accidentally happened to engage all servos in the middle of a CD - and the track display suddenly appeared. I reached for my headphones and confirmed that the CD was playing, just fine.
A little further investigation allowed me to determine that the CD would play fine from about the middle to the end but would get progressively noisier when moving toward the starting track and would be totally unplayable at the very start.
Now, what could depend so fundamentally on track position? Well, there are two possibilities: spindle motor speed and PLL frequency. A little careful tweaking of PLL center frequency had little effect.
One thing I noticed was that one of the servo driver ICs was running quite hot. This should have raised a red flag but again, this was the first time I had seen this problem. I also observed that putting a heatsink on the IC and blowing on this would permit the disc to play error free much closer to its start.
So now, you are saying, "what a moron, everyone knows that Pioneer CD spindle motors are crap". The confusing thing here was that the spindle motor was not dead, just marginal. So, all basic observations came up negative.
Anyway, back to the saga. Suspecting the driver IC, I obtained a replacement from MCM Electronics and swapped it. No change. Measuring motor voltage showed a maximum of 1.7 V or so at any time including startup. Since the driver is known now to be good and power was confirmed to be stable, I started to suspect the motor.
Disconnecting the spindle motor and cycling the player revealed that the driver was putting almost 10 V on the motor terminals but the motor was no doubt partially shorted and dropping this to less than 2 V with the consequential high power dissipation in the driver.
Now for the long shot. While the player was attempting to spin up and read the disc directory, I gave the motor a squirt of degreaser through its ventilation holes. The motor took off - went totally overspeed. Power off. Wait for degreaser to evaporate. Try again. Now, the directory came up the first time even though my internal controls were still no doubt not perfectly tweaked. All functions worked perfectly. For the first time is about 2 years, the player was producing music (without the help of TEST mode!
I then performed a normal alignment of the internal controls (but this is another story).
Measuring the motor voltage now showed greater than 5 V at spinup and a range of 2-.5 V between start and end of disc.
Comment: At this point the proper course of action would be to replace the spindle motor. However, since this is my CD player and replacing spindle motors is sometimes a pain, I will just keep an eye on performance. A pretty good indication of the motor's state is the time to spinup. If this deteriorates again I will be forced to replace the motor. For now, it continues to be satisfactory.
The initial confusion here was due to the fact that the motor was not totally dead, just weak enough to cause a problem with the inner tracks and more importantly, the directory. This is one of those cases where the old style turntable with a bad weak motor would have been much easier to troubleshoot,
Symptoms: Totally dead. No schematics available.
Testing: Applying power produces no output. Only observation is that lights flicker indicating the input filter capacitors are charging so this eliminates a blown line fuse as a possibility.
Unfortunately, this unit is not what I would call a 'simple switcher'. In addition to the main switchmode transistor, there are 2 other power transistors, a uA723 IC regulator, countless discrete transistors, resistors, capacitors, some components I cannot identify. This is all on the primary side of the transformer. Tracing the circuit is virtually out of the question due to its complexity. The only good news is that I have several identical units so I can compare readings between the bad one and a working unit. Powering with a Variac produces similar lack of any output. This is not a case of the outputs shutting down - there is simply no startup.
First check: power to main filter caps, continuity of thermal protector, power to uA723, power to switchmode power transistor. These all are fine.
Next, checked components around input including power transistors, large resistors (suspecting a startup problem), capacitors, etc. All ok.
Finally, about to give up, I decide to just test resistance across a more or less random selection of components. Everything is identical until I put my meter across a 6.8 M ohm resistor. On the good unit, this measures above 1 M ohm. On the bad unit, it measures about 40 K ohms. I unsolder components around this resistor until I located a 2N4124 transistor that makes a difference when removed. Testing on the x1 range of my VOM it tests fine but on the x1K scale, there is significant leakage in the reverse biased junctions. Comparing with a nearby 2N4124, this is definitely not the normal characteristics of a 2N4124. The 2N4124 is a general purpose transistor so I replaced it with a handy 2N3904.
Powering with a Variac, the supply now comes up fine. I have no idea of the function of the bad transistor.
Comments: This might be called a blind repair. Like bad connections, the failure mechanism and function of the bad part will probably never be known. It is not known whether the transistor was marginal to begin with and ts characteristics just drifted over time, or whether it went bad.
The basic assumptions which permit this technique to work at all are that for a sudden change in behavior in a system with mostly discrete parts, one of these parts has changed its resistance enough that an ohmmeter check has a chance to find it and that the circuitry is interconnected enough that checking a relatively small subset of node combinations has a good chance of locating the bad part.
Symptoms: Basically operational except absolutely no color - not even any color noise between channels. Color and Tint knobs have no effect. In addition, brightness control has very limited range - brightness slightly too high. Several other minor problems including cracked tuner knob, dirty tuner, broken antenna wires.
Testing: This involved tuning local strong channels, adjusting fine tuning, tweaking AGC, etc. Under no circumstances was there any hint of color in the picture or between channels.
Fortunately, such symptoms narrow down the possible area of investigation to the chroma decoder circuitry. Searching the circuit board for a likely subsystem, I found that the set uses a TA7608P chroma chip. Fortunately, this chip is listed in my ECG Semiconductor Master Replacement Guide with a cross to ECG1532. Naturally, I suspect the IC at this point but know better than to just go out and find a replacement - I have been burned in this way with an RCA TV color problem - maybe I will say more on that in another Repair Brief. While the ECG does have a pinout, this does not really provide enough information to probe the circuit.
Off to the library to obtain the Sam's Photofact for this set. $0.75 poorer, I copied the complete schematic and another interesting page - a chart showing the resistances to ground for all pins on all of the intergrated circuits used in the TV. One item I forgot to look for was the block diagram that may have been included of the TA7608P chip. Oh well.
One thing I did try once armed with the Sam's was to attempt to tweak the subbrightness control. Even this had very little effect. OK, on to the fun stuff.
First test: confirm that the resistances of the circuit match those printed on the resistance chart. The chart specifies a DMM that applies less than .1 V on the ohms scales (to prevent forward biasing of any semiconductor junctions). Hopefully, my DMM satisfies this requirement. First step: make sure the main filter capacitor is discharged before making any resistance measurements. Done. Unfortunately. these tests do not reveal anything amiss.
Tests of this type are not guaranteed to find any problems. However, there is a fair chance that a shorted or open part would show up as a bad reading in the near that part. In my case, if there were any bad parts, the circuit topology prevented this simple resistance test from detecting them.
Now for the live tests. I don't have a color bar generator so I just have to hope that a broadcast channel will provide a signal that is close enough.
In the interest of safety, all the following tests are made with the set powered off of my isolation transformer.
Voltage measurements were inconclusive. Although some where off by 20%, this could be due to my non standard input signal. There did not appear to be any particular pattern.
Next, I used a scope to look at the testpoints for which Sam's supplied waveforms. Again, these will be different than the ones using a standard colorbar signal but the overall appearance should enable me to determine if a particular output is dead or the amplitude is way off.
All the waveforms looked reasonable except one - the output of what I deduce to be a gated chroma amplifier. Its output is almost dead. The color reference oscillator (3.58... MHz) looks fine as do the chroma input and color burst gating pulses. All the supply voltages and decoupling pins look fine as well. This doesn't look good for the chip. The signal seems to be getting in but the chroma amp would seem to be dead. Fortunately, I could not locate an inexpensive replacement from my usual sources. The TA7608P is probably obsolete. Even the ECG1532 is not available from MCM Electronics or Dalbani. I did not get to the point of trying ECG directly. You will see why I say 'fortunately' in a moment.
When confronted with a situation of this type, I usually try some experiments.
What would happen if I apply the chroma signal directly to the point in the circuit that is the output of that dead chroma amp? I take a 10K resistor and jump the input of the chip to the chroma amp output (and input to the chroma demodulator.) Now, I have colored stripes on the screen indicating that the chroma demodulator circuit is probably functioning. (Without the color burst to phase lock, I could not hope for anything more). So, it still looks like that bad amplifier. Well, one last desperate effort....
I use my Sam's patented magic spit. This has served in on numerous occasions mostly when locating clock noise, marginal timing, or glitches in high speed digital systems but hey, the world is really analog anyhow. I am not joking. Those who have done serious debugging know exactly what I am talking about. Moisten your finger. Run it up and down the pins on a suspect device. If something changes you have either (1) found a particularly critical or high impedance but normally behaving circuit (for example the frequency determining LC network of an oscillator) or (2) something that is open or on the edge.
Magic spit to the rescue: running my finger (one hand in my pocket, isolation transformer, etc.) over the two rows of pins on the chroma chip proved to yield immediate results. Around the low number pins, the color suddenly appeared grossly overloaded but with some indication of correlation with the picture. This is the first time I have seen any indication of picture related color. Hum.... OK, now to narrow it down. I take an insulated wire, and strip both ends. Holding one bare end with my fingers, I touch each of the pins in turn of the chip. Touching pin 6 has the most dramatic effect producing the distorted colors. What is connected to pin 6? According to the schematic, it is a 2.2 M ohm resistor to pin 3 and a decoupling capacitor to the power supply. It is unlikely that the capacitor would fail in such a way as to cause this behavior. So it must be the resistor. Rummaging around in my resistor cabinet I come up with a 2.2 M ohm resistor. and tack it across pins 3 and 6 (with power off!).
Now I get distorted color but this looks a lot more like a color TV than what I had before. Time for a better antenna. That helped a little but the picture is way too dark. Well, I did fiddle with the sub-brightness control back when it had minimal effect. Locating the sub-brightness control again, it now functions as expected having more than a sufficient range. When adjusted to produce a picture of normal brightness (with the user control mid-range), the color appears normal. Some additional fiddling with the Color and Tint controls yields a fine looking color picture.
Removing and testing the original 2.2 M ohm resistor confirms an open circuit. Soldering in my replacement completes the repair.
Now to clean the tuner, wipe down the case, repair the knob and antenna....
Total cost $1.77 including original purchase price (I threw in a hypothetical $.02 for the resistor).
As I am writing this, I am watching the Goldstar TV - my trusty RCA has just died after 14 years with no picture (raster and sound ok - that will be another Repair Brief).
Comments: It is always tempting to suspect the expensive or unavailable part first. Very often, as in this case, this proves to be erroneous. Had the TA7608P been readily available at reasonable cost, I would have probably replaced it only to find no change in behavior. This would, however, have saved time.
Be warned that the "Sam's Magic Spit(tm)" approach must be used with caution. You must understand the safety implications of touching *any* live circuit especially with moistened fingers. I use an isolation transformer for debugging. However, even with this precaution, I would think twice before doing this on a live chassis (the Goldstar signal circuits are isolated from the power line).
Symptoms: Band of what looked like tracking noise would come and go depending on tape being played, speed of tape, whether at start or end, etc. The noise was confined to the top 1/3 of the picture. Its height could vary from just a couple of video lines to a band occupying 20 % of the screen.
Testing: Several tapes were played initially. Problem would be nearly absent with some but severe on others. It was generally worse with EP recorded tapes compared to SP tapes.
I generally do not like problems of this type because one of the more likely possibilities is of a worn video head. This is one of the classic symptoms yet it could have a number of other causes. The approach must be to eliminate as best as possible the alternative causes until the risk of purchasing a new video is minimized.
Alternate #1: dirty heads. Head cleaning with a wet cleaning tape followed by a manual cleaning had little effect.
Alternate #2: tape path alignment. Visual inspection of the tape movement showed nothing out of the ordinary. Tape motion was very smooth and uniform with no wiggling, wavering, or wondering. All tape guides were properly positioned, perfectly vertical (where appropriate) and the tape appeared to be riding at the correct height on the video head cylinder.
Alternate #3: backtension. Insufficient backtension could result in similar problems. Inspection seemed to indicate that backtension was normal. Manually increasing backtension by gently pressing the backtension level to the left made a slight improvement. Increasing the spring tension did the same. However, these were not dramatic effects and backtension is not a critical setting to obtain a clean picture (though it is important to be accurate to minimize head wear and clogging).
Alternate #4: roller guide height. Although visual inspection of the of the tape path alignment proved negative I decided to confirm roller guide height by careful adjustment of the supply side roller guide - carefully noting its original position. (Problems at the top of the picture would be related to the supply side roller guide.) Optimal position for both EP and SP was at the original setting.
This left the video head as a likely candidate and at this point based on the age of the machine, a new video head cylinder (MCM Electronics, ERH433) was ordered and installed. Success! There was no doubt about the improvement. The noise bards completely disappeared and the normal backtension provided more then adequate head-tape contact.
Comments: Subtle problems that eventually point to the video heads are among the more difficult to diagnose with enough confidence to risk ordering an expensive video head and find out that the problem was elsewhere. This was a case of video head wear (as opposed to a mechanical or electronic failure of the heads). The chance of having an identical video head available to swap - which is the best test - is quite small, especially for a 3 head type. If this were a 4 head machine, some meaningful comparisons could be made during playback since a different set of heads is often used depending on tape speed and mode.
Thus, unless there is visible damage to the video heads or something like an open winding that could be revealed by simple testing, it comes down to eliminating as best as possible the alternatives until only the head remains a likely possibility.
Symptoms: Everything worked fine except dialing. For some buttons, dial tone would not go away. For others, tones would be accepted but would be erratic and incorrect digits. Certain tones sounded weak or single frequency.
Testing: All buttons were tested. It was found that the problem was not even consistent as some buttons would not work all the time.
While the internal wiring of one of these old phones is intimidating, the basic tone dialing circuitry is an amazing example of simplicity. About the only things that fail yet still permit some tone generation are the pot core coils that determine tone frequency. Therefore, this is the first thing to check.
Sure enough, the core that deals with rows has split where the two halfs are joined. This seems to be a common problem due to both the age and brittle cement used on some revs of this model phone, and probably, as a result of rough treatment when hanging up the handset.
These cores must be aligned before being glued back together. In addition, there is an adjustment plug which may need to be tweaked. I align by ear as follows: Put a known good tone dialing phone and the bad phone on the same phone line. Depending on which core is bad, depress either an entire (same) row or column of buttons on both phones. (Adhesive tape is handy to hold down the buttons unless you have four hands.) By depressing the entire set of buttons, you are disabling the other tone generator so you hear a pure tone. Without turning the fine adjustment plug (assuming it was not disturbed; if it was, set it mid-range or the same as the one in the other core), rotate the loose core top until a zero beat is obtained. As your rotate the core, you will hear the tone change. As it approaches the correct setting, you will hear the tones beat against each other. When you are set correctly, the pitches will be equal and the beat frequency will go to zero. Mark the position of the core with a pen or pencil and then glue with Epoxy or other general purpose adhesive (around the outside - not on the mating surfaces as this will affect the tone frequencies). After the glue sets, confirm and adjust the plug core if needed. These cores use a strange triangular core tool - I made mine by filing down an aluminum roofing nail (do not use a ferrous material).
Comments: Those classic ATT touch tone phones are virtually indestructible. However, broken cores (or actually, just broken joints on the cores) are common but easily repaired once you know what to look for. Setting the tones by referencing a known good phone seems to be a very reliable technique as the zero beat permits an adjustment to better than .1%. Note that if the reference phone is a more modern (and flimsy digital one), then pushing multiple buttons may not work as it does with the old analog models. Setting the frequency using the normal dual tones will work - it is just not as easy.
Symptoms: Tray wasn't even on track, just sitting inside; Flapper ripped off of mountings, electronic condition unknown. It is obvious that the owner had attempted something - it would be generous to call it a repair - and was unable or did not bother to get it back together.
Testing: Not applicable at this point. With loose parts removed, power was applied to determine if there was any hope at all. At least the front panel came alive and pressing Eject resulted in the tray loading motor spinning.
In order to attempt to play a disc, the controller needs to think that the tray is closed. It will then go through its startup cycle. In the case of this player, there is a limit switch - somewhere. Rather than trying to locate it, I decide to put the tray back on its tracks. This is easy but there is still something wrong as it jams when the Eject button is pressed. So be it, leave that for later. At least the limit switch will be activated. Rummaging around in the pile of lonely parts removed from the carcass, I locate the clamper cover with the magnet. I pop in a garbage CD, put the clamper cover on top (make a mental not to press Eject under any circumstances as the tray, disc, cover, and anything else that is not screwed down would probably fly across the room) and press the power button. Some success - the disc spins and the directory is correctly displayed. The display came up rather quickly indicating that most of the optics and servos cannot be far out of alignment. This is quite remarkable!
With mounting anticipation, I connect the audio outputs to my amplifier and press play. The disc spins and makes repeated attempts to start playing at track 1 but it is obvious that something is terribly wrong. Attempting to play other tracks results in similar behavior.
The pickup appears to actually move to the general vicinity of the correct track but is unable to locate and lock onto the time/track that is selected. Pioneer CD players perform a very audible search to home in on the correct disc location; there was no evidence of this search.
I next attempt careful adjustment of the servo controls. Note that I do not expect this to help the problem based on how quickly the directory was displayed. However, the tracking could still be off and with care, there should be little risk of making things worse. Who knows what controls the owner touched in a misguided hope of performing a miracle. First, I marked the *exact* position of each control with a felt tip pen. This will get me back to the supposedly good positions no matter what. The only controls that would likely have an effect are those related to tracking. Careful tweaking of tracking balance, tracking offset, and tracking gain have no detectable effect. I put them back in their original position and verify that the player still recognizes the disc. So far so good?
At least the moron who butchered this thing does not seem to have touched the electronic adjustments.
At this point what do we know? Well, we know that all of the major components of the optical deck work including the laser, photodiode array, fine focus and tracking voice coil actuators, and spindle motor. These are all needed to read the disc index. The spindle motor, a common problem in Pioneer CD players is fine as its toughest task is at disc startup where the speed is greatest. Since the disc index is located at the very inner extent of the disc, we do not know if the sled servo (coarse tracking) is working correctly, only that it is doing something - it resets to the inner track if manually moved away and it does move to the approximate position of the selected track.
Well, Pioneer CDs have a TEST mode. Where is the button? I hunt all over for the little button and am about to give up when there it is! Hidden by the cables to the front panel.
OK, press TEST while switching on power. Now I have control of the servos. A little experimentation confirms that focus and spindle rotation seem to be functional: (of course, we knew that, right?) With no disc in place, the focus search routine is initiated by pressing TRACK FWD. The disc will only spin if focus lock is achieved and this is confirmed with a disc in place. So far nothing new. I am able to move the pickup back and forth on its tracks by pressing SEARCH FWD and REV.
However, when entering the correct sequence to play at an arbitrary point on the disc, weird things happen. If I use the SEARCH FWD and REV buttons to move the pickup to a particular spot on the disc, press TRACK FWD to close the focus servo, PLAY to start spindle rotation, and then PAUSE to actually start playing, the track and time info is only displayed for an instant. Then, the pickup seems to move toward and bump against the inner limit. Sometimes, a couple of times are displayed in rapid succession which are not sequential as they should be. In fact, they nearly always are far apart and the second is usually a lower time than the first. Then the display is blank.
Hum, I don't have a schematic so this could be the end of the line. But, I do see one chip on the circuit board that is getting unusually hot and I know from past experience that it is a servo driver - TA8410K. I have absolutely no idea if it is related in any way to the problem or really, for that matter, what the problem is. I only know that (1) it has only 10 pins and is easy to replace, (2) I have a replacement in my parts box, and (3) it is getting hot (which may or may not be a fault since I know these type of chips to run at least warm).
Getting to the bottom of the circuit board proves to be a bit harder than anticipated requiring removal of most of the snap type connectors. I guess these are cheaper than real connectors for Pioneer but a pain for servicing (cables are terminated in tinned wires and placed in the connector housing, then a cover is pressed down to lock them in place). I manage to only mangle one of these (cosmetic damage only).
Replacement goes smoothly. Getting all the connectors back in place is loads of fun but the effort is worthwhile! Now, the disc plays on the first attempt. There are still some tracking problems but this is a distinct improvement. In all honesty, I am not sure that the chip made the difference - it could have been a bad connections at one of the connectors. The new chip runs warm, perhaps not quite as hot as the old one, I am really not positive. I put a heatsink on it in any case (as I always do with these chips - just for insurance.
Next I tackle the mechanical restoration. First step: get the tray to move smoothly. Without going into terrible detail, the tray consists of two parts whose relative motion raises and lowers the disc. There appears to be something missing which controls when this raising and lowering takes place as the disc is lowered even before the tray moves into the machine. Sometimes there is a ball that controls this and a little examination reveals a grease trail where such a ball could have been. A corresponding hole in the tray bottom confirms this. I didn't notice any such ball in the parts pile but it could have easily been lost (I later found it near a corner of my workbench) but for now, I located a similar sized steel ball in my steel ball collection. With the ball in place, the tray now moves smoothly in and out and the disc is raised and lowered at the proper time.
Now for the clamper.
This is a much sorrier affair as the clamper is mounted to the deck sheetmetal with a couple of plastic standoffs that have been totally snapped off at their bases. First I try simply glueing them but this does not appear to be solid enough. In addition to the glue, I am able to clamp one down with a metal scrap that I carefully shape and screw down. For the other, I made a splint using a screw through a drilled hole into a neighboring strut. Now the clamper moves up and down at the proper time but the cover disk with the magnet seems to hit the tray. The part that seems to help out has totally disappeared so I take a brass rod and mount it in its place. Even without the rest of the mechanism, this seems to work fine. This rod, wrapped with electrical tape to prevent damage to the disc, prevents the disc from flopping around too much. Disc loads; disc unloads; all is well.
I then went through the electrical servo adjustment procedure as outlined in the CD Player Notes, final tweaking by maximizing the amplitude and stability of the 'eye' pattern. I made the mistake of attempting to touch the 'tangential adjustment' (at least that is what I think it is - without a proper alignment disc, this appears to be very difficult) and spent some frantic minutes until I was able to restore it to its original position. Beethoven's Ninth Symphony comes in handy as it runs almost to the edge of the disc (74 minutes) necessary to access the tangential adjustment. I even risked careful adjustments of the LD - laser power just to determine that it was not at the limit of its power. It was not. I am fairly confident at this point that the adjustments are pretty much where they should be - and they are very close to their original position.
Now the CD player works fairly well though it does not seem to have as much disc defect tolerance as I would expect. I do not know if there is still a fault either optical, mechanical, or electronic as all tests that I can perform without service info seem satisfactory. Considering what the player went through, this has still been a rewarding experience.
Comments: I consider this to be more of a learning experience than a
repair. At the outset, I did not expect to be able to get nearly as far as I
did. It was fun as such things go.
While I am in favor of home repairs, this is an example of a situation where whoever attempted the repair of a problem due most likely to the bad servo driver IC, totally destroyed any possibility of a professional even going beyond looking at the unit and stating: "Yup, that was a CD player once upon a time long long ago. To whom should I send the flowers?"
Symptoms: Fm reception is totally dead. Station numbers change erratically, not possible to save presets. Some AM stations work but most do not. This happened without warning - turned it on one day and it was sick.
Testing: This involved methodically checking to see what functions are operational. Incrementing and decrementing of FM station frequencies is not operational in seek mode, only in manual. There is not reception on any FM station frequencies. Incrementing or decrementing AM station numbers across certain boundaries (I forget the exact locations) causes a sudden jump of 800 kHz and may actually jump to an illegal station frequency. Various other modes are non functional including saving of memory presets. Even the hard reset does not store the factory presets.
I purchased the service manual for this unit - a nice piece of documentation and very reasonable - about $12. However, this is an example of modern technology where even schematics, pin descriptions of the various LSI chips, parts lists, etc. are not really adequate when so much depends on firmware (in 3 microcontrollers) which is not provided. It turned out to be difficult to even determine where each function is centered.
Some electrical tests that were performed:
Power supply voltages were verified.
Waveforms were checked on frequency synthesizer chip (LC7210).
Function of PLL charge pump was verified in both AM and FM. Output (VCO control voltage) was consistent with frequency display when reception was possible but not at other times. However, this could not be a problem with the charge pump, only the digital control.
Intermediate 4 bit busses were checked for stuck-at faults - there were none.
The first real clue is that since even some manual tuning functions are faulty, this is probably a digital fault. Presumably in manual, the station display is driven by the microcontroller that drives the synthesizer chip rather than being returned by that chip after a station search. Even in this mode (for AM), there is the issue of the 800 kHz jump. This is not approximate but exact and probably due to a stuck bit representing the 800 place value. The question then became: where was the bad bit? It is not on one of the intermediate busses as these were tested.
Could it be in the tuning microcontroller? Maybe, but then I would expect other functions controlled by this chip to be faulty (like mode setting, etc.) This is not the case. Could it be in the frequency synthesizer chip? Probably as only station tuning functions are defective. Could it be elsewhere? There do not appear to be any other busses or digital control lines that could cause the set of problems that are present.
However, not confident enough of the diagnosis of the faulty LC7210 synthesizer to spend the $25 or so that Yamaha would probably charge and not finding this part in any of my normal mail order sources, I set the receiver aside for a while. I dig out my garage sale NAD for use in the meantime.
A couple of MCM catalog editions later - what's this? LC7210 - $6. I will spring for that. Next MCM order arrives, solder in a socket as I always do where possible. Replacement chip cures all problems!
With 20/20 hindsight, it is almost possible to identify the place inside the LC7210 where the 800s bit bus fault occurs based on the symptoms and the rudimentary block diagram provided in the service manual.
Comments: Although not evident from the description above, this was a frustrating experience even with the service manual because there really was not enough information present to make the logical inferences needed to come to a definitive conclusion as to the defective part. Modern consumer electronics include more and more microcontrollers where the intelligence is buried in firmware and not the hardware itself. Without firmware listings, a microprocessor is just a black box even with pins listings and internal block diagrams. It would be nice if the service manual would at least provide better indications of which functions is located where - identifying the functions of each of the components. (It would also be nice if they were written or at least edited by Americans (in the case of a manual destined for the U.S. market). Some of the translations are, well, a bit strange.
Symptoms: Suddenly, the picture lost *all* horizontal hold. There was no evidence of any kind of attempt at lock in. I do not know whether this happened at power-on or while in use.
Testing: With strong signal, it was determined that horizontal hold had no effect. It is as though the H sync is not making it to the lock circuitry. Adjusting horizontal hold makes picture move across screen. Angle of sides of picture changes but there is no lock - even incorrect - at any setting.
Using my isolation transformer, I prepare to scope the relevant signals. I obtain the Sam's for the set. I check for the sync signal at the input to IC400 (I think). It is there. This should be a snap - bad IC! Well, that is exactly what happens - a careless slip of the scope probe and not only a snap, but a crackle and a pop - and now I have no video, no HV, no deflection - nothing.
OK, so what started out as a simple signal problem is now a major (at least cost and pride wise) power supply problem.
Checking the first TO3 transistor I can locate - short - one dead transistor. This is the power supply series chopper.
Checking the horizontal output transistor (HOT) with an ohmmeter - short - second dead transistor.
After removing transistor, I check for rectified line voltage at the input to the chopper - nothing. Tracing this back I soon locate an open fusable resistor.
So, whatever I touched probably caused the HOT to fail (forced on for too great a time can blow the HOT as a single shot event). The shorted HOT probably then took out the chopper transistor.
This is not fun. It is not likely to be inexpensive either. It does seem that no other parts have been sacrificed. Fusable resistors and driver transistors seem ok in so far as my meter is concerned. I still assume that the original problem was caused by a faulty IC400 but this point it is impossible to confirm this since the set id dead-dead.
Damage:
Chopper transistor - $10, horizontal output transistor - $6. IC400 - $15, fusable resistor - $1.
After replacing the components, making sure to use mica insulators and silicone heat sink compound for the transistors, the set comes back alive. Sync is fine. A little touchup of the video background and gain controls (unrelated to the sync problem) and we are done. Ouch.
Comments: The lessons learned here came at a cost - but mostly to my pride. Cascade failures are all too easy to induce through carelessness. Power supply circuits are not forgiving. One would think that probing the sync signal would not be able to kill anything. However, the design of power supply and deflection systems share some common characteristics. One of these is that a single instance of an improper drive waveform can blow the switching transistor as a single shot event - excessive current or excessive flyback voltage. This is a matter of exceeding the safe operating area of the transistor.
What you learn: if possible, make all connections to your test equipment with power off. Insulate all but the last mm of your probe so that any slip cannot cause a short. Work methodically, think things through, don't be over-eager, don't take shortcuts.
Symptoms: Totally dead - no front panel display or anything else.
Testing: Plugged unit into live outlet confirms description of problem.
First step: remove cover.
Second step: confirm that HV capacitor is discharged. Although the unit has been unplugged for several days, it never hurts to be careful. Discharge with high value high wattage resistor (well insulated) and confirm with HV voltmeter.
WARNING WARNING WARNING etc. Microwave ovens are probably the most dangerous piece of consumer electronic equipment in terms of potential for electrocution while being repaired. Much more so than TVs, for example.
You might think at first that the possibility of microwave exposure is the principal danger. However, unless the door seal, oven chamber, or waveguide or its seals are damaged, there is no way for microwave radiation to escape. This still means that proper precautions should be taken - don't operate the oven for longer than needed with the cover off and don't stand too close.
Third step: test fuse. Open. Since these have ceramic bodies, it is not easy to determine if the fuse died due to an overload or a short by visual examination.
A microwave oven can blow a fuse for several possible reasons. Some of these are:
Some quick checks reveal that the capacitor is a dead short.
When replacing a microwave oven capacitor, it is important to get a fairly close match for the capacitance. The uF rating of the capacitor affects the microwave power output. Note that the 'working volts' rating on a microwave oven capacitor is not the same as on common capacitors found in other electronic equipment. It is not the maximum voltage permitted across the capacitor but closer to the VRMS rating of the HV transformer. And of course, before you start pulling wires off (1) mark down where they go and (2) discharge/check for voltage on the cap one more time.
Replacing the capacitor with one from MCM Electronics brings the oven back to life.
Comments: It is highly likely that the capacitor failed due to a defect in manufacture rather than some other underlying problem in the circuitry. When one thinks about how a capacitor is constructed - rolled up layers of foil and dielectric - it is amazing that capacitors do not fail that often. Any nick, thin spot, etc. represents a point of excess stress and can fail as in this case after considerable use - resulting in a short circuit, dead oven, and unhappy chef.
Symptoms: When first turned on, TV appears to function normally. Why was it tossed? Well, after 30 seconds or so, a pair of hum bars begins to appear in the picture gradually getting worse until horizontal width and sync are affected.
Testing: Using a Variac, there is a point below normal line voltage where set operates perfectly. OK, so I will keep a Variac attached to the unit!
After removing the cover, the first thing to suspect is the main filter capacitor. If this should dry up and lose some of its value, these would be the exact symptoms. Jumpering (with power off) of a known good capacitor I keep for this purpose doesn't change anything. But what is this? A discolored resistor catches my eye. Maybe it is changing value as it heats and causing these symptoms. I wait a reasonable time for the set to cool and measure the resistor - 360 ohms. OK, replace with new one. Expecting this to cure the problem I am disappointed when there is absolutely no change.
Off to the library for the Sams' Photofact. Darn - Sams' does not have a service folder for this model. Nor for any similar models that I can determine (the librarian was very cooperative).
Well, the problem seems to be heat related. I get out my trusty can of cold spray. After going through nearly the entier can, it would seem that there is only one part that has an effect on the hum bars when it is chilled. It is the SCR that is part of the power supply regulator. Rather than simply obtaining a replacement, I decide to trace the circuit to determine, if possible, the possible cause of the problem figuring at this point that the SCR is simply sensitive to heat.
During normal operation, an IC drives the gate of the SCR but what is this?? Until the secondary supplies kick in and provide power to the IC, the SCR is driven by - you guessed it - the mysterious resistor. The other end of the resistor goes to the raw DC on the main filter capacitor. Now that is odd....Since I do not believe much in coincidences, I now start rethinking the significance of this. Maybe that resistor is not quite what it appears to be.
First, I remove it and see what happens: nothing. Power on, power off, nothing.
Next, I momentarily touch the resistor to the circuit pad - the set comes alive. Then I remove it. The set remains alive. And, after several minutes, no hum bars. Hum....
I then try increasingly larger values of resistance until turn on is not reliable - 15 K seems marginal, so I will go with 8.2 K ohms = that is over 25 times what I measured! No wonder there were hum bars indicating regulation problems - that low value resistor was totally overwhelming the poor IC in driving the SCR.
The set is used daily and has been operating without further problems for over 5 years since reviving it. It works great with a $10 universal remote control.
How did the resistor get damaged in the first place? I have no idea - maybe its wattage was slightly underrated and it just finally decided to poop out. I have no way of knowing what the original value was supposed to be or even, for that matter, the wattage.
Comments: resistors can and do change value, sometimes, as in this case, quite dramatically. Without a schematic, there is no easy way to determine when and if this has happened - and what the original value should have been. However, any discoloration, burn, or scorch marks should arouse suspicion. With 20/20 hindsight, these signs may indicate the presence of carbon - a fairly low resistance substance and thus reduced resistance is likely.
And yet again, a $.02 part brings a complex renders a complex piece of equipment inoperative.
Symptoms: Player will shut off at totally random times or sometimes will not recognize the disc. There is a clicking associated with the problem - probably focus search failing.
Testing: Attempting to play various CDs to completion provided no indication that the particular CD or power adapter made the slightest difference. There were some false leads with respect to the latter but these turned out to be strictly coincidence. The lens was inspected and cleaned anyhow with no change.
The first hint of the source of the fault came as a result of an observation that pressing on the cover would sometimes either cause the player to stop in the middle of a disc or allow it to recognize and begin playing a disc when it would not otherwise cooperate.
Perhaps, the interlock switch was not being pressed in far enough. So, rather than open the unit (I really don't like messing with the insides of portable CDs if I can help it - you will see why in a few moments), I glued a bit of plastic to the post that pokes the switch.
This seemed to help. For a few weeks, the problems had for the most part gone away and the owner was a happy camper. Not surprisingly, this fix was only temporary.
Since the quick fix had some effect, it is very likely that I am on the right track. I will have to open it and deal with the switch face-to-face.
This is not too bad except that it is necessary to remove the main circuit board to access the switch which is mounted on a little board of its own. Four screws (large enough to actually see without a microscope) to get the bottom off, another couple to remove the main board. One more and I can remove or at least extend the switch circuit board far enough to inspect its solder connections and get at the switch.
The solder doesn't look too bad but there might still be hairline cracks that are not readily visible. A little reflow and they should be fine. (Problems with solder joints here are not related to heat as in a TV or monitor but rather due to the mechanical stress that is applied to the switch every time the lid is closed.)
Now for the switch. It appears that the cover of the switch can be snapped off relatively easily. The contacts appear somewhat gummy so I clean these and pop the cover back on.
Tests with an ohmmeter now show the switch action to be solid. Wiggling the switch lever and/or the entire switch has no effect.
Great, put it back together and I am done.
After replacing the switch board, main board, and bottom cover - the test.
Fanfare please!
Nothing. The player is dead as a door nail. It now will not even focus and gives up almost immediately.
Off come the screws. Almost immediately, it is obvious what has happened. In replacing the main board, I accidentally squashed one of the printed cables linking the optical pickup and main board, partially severing the cable. In fact, 2 of the 4 conductors are cut. This is the focus and tracking drive cable so it is pretty important. What a pain!
Fortunately, luck is on my side with respect to the location of the break - it is at a non-flexing part of the cable. Therefore, repairing the cable should not be that difficult since once the conductors are connected electrically, they can be coated with a sealer and flexing will not be a problem.
To repair a cable of this type, I have two options: I can attempt to jumper the break with some fine strands of wire or I can go point-to-point from the circuit board to the destination on the optical pickup. However, the latter connections are nearly hidden and would be difficult to solder.
I opt for the first. Using an Xacto knife, I carefully scrape the orange mylar coating from both sides of the break. Then with #30 wire, I carefully solder across the break for each of the conductors. A spring clothespin holds the wire in place during the soldering. The entire affair is then coated with some clear sealer to reinforce it mechanically and provide insulation. It isn't pretty, but it will work fine. For added protection, I add a layer of plastic electrical tape.
Now, finally, reassembling the unit keeping cable routing firmly in mind, there should be no problem.
And, as expected, the player comes back to life and is rock solid with respect to playing and recognizing discs. The oops should have no effect on the expected longevity of the player.
Comments: we all can point to those minor disasters where we have overlooked something where we should have been more careful. Whenever reassembling anything, it is imperative that lead dress (ok, fancy term for how the cables are routed) is kept firmly in the forefront of your mind. It seems that with more and more miniaturization, this is an increasingly important and at times, frustrating consideration. First of all, it is very tempting to say when disassembling the unit 'this is obvious, no need to write it down'. Bad move. Often, it appears much less obvious when putting everything back in its place. I have never quite figured out how they do it during manufacturing - correctly most of the time.
Ignoring cable routing can lead, as in this case, to severed wires. It can also result in shorting between wires or between wires and sharp metal brackets or shields. Broken wires can usually be repaired if they can be located. Shorted signals can result in additional hard-to-locate collateral damage which can really turn your hair gray.
What is even scarier is that with line connected electronics or appliances like vacuum cleaners and even toasters - this can lead to electrically live parts accessible to the user. Sometimes, the plastic insulation on typical internal wiring will not fail immediately but will cold flow and cause problems later. So, one should always make every effort to assure that no wiring is being pinched and for metal cased appliances, check that the case is not electrically live - has a high resistance (usually infinite, but at least a few M ohms to both wires of the AC line with any on/off switches in both positions) after the repair is completed. For non-heating appliances or electronics, a little electrical tape goes a long way. For heating appliances you really need to make sure that bare wires are routed far from any exposed metal of the case taking into account as well any motion that may occur during normal operation or due to being knocked about or dropped.
Symptoms: Drive behaves the same as a similar working drive until it is accessed. Then, there is no response by any DOS or Windows software. No CDs are recognized, always get the message: Abort, Fail, Retry?
Testing: I keep an old (well, what other type are there?) 286 PC clone system around for the primary purpose of testing peripherals. Installing the drive and software confirms the reported behavior. I was given two similar drives. The other one was reported as being intermittent but seems to work fine in my test system. This one was indeed dead.
Since it is impossible to observe the behavior of the pickup and, in particular, the lens with the cover on, the first step is to get at the guts.
Fortunately, the CDU33A is quite simple to disassemble.
There are only two major components: the Printed Wiring Board (PWB) where all the active electronics are located and the Optical Deck including laser, optics, and pickup worm drive mechanism.
The other parts include the upper plastic casting and metal shroud, solenoid latch assembly, right and left guide rails, drawer assembly, and front bezel, two springs, bottom plate, 6 screws.
There are only two electrical connectors inside: one flat printed cable linking the PWB and optical deck and a two pin connector supplying power to the eject solenoid. This is in pleasant contrast to some other CDROM drives I have seen with a half dozen or more small connectors spread all over the PWB making removal and testing very difficult and risky.
After about 10 minutes, I have the drive apart and can now reassemble the major components on the bench outside the case to observe behavior.
I prop up the circuit board and reconnect the flexible cable - noting the orientation marks. I can now run the drive with full visibility of the mechanism and optics. With a CD in place, there is no danger from the laser beam. I make sure the PWB cannot short to anything and that the whole affair cannot tip over.
Having set up this contraption (you would have to see it to appreciate appreciate this terminology), I am ready to continue testing.
Naturally, it now works perfectly.
No amount of abuse seems to phase it - wiggling cables, flexing the circuit board, trying multiple CDs, all fail to reproduce the original problems. Could it be the case? I can think of no reason why it should make a difference? Is there anything else different? I don't think so. Perhaps the sled was jammed somehow and disassembling the drive fixed it. Who knows.
After reassembly, the drive continues to function perfectly.
Comments: How many times has someone brought you a 'broken' device which has magically started working again on your bench. It certainly cannot hurt your reputation. Admittedly, here, I had to actually do an exploratory before rejuvenation to convince it that I meant business.
It has now been almost a year and the drive continues to function. I can only guess that the cable may have been poorly seated or had some dirt stuck in the contacts. Until it fails again, there isn't much more to try. Unfortunately, the saying: "if it ain't broke, don't fix it" now applies. I have no idea if the drive will ever again fail within its normal life expectancy, but in the meantime, where did I put my Win95 CD? (No comments, please, about choice of OS).
Symptoms: Width slightly reduced. Slight evidence of 60 Hz hum bar, brightness pulsating, raster shaking, somewhat channel dependent.
Testing: All of these symptoms were easily reproduced on the bench. The 60 Hz hum bar is the giveaway indicating a low voltage power supply problem.
Rather than operating the TV off a Variac to confirm lack of regulation, I decide to just try the most likely solution - a replacement main filter capacitor. With power off and making sure the main filter capacitor is discharged, I use a pair of clip leads to jumper my test cap across its terminals.
The set now works perfectly.
Removing the old capacitor (not easy as the rivlets really do make nice heat sinks), testing with my trusty Radio Shack DMM on its capacitance scale reveals that the value has dropped by over 85% - pretty amazing that the set worked at all!
One highly overpriced replacement filter capacitor (I used a local distributor instead of my favorite mail order sources) and the deed is done.
No disasters on this one!
Comments: This capacitor was mounted next to a large heat sink - possibly the power regulator. When replacing electrolytics, we often ignore one very important specification - the temperature rating. Either the original capacitor was defective or it was not rated for the thermal conditions inside a compact TV. The TV was not that old - maybe 3 or 4 years at most. We all can point to equipment we own that is still working after 20 or 30 years going strong on the original filter capacitors.
Symptoms: Dead as a door nail. Only evidence that it is connected to the line is a momentary flicker of lights when TV is turned on indicating that the main filter capacitor is being charged.
Testing: This set has a pull-type on-off switch. There were no blown fuses. Checking with a voltmeter shows 150 V on the main filter capacitor with the switch in the on position. Ditto for the collector of the HOT.
This would seem to indicate that there is a problem with the startup drive to the Horizontal Output Transistor (HOT).
Off to the library for the SAMs....
Many Zenith TVs use a simple multivibrator to generate a startup signal to the horizontal driver transistor until the flyback can generate the secondary voltages needed to operate the deflection ICs. Once these voltages are present, the startup circuit is disabled. Indeed, such a design is used for this TV.
Checking with a scope (powering the TV through my isolation transformer) at the base of the HOT shows no drive signal.
Tracing back, there is no signal at the driver transistor or from the output of the startup circuit. One of the two transistors in the startup multivibrator is bad.
I do not have a suitable replacement - it is a high voltage low current Zenith part similar to an MPSA43 - 200V. I will need to obtain one, or better yet, two to replace both transistors in the multivibrator.
To confirm that the rest of the TV is operational, I use a common technique to 'jump start' a TV where the startup circuit is defective. This is to inject a signal of around 15-16 kHz directly into the base of the HOT to substitute for the startup circuit.
With the TV turned on, momentarily touching the output of a pulse generator set for 15 kHz and a couple of volts amplitude to the HOT base brings the TV to life. Everything appears normal except that the TV does not start on its own. Somehow, I don't think my neighbor would approve of this solution. (Also, I am not giving up my pulse generator!).
Caution: jump starting a TV like this is risky. In addition to the dangers of mucking with a live TV, injecting a signal with improper characteristics into the HOT can destroy it and possible a lot of other circuitry - instantly. For example, a single cycle with too long an ON time can blow the HOT from overcurrent while driven on or overvoltage during flyback. Use this approach with care.
Replacement of the multivibrator transistors with the exact Zenith parts completes the repair successfully.
Comments: Examining the schematic of the startup circuit reveals that it appears to be designed to fail - especially with kids about. While the transistors are rated at 200 V (they are running on the 150 B+ from the line power supply), the transistor power rating is only .6 W. Even though they are running in a switching mode, I believe that repeated on/off cycles can stress these to the breaking point. Something was mentioned about my neighbor's kids turning the TV on and off repeatedly. I have not duplicated this experiment but suspect that such treatment at least may contribute to premature failure. Fortunately, in this case, it was only in the startup circuit.
Power-on is a stressful time for many types of equipment due to inrush current, transient voltage, so many things changing quickly, etc. In addition, designers may not study and characterize the behavior during startup with the same amount of care that they presumably (we hope) do for steady-state operation.
Symptoms: Inserting a tape works fine - it plays, it records, it FFs, it REWs. However, attempting to eject a cassette results in an infinite loop - the VCR grabs the tape back just before it pokes out of the slot. Sometimes, the tape can be grabbed in time but usually the cassette does not exit far enough.
Testing: Symptoms confirmed. With the top off, it is easy to catch the tape but I don't suppose this would be an acceptable solution. In addition, the cassette carriages seems king of sloppy - loose for want of a better term. This would indicate a mechanical problem with the cassette basket - the mechanism which moves the cassette into position inside the VCR.
First step: a close examination of the basket mechanism. Nothing obvious - no broken parts visible.
Next step: attempt to remove the basket. With most VCRs, this is a simple matter of 4 screws and perhaps a connector. Not here. There are 4 screws, but once the screws are removed, only one side wants to come loose. The left side, with most of the gears and whatsits, is firmly fixed to the base of the tape deck. No doubt, there are critical timing relationships that might be disturbed once removed. It stays for now.
Perhaps, removing the bottom cover will reveal something. 8 screws later, bottom cover off. What's this? A spring!! So now, we know that something is indeed broken and most likely in the basket somewhere. This sort of spring is not the type to have just popped off - it is a close wound coil spring with hooks at each end. And, guess what, there is also a tiny bit of white nylon which was probably the tab onto which the spring was hooked at one end.
A close examination of the visible portions of the basket above and below deck finally turns up something now that I know generally what I am looking for. Thankfully, it is accessible and I hopefully don't need to pursue removing the basket which almost certainly would not be a fun thing to do.
The spring is supposed to be connecting two gear-type wheels in the EJECT mechanism. With the spring sprung, these were free to rotate when they should not have and their free play was sufficient to cause the EJECT operation to screw up.
So, how to repair? There is no good way to glue nylon and even if there was, the tab is so small that it would be impossible to provide a strong enough bond to withstand the spring force. Replacement of the part with the broken tab is a possibility though again not a pleasent one - it would require removing the basket. Of course, replacing the entire basket is another unpleasent and expensive options. Installing a metal post in place of the tab is also a possibility - one that I do not really want to contemplate.
Well, it appears as though there is nothing particularly critical about the spring placement. Is there an alternative location to connect the end with the broken tab? Yes, it would appear that it will be sufficient to hook it around another large wire spring. However, then it is probably stretched too long, so I make a link out of a piece of a paper clip and this seems to be about right. (Paper clips, bailing wire, scotch tape and chewing gum (well maybe not chewing gum) are among my favorite things). Getting all this in place under spring tension between the edge of the case and the basket plastic frame proves a bit of challenge - requring a dental picks, needlenose pliers, patience, and few carefully chosen four letter words - but I prevail. The EJECT operation now works perfectly.
While not pretty, I believe the newly designed spring attachment will be much more robust than the original. I should write to Samsung!
Comments: This is a another case of poor design - there can be no other way of describing it. The spring is rather large (you can visualize it, can't you?) and the tab much too small. Another .0001 cent of plastic and it would outlast the rest of the VCR. There was absolutely no excuse as there is plenty of space to enlarge and reinforce the tab.
Symptoms: Power light blinks indicating that it is not able to run the program contained in the game cartridge.
Testing: Tried multiple cartridges without success.
The most common problem with these units is a worn or dirty system unit game cartridge connector. In this case, the red power/status light will continue to flash even after the RESET button is pressed with a game cartridge in place. Replacements are available for about $9 from the usual sources (MCM Electronics, etc.)
First, I try another game cartridge - the one that is not working may just have dirty contacts or may be defective. This does not work.
So I need to get inside. Fortunately, unlike some other consumer stuff, this is quite easy. Six screws underneath followed by about a dozen to remove the metal shield and circuit board so the connector can be removed and inspected.
Before removing the connector from the circuit board edge, I give the system another chance to redeem itself. With the latching mechanism removed, it is possible to press the cartridge down somewhat lower than normal increasing the chances for good contact. Indeed when this is done, it is possible to occasionally get a good reset and game startup on the TV. This certainly confirms the original suspicion.
Now, can I revive the original connector or must it be replaced? There are three kinds of problems that generally occur with these connectors:
Don't neglect the game cartridge connectors. These generally do not wear but may collect all kinds of strange stuff. Rather than fight with the security screws that you may find holding the case together, I usually simply use a Qtip with water, contact cleaner, or alcohol - or one after the other - to clean these contacts. Again, very fine sandpaper may be needed in extreme cases.
Even if these procedures only make a slight improvement - you can press down on the cartridge and the machine will respond to the RESET button - you have confirmed that the connector is indeed the problem. In many cases, just cleaning will result in reliable operation for a long time to come.
In the case of this particular system, all three problems were present. However, for the time being at least, the system has responded well to treatment.
Comments: While the original Nintendo game machine is a couple of generations out of date, many are still in use. And, hey, young kids usually don't care. OK, you don't have to admit to being the one who cannot resist just a couple rounds of 'Super Mario III'!
Old Nintendos can usually be picked up for $5-20 at garage sales sometimes complete with a selection of games, sometimes bare. The games go for $1-$5 depending on the barganing skills of the kid selling the stuff.
However, a bad connector is almost a sure bet with a secondhand system. Consider that most electronic connectors are typically rated in terms of hundreds of insertion/removal cycles. A Nintendo machine must endure thousands of not necessarily gentle cycles over its lifetime. The connector was not designed for that. Furthermore, you are likely to find all kinds of muck inside, mostly unidentified, and often difficult to remove. Nonetheless, these things are remarkably robust, electronic failures are infrequent, and they can usually be revived without much difficulty.
Symptoms: Former owner complained about difficulty in ejecting.
Testing: Tried playing multiple cassettes (not all at once!). For the most part, the VCR behaved normally. Maybe just a bit sluggish loading but no other obvious problems. Why did he dump it?
I did my usual cleaning - rubber parts did not look to bad, leave them for now. Even the idler tire appears to be in decent condition. I will use the VCR and see if any problems appear.
The first sign of trouble appears once when attempting to use REVIEW mode - the VCR abruptly stopped and attempted to unload the tape. The loading motor was spinning but nothing was happening (I think it was turning in the wrong direction and the belt was slipping - I am not sure). Oh boy, time to leave the cover off. Manually giving the motor shaft (fortunately it is accessible from above the deck) a couple of turns convinces the VCR to complete a correct unload cycle.
Well, this sounds like the classic 'if it is an erratic Sharp VCR, the mode switch must be dirty or bad' problem.
(2 years pass as I am in no mood to bother with this repair at the moment.)
OK, now I have a need for a reasonably decent VCR to replace my cousin's Mitsubishi HS328U which is finally dying. So, I dig the Sharp out of the closet and see about its condition. Now, it doesn't even want to play a tape at all. Well, I know I have to deal with the mode switch, so first things first.
The mode switch on this model is sandwiched between the loading gears and a mounting plate - all parts of what I will call the 'loading gear assembly'. To access the mode switch, this entire unit needs to be removed and partially disassembled. The gears operate the roller guide loading mechanism, and a couple of cam operated levers which are conveniently hidden when it is removed or reinstalled. It is driven by the loading motor via a couple of idler gears.
Timing marks: In the unloaded position, there is a hole in one gear that appears to line up with a slot. So, with the roller guides retracted (and the gears which operate this linkage have timing marks which also line up), this hole should be centered in the slot. Fine. This appears to be the only critical relationship with respect to removing the loading gear assembly.
I unsolder the 4 connections to the mode switch, remove 3 screws, and - sproing! What was that? OK, one or both cams still had a lever with spring pressure applied. Hopefully, it will be possible to extend these these when replacement time comes along.
With the loading gear assembly removed, it is still not possible to access the mode switch. Now to disassemble it. There are two fancy cam gears which obviously must be timed correctly - in one position there appear to be an arrow and triangular hole which line up. I add a couple of marks of my own for good measure with a felt tip pen. A simple split washer holds the gear I need to remove onto its shaft. (Note: these split washers are not designed to be reused but with care in removal, they can usually be replaced without any long term problems. Of course, a professional would have an assortment of replacement sizes handy.) Removing the gear carefully, there don't appear to be any flat washers or spacers to worry about.
Once the gear is removed - making a note as to which side is up though this is pretty obvious - the mode switch is exposed. Squeezing the center of the split shaft enables the cover to be popped off and the interior appears. I almost lost the springy wiper as it is not fixed to the plastic cover but popped free when first removed. A frantic search was needed to locate it on the floor. The wiper fingers and encoder contact traces seem to be in good condition but whatever was used as a lubricant is a little gummy and might be the problem. A simple cleaning seems to take care of that. I also bend the wiper fingers a bit to increase the contact force very slightly.
Now, to get everything back together. First, the wiper is replaced and the mode switch cover is snapped back in place. Free rotation is confirmed. Then, the gear that was removed is returned to its shaft along with a cam follower lever that was under it. The split washer is replaced.
To install the entire loading gear assembly means that the original gear timing relationships must be re-established. In addition, care must be taken to make sure those two cam follower levers I mentioned previously are properly positioned. This takes a bit of work but eventually, I am convinced that everything works as it should. The screws are tightened and then free movement of all the parts is confirmed by manually cycling the loading mechanism. The 4 mode switch connections are then resoldered.
Now for the test. Since this was not a hard failure to begin with, there is no guarantee that any problems will be detected.
The tape seems to load correctly but then the VCR unloads and shuts down. What is wrong? It would appear that the takeup reel is not turning. Hum, probably that rubber wasn't as great as I had assumed a couple of years back. I now do a more complete cleaning and, in particular, remove the idler tire and inspect it. It appears to be ok but as a test, I turn it inside-out.
Now, everything works as expected. Testing with a cassette cheater (shell), there appears to be adequate takeup torque. I clean the idler tire again and reinstall it in the normal configuration. All modes appear functional even when testing with a full takeup reel - requiring the most takeup torque. I will order new rubber anyhow and replace it at a convenient time or if problems reappear.
This VCR now appears to operate reliably and consistently. I have seen no evidence of the original erratic behavior. Only time will tell for sure.
Comments: I cannot overemphasize the importance of making careful notes as well as adding timing marks of your own when removing any parts of a VCR which could conceivably have critical timing relationships. Not doing this can really mess up your day. Err on the side of excess - it won't cost you anything.
Sharp VCRs seem to be particularly prone to mode switch problems: Of the 3 Sharp VCRs under my control, 3 of them have developed dirty mode switches resulting in a variety of erratic symptoms including, as noted, going into the wrong mode as well as aborting the tape loading operation for no good reason.
It would seem that a VCR design using an optical mode switch instead of one with sliding contacts would be much more reliable at only modest additional cost. After all, VCRs already use a number of optical sensors and cheap computer mice use optical encoders not very different in design from a mode switch. At least, it would be nice if mode switches were readily accessible. Some are visible as soon as the bottom cover is removed. Others require substantial disassembly with associated risks of incorrect reassembly resulting in mechanical timing problems or even damage when the unit is cycled.
Symptoms: Horizontal deflection jittery, possible vertical collapse, arcing flyback - all in one set! This info from Dave whose friend owns the set. Dave is a tech at work who is now doing more software than hardware (not necessarily by choice).
Testing: I did not actually see the original problems, nor did I have access to the entire set as Dave came in one morning with the guts of this set under his arm (more like both arms). We actually attempted to power it without the yoke or CRT but there was absolutely no evidence of anything. Surprise surprise.
Since the original description of the problems is somewhat incomplete, a visual inspection is made and the HOT is tested for shorts just to be sure. There were none. However, the visual inspection did confirm that the flyback had a narrow but rather long (maybe a couple of inches) crack in its housing, There was no conclusive evidence of arcing but this is one area where the original symptoms were fairly definitive as the owner stated that there was arcing around the flyback. (He probably knew just enough to be dangerous, but hopefully has not done anything we will regret.)
This would explain the jittery horizontal but what about the vertical problems? Were there really vertical problems. I never did get a good answer to this question - at least not until later.
While it is likely that the flyback could be patched up at least temporarily, it was decided to order a new one. The owner was willing to spend up to $150 to repair the set - I have no idea why. No match from places like MCM Electronics - must go directly to Magnavox (Philips, actually). $71, ouch. Admittedly, this is one of the spiffiest flybacks I have seen lately (at least since that A-line Zenith with the cool ribbed plastic coil form). It has a detachable CRT anode wire - wire and suction cup sold separately! Well, for $71, you cannot expect everything.
Although we have agreed to order the flyback, I decide to test the old one anyhow, so next day I bring in my flyback testing widget (12 V chopper, see document on flyback testing). This is the first time Dave has seen this tester and Ed (our chief digital design engineer) is also curious but stands at a safe distance, having a great deal of respect for a few puny kV. Ed always stands at a safe distance when anything higher than 5 V is involved!
First step - locate the HV return. In this case, it is obvious because (1) a separate bare wire is brought out to a pin and (2) this wire is connected to no other pins on the flyback. (With a built in HV rectifier, it is not possible to use a normal DMM to locate this wire.)
Next step - wrap a ten turn coil around the core of the flyback and connect this to the chopper.
Apply power - a nice healthy arc can be drawn from the HV lead of the flyback to the return connection, current draw on power supply is low. Flyback is quite functional. This does not test for breakdown at full voltage but does rule out hard shorted turns. (Ed can be overheard mumbling something about sticking with 5 V logic.)
Result is fine by me, owner wants new flyback and this one will make a great HV supply for a plasma globe or something - someday.
So, we pile the chassis and all its attachments onto a table in the corner of the testing lab awaiting our shiny new flyback (minus the red wire, some assembly required). It looks kind of pathetic there but no one else dares go anywhere near let alone touch it after an off-hand comment about charged capacitors!
Approximately 5 days later, our new flyback arrives and is soldered into place.
Next morning: I see Dave pulling up in his Chevy wagon. Guess what is in the back? The entire huge, heavy TV, belly down. Oops. We quickly find a place for it somewhat out of the way in a back room.
Apparently, there is no arcing and the horizontal deflection is stable. But, there is absolutely no vertical at all - flat lined. OK, so the rumors about vertical collapse were not exaggerated.
A little more visual inspection reveals a couple of interesting observations. First, all the deflection circuitry - both horizontal and vertical - is clustered in a small area near the flyback. In addition, the crack in the crack in the original flyback is adjacent to some of the *vertical* output circuitry. So, perhaps, the arcing was making its way to something in the vertical deflection. What kind of output chip is it? Ah, my favorite - a TDA3654. Fortunately, I have a bunch of them to keep one of my tough dogs fed. So, I am well prepared if need be.
A quick measurement of power to the TDA3654 reveals that there is none. Maybe this won't be so bad after all. Tracing back with an ohmmeter and what do I find? An open fusable resistor! And, in exactly the right place to be killing power to the chip. Could it be this easy? Actually - yes in this case. I install a normal 1 ohm 1/4 watt resistor (only for testing). I also use the ohmmeter to confirm that the rectifiers in the vicinity are healthy. We are set!
Power! At first there is nothing on the screen but then snow gradually appears - and it is full screen. There is no antenna. Of course, reception inside our building is nearly non-existent due to all the computer RF interference and steel beam construction. However, we quickly locate a pair of rabbit ears (or maybe it was just a couple of feet of hookup wire) and tune one of the few channels that is viewable at all - which happens to be broadcasting the morning cartoons. But that is just fine. Everything appears normal and I remind Dave to replace that resistor with a proper flameproof variety.
Dave cannot believe it.
Ed is nowhere to be found.
Everyone loves the cartoons.
Comments: The mechanism for the vertical failure still remains obscure. Apparently, the arc caused a momentary but not fatal short circuit in some part in the vertical output circuitry which blew the resistor. We always hear how sensitive ICs are to static - here we have 25 kV of raw power discharging nearby with apparently no permanent damage except to a 25 cent resistor.
Symptoms: Horizontal position shifted almost off the screen; delayed sweep and B timebase inoperative. Alternate triggering erratic at low intensities(??).
Testing: How does one test a scope? Well, put it through its paces with reasonable input signals - a 10 MHz clock oscillator provides a nice test signal. Maybe another scope would be handy?
Prologue: (You can tell right off that this will be a feature length saga.) I bought this scope at a garage sale. Now, understand, garage and tag sales around the Philadelphia area where I live are usually of the "Aunt Minnie's old silver plate" variety. Electronic equipment is usually limited to comatose VCRs and color TVs that play in B/W (not that I complain about this sort of stuff for the right price - as little as possible). However, one little ad catches my eye: one item amongst all the bric-a-brac is 'test equipment'.
BTW, I never go to flea markets with any serious intention of buying anything. It is clear where their stuff generally originates. All the junk I turn down at garage sales ends up with hugely inflated prices at flea markets!
I get to THE sale relatively early (I am not quite the garage sale addict type who gets up at 5 AM to be first in line). All that is visible are a couple of pathetic old signal generators - one audio, the other RF. Well, $10 for an RF signal generator isn't too bad. I could probably have bargained him down to $5 but first the all important question: Anything else? (Not that I expected any sort of affirmative response given the assortment of hat boxes, deflated basketballs, and old Christmas decorations.) However, surprise surprise! "There is one other item." So he crawls under a table and drags out an HP AN/USM281A - a real oscilloscope! "Well, I have this, um, oscilloscope. It is solid state, dual channel, 50 Mhz, etc." Now, I am paying really close attention (but of course, not wanting to show it). The only oscilloscopes I had seen at garage sales until this time (beside my $3 Tek 321, but that is another story) are usually the really beaten up Eico variety). He is actually doing a pretty fair sell job. So, how much are you asking? "I would like to get $100 for it." Very interesting. Can I try it? "Sure." So, he props 'my' scope on top of a rickety old bar stool (I would have been quite upset if the thing had gone crashing to the floor but still didn't want to act interested enough to suggest he find a more stable spot.) I figure that if it appears to work at all, $100 is a good price even if I have do some repair and calibration. I fiddle with the controls, also noting that it comes with two nice looking 1X/10X probes. Suddenly, the scope really cooperates - it must really want a new home being so lonely stuck in the back of that garage. The trace scoots off to the right of the screen. None of the front panel controls have enough range to bring it back. I mumble: I cannot get the trace back. He says "Oh, um, uh..." Before he can get too far, how about $50. "Sure, ok." I didn't do enough testing to find out that the delayed sweep was also dead. For that matter, even with the 10 turn delay time pot in plain view, the existence of a delayed sweep mode did not register. I only found that out later. No amount of fiddling would produce any difference between the A timebase and Mixed A+B. The B timebase was totally dead.
So, how to go about tackling this? I have no service manual, no schematics, and looking at circuit boards, the semiconductors are HP house numbers. I didn't have an ECG manual. Fortunately, the component side of the circuit boards are readily accessible. However, tracing the wiring is a real treat with HP's love affair with multicolored striped bundled wiring harnesses. I could try to buy a manual (this was somewhat before the days of sci.electronics.repair). Nah, that would be cheating (and probably expensive). I did try our local HP sales rep when we were looking into their logic analyzers but he did the usual salesperson thing and lost interest once we signed on the dotted line.
So, I had to repair it the old fashioned way - ohmmeter, circuit tracing, seat of the pants, etc.
Objective #1: find the horizontal position problem. Even if the delayed sweep remains broken, a dual trace 50 MHz scope is very useful. Fortunately, this problem appears solid now (and not intermittent as was the case previously) so ohmmeter tests of the horizontal sweep board components should be possible. Tracing back from the deflection plate connections to the CRT finally results in a difference between apparently symmetric sections of the output stage. An 11 K ohm power resistor tests open! Well, that wasn't too bad. It doesn't appear as though there is any cause other than age. Replacing the resistor restores full range control of horizontal position. About 1/2 hour to find. Not too shabby.
At this point, I considered the operation a success and put the other problems aside. Partially, this was because what I had was usable and partially because I did not expect the delayed sweep/B timebase problem to be nearly as easy to solve.
(Actual elapsed time: about 2 years. Well you know how I suggest 'sleeping on a problem' when you cannot solve it immediately!).
Objective #2: Fix the B timebase. The only help I have with this is the fact that the A and B timebase circuitry is quite similar so some comparisons of resistance measurements will be possible. However, for some reason, my first pass over the components with an ohmmeter does not turn up anything obvious.
Using another scope (a Tek 564), I poke around the B timebase circuitry a bit to see if I can locate any interesting signals. I suppose my definition of an 'interesting signal' is one that is doing anything - not flatlined.
What's this? A ramp waveform - it must be derived from the A timebase as it maintains a fixed relationship with the A timebase output but goes into the B timebase circuitry. My guess would be that this was be used to provide a gating pulse of variable width controlled by the delayed time (10 turn) pot. Maybe following this signal will lead to something. Sure enough, it goes to what must be a comparator circuit since the pot also connects nearby. And - what is that? A charred resistor! Now, why didn't I see that before? Fortunately, there is another identical circuit across the board and that resistor is readable - 100 ohms. Now we are cooking (hopefully not literally). With great expectations - switch on. Still no action from the Mixed A+B or B timebase. As far as I can tell, not a thing has changed. The B timebase is still as dead as a door nail. The good news is that the resistor is not getting hot, so that is encouraging - probably.
Next, I continue on with my search for shorted or open parts with an ohmmeter. This time, I will be more systematic hopefully not missing anything. Finally, results! Another blown part. This time, it is a transistor. From the remaining good junction I can at least tell it is supposed to be PNP. Measuring the voltages across C-E, it appears as though a 2N2907 will be of adequate ratings (at least voltage wise). Hopefully. Soldering in the new transistor from the top of the board is not fun - but more fun than attempting to remove the board entirely. Power: Darn, still no action.
Continuing with the ohmmeter finally turns up a shorted diode but what type? Again, duplication comes to the rescue. It is a 54 V zener. I use a pair of 25 V or so zeners temporarily to substitute for this unusual diode. Now, finally, the B timebase is responding to treatment! Having done what I always caution against - turning adjustments without marking them - the behavior is a bit - strange, but the two relevant controls (don't ask me at this point what they did) could be set for proper operation of the Mixed A+B as well as B timebase.
How could 3 parts in apparently not directly connected circuits be blown? I have no idea except to suspect that the previous owner may have attempted to repair the B timebase and never stumbled upon the actual cause which was most likely the bad zener but managed to blow other parts in the process.
Objective #3: Determine why turning the intensity way down causes the alternate sweep mode to get stuck on one trace. This one is a minor annoyance only and really doesn't affect the utility of the scope in any way. It is just not quite perfect. I finally locate a couple of adjustments in the vertical plug-in that seem to have an effect on the rise time of the start of the sweep or something - they seem to modify the strange behavior as well as affecting the linearity of the left 1 cm or so of the screen for high sweep speeds. I finally find a compromise position that seems to be satisfactory.
Wow, a whole bunch of simple problems but now it appears to be in pretty good condition. A couple of drops of oil for the delay time control, clean the switches and controls, and a piece of Plexiglas to protect the CRT and it is done.
Comments: What do they say? "Real engineers don't need no f***ing manuals". Or is that programmers? Well, whatever. A service manual would sure have made the task a lot easier. But where is the sport in repairing something with actual accurate documentation?!
The AN/USM281A is still a good solid easy to use oscilloscope for general design and debugging. I don't know if this one ever saw duty in the Navy but I have seen this model going for about $250-300 from test equipment outfits like Tucker. In my tests, the scope will display a viewable waveform and lock at frequencies greater than 80 MHz even though the specs are for 50 MHz vertical bandwidth. The mainframe itself, I think, is rated for 100 MHz. It takes standard HP180 series plug-ins so if I ever come across any of those at another garage sale.... (about the same time pigs learn to fly!)
Symptoms: Platter turns but 'lock' light flickers and speed is slow and uneven (even to the unaided eye and without listening, it is obviously struggling).
Testing: Both speeds (33-1/3 and 45) have similar problems. The selector switches appear to be clean and solid. By gently touching the spinning platter, it is found that there is also essentially no torque - it stops very easily.
It was quite obvious that the servo system was having difficulty reliably locking - as evidenced by the flickering 'lock' indicator and lack of torque. In addition, the platter did not appear to want to start up reliably at some rotational positions.
So, what does it use as a reference? Remove the platter! This requires popping a cosmetic cover and large E-clip. Aha, what is this? A little pickup near the edge that looks sort of like a tape head. However, unlike an audio or digital tape head, it has a series of offset laminations about 1 mm in thickness. Not visible but inferred is a magnetic stripe pattern on the inner surface of the platter which is in close proximity with the pickup when the platter is installed. Better keep magnets far away. That pattern was put on with a special jig at the factory - there would be no way to reconstruct it if some, say, accident were to take place.
As a long shot, I attempt to adjust the pickup closer to the platter surface. Perhaps the magnetic pattern has weakened or something else has drifted. Ouch, now it is rubbing. A little further back. Ah, now it is clear.
Not too surprisingly, there is no change. Symptoms are identical.
Now what? Unfortunately, there is no way to get at the circuitry - under the platter - when the platter is installed. There is no way to excite the magnetic pickup with the platter removed. Not true! After storing the platter at a safe distance, a simple magnet will generate a 20 mV signal out of the pickup. This is probably greater than the normal signal level.
The circuit is pretty simple - couple of transistors and other stuff being fed from the pickup for feedback and hall effect sensors for motor control. The motor is a brushless DC 4 pole type with the commutation control external and on the same board as the servo lock PLL.
Maybe a little signal tracing is in order. Using my magnet, I can see the feedback signal making its way through to what I assume is part of the PLL - probably the phase detector.
In retrospect, even suspecting the PLL's feedback signal was probably not valid. The key is the dependence on rotational position during startup.
So, what about the motor signals? There appear to be two outputs from the motor (in addition to the coil driving signals). What do these look like? The first (from H1 - Hall sensor 1) flips between +5 V or so and ground as the motor rotor is rotated through a complete revolution (Wow, Peter Piper picked a pack of...., sorry, just practicing.) However, H2 seems to be mostly dead - stuck at an intermediate voltage and only varying by a fraction of a volt. Well, that could certainly be a problem.
(If this had not turned up anything, I would have gone on the determine if the driving signals were correct).
Unfortunately, the actual sensors appear to be under the rotor. First the rotor and then the entire motor circuit board has to be removed to access H2. There is a slight risk that removing the powerful rotor magnet from its pole pieces will cause it to lose some magnetization (this can happen when removing the rotors of high energy servo motors, for example, if a dummy rotor core is not slipped in as the rotor is removed). However, I risk it and the rotor magnet seems to be just as strong as ever when replaced. I stick it on a piece of soft steel as a keeper to be sure there no possibility of it weakening while it is off the turntable.
The tricky part is accessing the bottom of the motor circuit board without ripping up the connections to the (fixed) servo board. The actual Hall effect sensor is in a four pin package about 2 mm on a side. There is at least a red dot to indicate pin 1. I use an ohmmeter to double check that the device itself is bad by measuring directly on the package pins. Confirmed, there is are very noticeably different resistance readings across the pins of the good and suspect parts.
I sent Jeff to buy the part (my 'customers' have to do something in return for free repairs and Jeff can convince anybody of anything).
Fortunately, Sony Parts was happy to sell this $4 (wow!) part to someone who is not a licensed Sony repair center. They were very helpful in fact, looking up the part number for H2 in their parts catalog.
Reassembly is straightforward though I had no idea if the alignment of the sensor was adequate until testing.
Now, at least the waveforms from H1 and H2 are of nearly the same shape and about 90 degrees out of phase as they should be. Replacing the platter and the lock light is now solid with decent torque from the motor. The platter will start quickly and reliably from any initial position.
Next day: Jeff comes in complaining that the turntable is vibrating! Indeed, during part of the rotation, there is a distinct vibration that can be felt from the base. What could this be? Best guess is that the pickup needed to repositioned. And, that was the problem. Apparently, my initial adjustment in trying to locate the original problem had resulted in the pickup being positioned further rather than closer from the platter. Some careful incremental movement and the vibrations disappear.
Comments: The elegant simplicity of this turntable is impressive. Too bad that turntables aren't really popular anymore. Well, maybe not bad. I cannot complain about the benefits of CDs though other may disagree. Fortunately, this turned out to be a motor problem and not an actual fault in the PLL which would probably have necessitated a schematic.
I am not sure if Jeff ever used the turntable after it was repaired (about 4 years ago) as I cannot imagine him wanting to deal with vinyl. Maybe that is why there has been no return call!
Symptoms: Front panel indicators are alive and the logic seems to repond to the PLAY and STOP as there is the sound of a solenoid but neither the capstan nor takeup reel shows any indication of even attempting to move. There is no sound of a whirring motor.
Testing: With the cover off, nothing appears locked up - everything turns freely and the belts seem to be in reasonable condition. The motor connections are readily found. Voltage to the motor is about 10 V in all modes so in all likelihood, the problem lies inside the motor casing. The only connections to the motor are the two power leads. There is no external tachometer or other apparent feedback used for speed control.
So far, this seems pretty straightforward. The motor bracket is fastened to the transport with 2 screws, a bit awkward to reach but I finally prevail. The motor itself is contained in an second metal case to provide shielding. To get inside requires prying off the cover at the non-shaft end with a screwdriver. So far so good.
Various techniques are used to perform speed regulation in a cassette tape deck. However, for a totally internal regulator, there are usually only two possibilities: mechanical governor and voltage regulator.
In this case, it turned out to be the latter - a little circuit board contained several components including a power device which was shorted. I was not able to identify or cross reference this part so I decided to make my own regulator.
However, first I needed to determine (1) if there was anything else wrong with the deck and (2) the proper voltage for the motor.
The only think I know so far is that the voltage to the motor is less than 10 V.
There is no strobe disk to watch under fluorescent lighting.
Adjusting tape speed:
Make a recording of a single tone on a tape recorder you trust - one with accurate speed.
My Heathkit audio signal generator and Yamaha cassette deck will do. I use a variable DC power supply to drive the motor after soldering wires to the motor terminals and remounting the motor in the deck. Since I will not be attempting to squash my regulator inside the case, I should not need to touch the motor again. I hope.
Apply power. Adjust the voltage to the motor to about 5 V and hit PLAY: It turns! And, there is sound from my amp. Uh Oh, what happened? The transport went into stop mode. In a VCR, I would suspect an idler tire or belt. What was that? Did someone say belt? Right, the belt has popped off of the tape counter. Maybe the tape counter has a contact on it which is used to sense that the takeup reel is turning.
Now, it stays on but the pitch is way low.
Then, I adjust the speed while listening to this same source simultaneously with the tape being played back on the unit to be adjusted. As the speed is adjusted, the pitch changes. As it approaches the correct setting, the tones beat against each other. When it is set correctly, the pitches will be equal and the beat frequency will go to zero.
Even if you are tone deaf, it is easy to adjust the pitch accuracy to better than 1/10 of a semitone using this method.
However, for this initial test, accuracy is not needed as long as the approximate voltage is determined.
The result: A little over 6 V. Excellent, any vanilla flavor IC regulator will do that from a 10 V input. The is quite low.
A scrap of circuit board, an LM317 (on heatsink, though this was probably not essential at the 100 mA or so current required by the motor), a couple of caps and resistors later, and Presto! a regulator. Speed adjust is done with a 50 turn pot. (Well, it was handy.) I do not attempt to stuff this into the motor case but screw it to the power transformer with an insulating standoff.
I now repeat the speed adjustment - more carefully this time.
One thing I do note is that after a few minutes of continuous operation, the motor speed and thus pitch changes by a detectable but not unacceptable amount (still only a fraction of a semitone) and then stabilizes. This is not due to the voltage regulator as the voltage is rock solid. I assume that the windings of the motor heat slightly and increase in resistance. Well, no feedback for speed control, what can be expected?
Regulator running cool, repair completed.
(5 or so years later:)
While listening to a tape, motor grinds to a halt. So what is up now?
Take off the cover. Hard to believe I had all the screws installed!
Checking with a voltmeter, there is only a few tenths of a volt across the motor but normal 10 V at the input to the regulator circuit. With the motor disconnected, the output of the regulator is exactly correct - 6.3 volts. So the regulator is most likely fine. What about the motor. Testing with an ohmmeter reveals that the resistance varies between about .5 and 2 ohms - much less than I would expect. So, there is a problem with the motor.
It is extremely unlikely that the entire motor shorted out.
This is the classic partially shorted Mabuchi-type motor scenario. I am not going to let a little motor get the better of me! I first try spraying it out with some degreaser - no dice, no change. I will just have to take it apart.
The end-plate is held on with a couple of bent metal fingers, pry them out. However, I cannot just pull the end off as it will rip the delicate metal brushes in the process. There are two access holes - I usually call them ventilation holes but I bet their real purpose is to permit a brush spreader tool (pretty impressive name, probably deserves a trademark) to be used to allow the brushes to clear the lip on the commutator. My brush spreader tool(tm) is - as usual - a bent paper clip.
With the end removed, I can now safely pop the entire armature out of the motor case after removing the pulley (plastic, easy press fit).
(Note, this would be risky with precision servo motors using using high strength rare earth magnets as the very act of removing the armature could lead to instant partial demagnetization of the magnets. This is generally not a problem with these cheap PM motors.)
The commutator looks a bit dirty but the real problem seems to be some metal particles bridging the segments - probably dislodged by the continuous rubbing action of the brushes. This is easily cleaned and the gaps between the segments are cleared with a pointy dental pick.
Now, measuring across any pair of segments results in a 20-22 ohm reading, much more reasonable.
Reassembly is uneventful and we are operational once again.
Comments: I can never resist attempting to repair a normally non-repairable part like a motor. Sometimes, they turn out not to be repairable or I loose a critical tiny tiny part to an unexplored corner of may basement but that is the exception. In this case, it was quite easy. The motor did not actually appear worn - the commutator and brushes were relatively smooth and undamaged. Therefore, a replacement would probably not be substantially longer lived than my restored motor.
Symptoms: Sometimes, it will recognize the disc and start playing. Most of the time, it will give up and go on to the next slot.
Testing: Several discs were tried without any conclusive differences in behavior. If a disc is successfully recognized, it will play without problems until about the midpoint and then the player will abort and move on to the next. Attempting to manually search forward past track 6 (on one particular disc being used for tests) will result in an abort as well.
Unfortunately, once a disc is rejected, the silly thing remembers that the spot (1 of 5) is empty so without cycling power, it is not possible to even attempt to play the same disc twice in succession.
However, this is a minor irritation.
The first problem was getting the case open. While the screws appeared to be ordinary Philips head screws, it required almost sitting on the screwdriver to persuade them to break free. Hope he never expects to have any warranty work done. The heads are barely recognizable!
Once open, the disc in the play slot is clearly visible. When the player fails to recognize a disc, it doesn't spin at all. Ha! a spindle motor problem. (Rubbing my hands!)
But first, check out startup. With suitable contortions, it is just possible to make out the edge of the lens with no disc in place. Pressing play results in the expected behavior of the lens moving up and down several times before giving up (with no CD present).
There is no chance of being able to see the lens with a disc in place. Forget it.
Well, maybe it is the spindle motor. I put a disc in and press play. Disc moves into position, pause, give up and move on.
I'll show it!
Cycle power. Press play. Disc moves into position. And -- now: give the disc a little twist. Yes! now the CD picks up speed and is recognized and starts playing.
Hummmm.
Sounds more and more like a spindle motor. Perhaps a dead spot or partially shorted winding. Or maybe a weak driver. Is this consistent? For the most part, it is. Sometimes, the disc will be recognized and will play on its own but most of the time, a little help is needed. Once it starts, a dead spot would not matter and the hardest time for a driver is when the motor is starting.
However, what about the problem of not being able to play to the end of a disc once play is successful? I confirm that this is still indeed the case. Yes, it is impossible to play past track 6 on this particular disc. Trying another one, there is a also a time location beyond which play aborts.
What does this mean? It now doesn't sound like the motor as the toughest job for the spindle motor is at the start of a disc.
However, what else could it be?
So, I roll up my sleeves and prepare to do battle with the spindle motor, at least testing it. This is not going to be fun. The spindle motor is located underneath the pullout drawer and there doesn't appear ti be any easy access. Well, every long journey begins with a single step....
As I am removing the bar with the clamper above the optical deck, something catches my eye. What was that? This is the first unobstructed view of the lens. That doesn't look quite right. Normally, the lens of a CD player or other optical drive is shiny with a bluish tinge. This one is fuzzy purple. That can't be right. Well, cleaning is easy enough not believing (but hoping) that a dirty lens could be the problem all along.
One Q-tip later and, yes, all the former problems disappear. Discs are recognized reliably, play flawlessly and to the end, and search works fine for the entire disc.
How could a dirty lens prevent the spindle from starting but then play apparently normally until a certain track? Well, I never actually did confirm that focus was established in the situations where the player gave up. But to have problems with focus but then be able to play substantially free of problems. Well, no one ever said that understanding was always guaranteed.
When discussing the results with the owner, he confirmed that the house was somewhat dusty but I know that no one in his family smokes and the player was not in a kitchen.
Oh well, at least I did not have to take the whole bloody thing (the owner is an Englishman) to pieces.
Comments: Why am I reporting on a simple case of a CD player that required a lens cleaning? Well, to point out that many problems really do have simple solutions even if the initial symptoms may point elsewhere.
In a portable, cleaning the lens would have been done as a matter of course due to the easy access. Cleaning the lens in this changer meant removing the cover as well as the bar holding the clamper. And, some of the symptoms did not really point to lens cleaning.
Symptoms: Front panel display is alive but not much else. There is no response to any buttons or the remote control.
Testing: Tried all the front panel buttons and remote control, unplugging, etc. Nothing.
The fuse in the power supply is fine. What the @#$% is she talking about?
Once the top and bottom covers are removed, a thorough visual inspection is performed. One intersting observation is that the capstan seems to be binding - the rotor of the direct drive capstan motor is rubbing against the bottom support bracket. Surely, this cannot be the cause of all the problems, could it? A little more thought and examination of how the capstan is mounted reveals the likely answer: there is a white plastic 'knob' with a cross-slot poking through the main circuit board on top of the VCR. This knob adjusts the height of the capstan bearing. No doubt the so called 'fuse' that was attempted to be replaced was this white knob which does kind of resemble a 3AG type fuse holder. OK, mumbling something about no user serviceable parts inside, I adjusted the capstan height so that it is clear of the bracket and spins freely. I make a note to check for any problems with the capstan servo after the main problem is found since as expected, there is no change in behavior with the capstan free to spin..
Now, back to the main event. Since there are multiple major system problems - no response to any buttons qualifies - a power supply problem is indicated. This VCR uses the famous (or infamous) Panasonic switching power supply (though I did not know of its fame at the time). I locate the power supply connector and start making measurements. I do not have a pinout or schematic for this particular power supply but there just happens to be a similar model Panasonic in the main conference room. How, I wonder if anyone will miss it for a little while? Any important customers today?
One thing that is fairly obvious: there is no evidence of the typical 5-6 volts that most VCRs use for their logic. The closest voltage is 3.5 V - on a couple of pins. Checking on the power supply connector of the other VCR, these pins correspond to the 5.1 V outputs. The other voltages are a bit high but this is not surprising since there is little load with nothing else working and the regulation is probably faulty.
Rather than working on the power supply in-place I decide to remove it to the comfort of my workbench. This is for three reasons. First, if for some reason, the outputs should skyrocket, I will not have the rest of the VCR to fry. Next, moving the power supply around will probably break the connections due to fatigue anyhow (it is soldered). Finally, it is simply more convenient. Only 9 or so wires are involved, so no big deal.
Five minutes later....
Now, for a switching supply, I probably need a load at least on the regulated output. I locate a 15 ohm power resistor, that should be about right for a +5 V low current (probably under 1 amp) logic supply.
Powering up using a Variac feeding my isolation transformer, the power supply is still outputting +3.5 V on the +5.1 V output. Good, at least it is not an excessive load problem on the +5.1 V outputs (which would indicate a problem elsewhere in the VCR. What about the other outputs? Well, they all test somewhat high (based on the measurements from the other VCR). Thus, an overload on any of those outputs is unlikely as well.
So, what could be wrong? Next step: draw out the circuit. This isn't a complicated power supply, no controller chip, just several transistors, resistors, diodes, an optoisolator, etc.
A half hour or so later, I have a not quite complete schematic. There could still be errors, but it is mostly there and sufficiently detailed to identify potentially bad parts.
Since this power supply is basically working - nothing smoked or blew up - this limits the possible problems considerably.
Testing components in the regulator feedback circuits does not reveal anything.
What about the optocoupler? With power off, I tack a wire across the input terminals (low voltage side). Now, if the optocoupler were leaky, this should make no difference. Bringing up the AC on my Variac, the +5.1 V output quickly reaches +5 - probably at an input of around 50 VAC - and shows no sign of stopping there. This is the expected behavior if the optoisolator were good. Cross that off the list. This also confirms that there is no excess load on the +5.1 V supply holding it down.
What about the filter components for the +5.1 V? Jumping a good electrolytic across the input capacitor (C16) of the Pi filter has no effect. So both the capacitors are likely good as the first should be sufficient to hold regulation. What else is there? What about the zener, D11? No dice, it and its buddy, the only other zener, D15, test good.
What else is there? Hey, what is this capacitor, C21? It seems to be in series between the +5.1 V output and the feedback circuitry? Since it is in series, leakage is important. I need to swap it or test for leakage out-of-circuit. I always opt to swap given a choice.
Ah ha! Success. Replacing with a good 1 uF 50 V capacitor results in precisely 5.1 V. The capacitor, C21, seems to bypass the zener when the output is changing - it in effect limits the rise of the +5.1 V output. Thus, if it turns leaky and passes current, not only will the +5.1 V output rise slower, it will be prevented from reaching its full specified value. The poor regulator does not know the difference between a rising output and a leaky capacitor.
Next day, replacing the power supply in the VCR restores full operation. There appear to be no problems with the capstan. All modes are fully functional. No other none user serviceable parts appear to have been touched.
I write a little note explaining what 'No User Serviceable Parts' really means.
Comments: Knowing what I do now, checking C21 followed by C16 and C17, and then the AC line filter capacitor, C4, would be the first thing to do whenever one of these or similar Panasonic power supplies shows up with incorrect output voltages. What this type of failure indicates is that components like capacitors really are like peas in a pod. When from the same manufacturer and lot number they are all very similar with respect to failure modes like drying up and losing capacitance or turning leaky when used in similar environments.
Most troubleshooting on the professional level is a matter of keeping good notes and/or having a database of previous repair tech tips. While on the subject, how about those solder connections in RCA/GE chassis CTC175/76/77 and all the others for that matter?...
As far as that 'fuse'. I must admit, had I known nothing about VCRs, the white knob does look an awful lot like a fuse holder. To a homeowner, it represents an irresistible temptation. Fortunately, he stopped short of attempting to remove the 'fuse' entirely which would have no doubt resulted in serious damage. And, no adjustment screws had been tightened! Thank you for small miracles.
Symptoms: According to the owner, the VCR gobbled up a tape and her husband 'removed' the cassette but admitted he really wasn't sure of what he was doing(!!).
Testing: In situations like this, a careful inspection of the mechanism should be the first step. For JVCs of this era, parts tend to fall off of the roller guide assemblies. In some cases, attempting to play a tape can cause expensive damage - a loose roller guide can swing up and smash the video heads.
Sure enough, the supply side roller guide assembly was loose on its track and upon removing the bottom cover, the infamous brass pin fell onto the workbench. One drop of Epoxy takes care of the roller guide repair.
So what else is wrong? Was any damage caused by removing the tape or playing a tape with the faulty roller guide assembly?
The VCR appears to be behaving just fine, thank you. At least it played the one test tape fine that I tried.
Return to owner. Try it.
Next day: It's back: Doesn't work on SLP or pause modes. Uh Oh, that sounds like a smashed video head. Sure enough, a close visual inspection reveals that one of the video head chips is broken. Most likely, this resulted from the roller guide flopping around and/or during 'removal' of the stuck cassette. Unfortunately, repair price wise, this is a 6 head VCR. Lowest head price from my source: $71. Ouch. I tell the owner. "That isn't too bad, go ahead". OK, I guess she remembers what it cost new.
One week later: installation is straightforward as the connections are all to a circuit board with no flying leads. Pop the new head on and everything seems to be fine but - what's this - flag waving? Was that there before? I sort of remembered some on my cheapo monitor with the old head (the part that was still good, didn't think much about it at the time).
So, I go and try the VCR on the Panasonic TV in the main conference room. A little better, still some flag waving. However, everything else seems normal - back tension in particular. It could just be my tapes. If recorded on a VCR with significantly different back tension and/or video heads that are not perfectly aligned on the drum (not a user or tech adjustment), flag waving is possible and does not indicate anything is wrong - just different. Many TVs will have a suitable fast vertical sync response or a special channel with this characteristic so not generally a problem.
I returned the VCR, concerned that it would still not be quite right. But, next day, everyone was happy and even with my description, had no idea what I was talking about. Plays just like new. Flag waving, what's that?
Comments: this is one of those situations where the recommendation: "always confirm what does and does not work before touching a piece of equipment" applies fully. Unfortunately, with the broken roller guide, this was not quite possible at the outset. However, I should have paid more attention to the behavior once the roller guide was repaired and before replacing the video head drum.
Interestingly, this was one of my first contacts with the JVC parts shedding VCRs but in the next couple months, came across two more JVCs - one with a dropped brass pin and the other with a loose plastic hinge pin in the roller guide positioning linkage. Then, I 'fixed' a coworker's JVC over the phone (425 miles away) by his description of the Symptoms: "Sure, you lost a brass pin. Pull the bottom off....".
VCRs really are like peas in a pod.
Symptoms: Indeed, video playback is poor. Tracking does not help. At times, the video totally disappears as though the heads are clogged. I also note that there seems to be a hum in the audio at times and there is some erratic operation when switching modes.
Testing: I tested with multiple tapes. Thoroughly cleaned the video heads using a cleaning tape, then cleaning sticks, then my thumb. In no case was clear video totally restored and the heads seemed to get clogged quite quickly. There is definitely hum in the audio. Occasionally, when entering play, the VCR will abort and unload.
This may be a case of multiple independent problems.
The hum leads me to suspect the power supply. This VCR uses a power transformer, rectifier, filter capacitor prior to linear regulators. Fortunately, unlike some Panasonic VCRs, the power supply in this one is easily removed and may be tested easily. Putting a scope on the main filter capacitor reveals that there is quite a lot of ripple - and that it is also somewhat erratic in amplitude. This could indeed account for the hum and erratic behavior. Some simple calculation show that the capacitance must be reduced by 75%. I locate a capacitor that is still perhaps only 2/3 of the labeled value and jerryrig it in place. The ripple is now much much reduced and the hum is gone. Time will tell whether the erratic operations is cured.
The owner was probably not even aware of these problems!
Now for the video problems - which are unchanged.
All symptoms point to a bad head. It is quite likely this machine has seen significant use. The owner is apartment bound and spends a lot of time in front of TV.
Indications of a bad video head include:
No visible damage in this case.
Definitely present at times.
Yes as described above. This is a two head machine so all speeds are affected.
No significant response to backtension. All guideposts seems to be locked solidly in correct position.
Absolutely - even after a manual cleaning (or using the Mark 1 Thumb), bad video seems to return quite quickly.
Given that most of the qualifications for bad video heads are met, I go and order a new upper cylinder from MCM Electronics. It is about $30.
This does indeed eliminate the video snow.
There is no further evidence of the hum or erratic behavior.
Comments: This VCR gets heavy use. I had cleaned it a few months before the present episode and noted at that time that video playback was not that great. But at the time, it didn't seem poor enough to warrant the expense of head replacement. However, now it was definitely unusable. The gradual and progressive degradation is a classic symptom of worn video heads.
Symptoms: Music gets stuck on outer tracks of some discs. Sections start repeating, stuttering, etc.
Testing: All CDs exhibit the same problems at approximately the same time into the disc.
History: This is the infamous 'Chinese Restaurant' CD player. I believe the problems started when after several years, they decided to change or add a disc. Yes, believe it or not, we had been subjected to the same music for as long as we had been visiting this restaurant - at least a couple of years. We were regulars. On this occasion, we were just getting through the soup (these are the full course lunch specials) when, what was that? The music got stuck for an instant. Being into this stuff, my ears are tuned to typical CD problems. Must have been my imagination. Then, halfway through the main course (Shrimp with Lobster sauce), there it was again. This time, it really got stuck, repeating the same measure for several minutes before anyone noticed and shut it off. Never being able to refuse a challenge, when settling the check, I inquire: so music broken? "Yes, not work." OK, I fix. So we walk out of there with this CD player under my arm and something to do for the afternoon.
Problems of this sort are almost always mechanical with simple causes and easy solutions. Attempting to play a disc - now it was totally incapable of even recognizing the index - resulted in the motor that moves the optical pickup just spinning its wheels. The worm gear was not moving and the pickup remained stuck about 3/4 of the way to the outside of the disc. Giving it a little help, resulted in resetting to the inner track limit and then successfully beginning to play the disc.
The most difficult part about this affair was getting to the worm gear as the optical deck is mounted upside-down and to remove it requires partially disassembling the changer mechanism. However, once this is done, the problem is quite obvious: Chinese grease! The last 1/4 portion of the worm gear is gummed up. As noted, the same 6 discs had been playing for as long as I can remember and none of these ever got to this outer track location. In addition to cleaning and oiling the worm gear, I decide to order a new belt which couples the motor to the worm gear as the slipping has probably weakened it. However, I will return the player to them in the meantime as it should work for a few weeks at least.
Well, that was about 3 years ago. The same new set of discs is still playing and I still have that replacement belt sitting in my desk drawer. We did get a free meal for the 3 of us out of the deal.
Comments: I know that many people are very careful to pamper their equipment. However, unless the various mechanisms are fully exercised to their limits at least occasionally - be it the pickup on a CD player or the suspension on an automobile - dirt, grime, and corrosion can set in and result in expensive repairs later on. At least that is my theory.
Despite my general low opinion of many JVC products, I have to admit that this CD changer has been very reliable. It has probably been running 8-10 hours a day, 6 days a week, for over 5 years requiring only this one minor cleaning and lube job during the entire time. That is not a bad record!
Symptoms: Totally dead, no display, no other signs of life. (Yes, I know, you are not supposed to plug in a dropped VCR until a thorough visual inspection is made inside and out.)
Testing: Not applicable.
This is an irresistible challenge. Aside from the chipped corner of the front panel, there doesn't appear to be any exterior damage. But, the piece of circuit board is ominous as it is apparent that there are numerous traces broken - and probably more inside.
Overall, VCRs are quite tough. However, falling in just the wrong way can do substantial and possibly not immediately visible damage. I have heard of someone fighting off a would-be mugger with a VCR but this too is not recommended practice!
In this case, the shop's estimate was way beyond what the VCR was worth and the owner was perfectly happy to upgrade to a newer model. I did make sure to get the remote control from him just in case a miracle happened - or the remote was the only way left to access the major functions.
After removing the top and bottom covers and front panel, the extent of the damage became evident. The good news was that the main board appeared to be intact and the mechanism itself has no obvious damage though this will not be fully confirmed until the electronic problems are addressed. At least, there are no obviously broken or bent parts - and no loose screws or other parts fall out. Nothing has popped loose.
I cycle the cassette loading and tape loading mechanism manually by turning the appropriate motor shafts. Everything appears to be free and seems to operate properly.
Inspecting for broken electronic parts does not reveal anything. At least the display is undamaged. However, the corner of the front panel display board is broken off - this is the piece in the plastic bag - thank you for saving it! In addition, cracks have propagated in a couple of directions cutting even more traces. Yuk. And, these are really, really fine traces. Double yuk. And, this is a double sided board. Triple yuk. Why couldn't the display have cracked in two - put it out of its misery.
There is always a slight risk that the initial impact has already fried electronic parts as a result of a momentary short or from broken circuit traces and there will still be problems even after repairing the visible damage and/or replacing the broken components. Or, for that matter, that my initial power test fried something else. Well, nothing ventured, nothing gained.
Optimistically, at least 25 - possibly considerably more - 10 mil width traces are cut. Some of the breaks are only visible with a strong magnifying glass but as they say, a break is a break is a break.
First, I repair the board physically with some quick setting Epoxy. It almost looks like a circuit board again. There is one little piece that is missing - and some traces go smack through its center. Well, you cannot have everything! Since, this is going to be a feature length restoration, I decide to remove the display board from the VCR - unfortunately, it is soldered in, 40 or 50 pins worth. At least, this is straightforward, just tedious.
With the board removed, it will at least be easier to get at both sides as needed. There is no particularly good place to start - they are all equally bad. Well, every journey begins with a single first step....
Where I can locate suitable end points, I solder fine wire (insulated #30 wirewrap wire) between these terminals. However, in many cases, it is simply not possible to trace far enough to locate the ends. In these cases, I use bare #30 wire directly across the break. A few I take a short cut and just bridge with solder - this will bite me in the end.
I attempt to double check each connection after soldering for correct wiring and that there are no shorts before proceeding to the next.
Unfortunately, one small piece of circuit board is completely missing and traces pass through this piece. I guess as best as possible the routing of these traces and hope. It seems to be part of the tuner memory circuit.
After what seems to be an eternity - it is probably on the order of 5 hours - I am prepared for the smoke test. This requires reattaching the connections to the mainboard and I will thus loose the mobility of having the display board separate. Well, so be it. This isn't even fun!
I plug it in! Well, no smoke at least. The display shows blinking 12:00. Progress! Still, ready to pull the plug, I hit the power button. What do you know - that even works. And there is some sound from the transport initializing.
Now to try the various functions. Let's see, no response from clock set, channel up, tuning controls. It is obvious that there are still a bunch of problems. Other anomalies: the Quick Record indicator is stuck on. What's this? The display just went dark. Oops, there is is back again. Pressing on the board seems to have an effect. There is still an intermittent somewhere.
Well, this is a start. Back to work....
Solder, solder, solder. After finding a half dozen more broken traces that I missed on the first go around, try again. Now, the clock can actually be set (well, except for the minutes). Quick record is still stuck. There goes the display off again. So the intermittent is still intermittent. Ouch! Why is the controller chip so hot? Pull the plug. Checking over the connections, nothing seems amiss but in the rats nest that the back of the board has become, who can say?
Following some traces that run under the display, I locate and repair a couple more that I had missed before. I rewire those few traces that I had just bridged with solder. I never do figure out exactly how the traces running through that missing bit of board should be wired.
This is as good as it will ever get.
For some reason, the Quick Record light is now out, I have no idea why. The display at least seems solid. The controller chip is cool again. Also have no idea why. Now to try a tape....
Success of sorts. The tape will play but the sound is muddy. CUE, REV, FF, and REW even work. It is not possible to reset the tape counter and it is also not possible to set the channel memory. Previously set channels can be tuned so that, at least, is not really a problem. And, who needs the stink'n tape counter anyhow.
It is not possible to adjust the A/C head azimith enough to get truly good sound. Only later, do I discover that the tape I was using for testing had been recorded on a VCR with incorrectly set azimith so this was probably a non-problem.
Just when I thought success was in hand, all of a sudden, after playing for about 10 minutes, the tape suddenly speeds up to about 10X normal with mickey mouse sound and loses sync. This is not CUE mode but yet another problem. The STOP button works but EJECT overshoots the correct stopping position as the main motor is obviously operating at increased speed in all modes. Resetting requires unplugging the VCR for a few minutes and manually rotating the EJECT gear a couple of turns. This is going to be a peculiar way to watch a movie! Something is obviously heating up, possibly causing a failure of one or more of the power supply voltages.
After spending about 15 hours on this VCR, I am in no mood to (1) give up after being so close or (2) do any more serious work. Is there an alternative? Yes, let me cheat. Maybe simply providing a bit more cooling to the power supply will keep it happy. So, I dig up a little blower removed from a defunct ultrasonic humidifier and prop it behind the VCR. Can this possibly work? The answer is - yes. Apparently, the added cooling is just enough to prevent the thermal runaway problem. Now, it is actually possible to play or record a 2 hour movie (first experiment: Star Trek IV). With this setup, the VCR will play or record indefinitely without spontaneously going into warp drive mode.
Comments: If you take a piece of equipment that has been dropped into a repair shop, the estimate you get may make the national debt look like pocket change in comparison. Attempting to repair a VCR or any other complex device that has been dropped is a very uncertain challenge - and since time is money for a professional, spending an unknown amount of time on a single repair is very risky. There is no harm is getting an estimate (though many shops charge for just agreeing that what you are holding is - a VCR!)
I suspect that the final problem - the thermal runaway is not related to the repairs I made on the display board but due, perhaps, to a heatsink that was loosened that I did not notice. Since the small amount of additional cooling provided by my blower was adequate to keep the VCR happy, it could even have been a pre-existing condition that just did not show up in a cooler location.
While a lot of effort was expended on this single restoration, for me it was well worth it. This was my first VCR. Despite the less than total success, the satisfaction was considerable. While the HS-318UR has long since been retired I still hesitate to cannibalize it for parts figuring that it has some historical significance.
A second identical power pack will be pressed into service for the loan of some of its organs.
Symptoms: When the bad supply is connected to a laptop with a known good battery pack, the red power LED flashes continuously. No amount of reinserting the battery or plugging/unplugging the adapter's DC plug clears the fault. (These contortions are sometimes needed when starting with a totally dead battery and are sort of normal.)
Testing: A voltmeter reveals that the output, 12 VDC, is cycling at the same rate as the LED. This occurs whether connected to the laptop or not. Comparing this with a good adapter shows that even without a load, the output should be a steady 12 V. The other power pack works fine with this laptop as well. Therefore the fault is definitely in the power pack.
These power packs are actually universal (90-240 VAC or DC) input switching power supplies which makes for a much more exciting adventure than a simple transformer!
The first challenge was getting inside. There were obviously snaps around the sides but it took a bit of detective work (read: the @#$% thing would not split in two) to determine that there was a concealed Torx screw (fortunately not of the security variety) under the manufacturer's label. Once this was removed (by puncturing the decal rather than pealing it back), the case came apart easily. At least it wasn't sealed and potted in Epoxy.
So, what do we have? It looks like a fairly typical small switcher - line filter, bridge rectifier, filter capacitor (big!), switching transistor and rectifier diodes in TO220 cases mounted to a full length heatsink, C-L-C 'pi' output filter. Part types for the power semiconductors cannot be determined immediately because of silicone rubber heat sink boots that entirely conceal the devices.
Uh oh, what's this? A conformal coated hybrid controller. I better hope it isn't bad as there is **no** way of determining what is inside. Obtaining a replacement would no doubt be impossible as well. Naturally, this is the first component that I suspect - wrongly, of course.
Well, what does a cycling output mean? Usually, this is an indication of an overvoltage or overcurrent condition forcing the controller to continuously shut down the supply and restart. A common cause for an overcurrent fault are shorted components on the secondary side of the supply. Overvoltage may result from defective regulator feedback components. The controller may simply be bad and misinterpreting the overcurrent and overvoltage sense inputs.
What does the output look like? On my analog VOM which has a fairly fast response, it appears as though it is cycling between 0 and a full 12 V (not something in between that would indicate a severe overload or short. Running the supply on a Variac reveals that the frequency of the cycle decreases as the input voltage is reduced but that the voltage swing remains the same.
What is likely: the main switchmode transistor is probably good but there may be shorted devices in the secondary side of the supply resulting in overcurrent, a defective regulator resulting in overvoltage, or a faulty sense circuit incorrectly shutting the supply down.
So, as always, I test all of the semiconductors that I can identify with an ohmmeter. Of course, I cannot do this on the hybrid circuit so there is an uncertainty that I might have missed something. However, everything I can test checks out fine.
What is next? Capacitors, resistors. All of these seem fine. I substitute some small electrolytics just to be sure. No change. Removing the output filter capacitors one at a time also results in no meaningful change. (Maybe the cycling rate increased - I did not check.)
At this point, I am temporarily out of ideas and the supply gets shelved for a few months. There is a spare but no one is eager to give it up (or maybe I just don't want to ask) for parts swapping - which is what I really want to do. Guess which part I want to swap?
A garage sale comes to the rescue as I find an identical power pack marked $5 but it is late in the sale (after all, how many people collect these things!) and I get it for $2.50. Whether it works or not, this is a handy source of parts - as long as it does not have the identical problem.
Supply #2: I plug it in and measure its output - nothing. Humm. A dead power pack could mean anything but as with any AC adapter, the first thing to check is the wire. And, sure enough, a little squeezing and bending of the DC plug end results in momentary contact and 12 V out. No doubt, the original owner spent the $60 or so for a replacement - not having read the FAQ on AC adapter repair.
Now, with a little effort, I should have a working power pack - and a source of known good parts as well. It turns out not to be such a simple repair as I have to carefully slit the rubber plug cover and then fish the good wire ends through that to reattach them to the plug itself. As they say, not difficult, just tedious. I have been there before.
Back to Supply #1. Now, I start swapping like crazy. The hybrid controller is first, of course. As you guessed, no change. Next is the transformer, then the switchmode transistor (a MOSFET), capacitors. No change, no change, no change.
Finally, the one part that I should have suspected all along - even if my VOM said it was good - the 12 V rectifier. Swapping this part - a TO220 with a pair of high efficiency (or something) fast recovery diodes did the trick. I know, you are saying: bozo, even in your FAQ, you say to never fully trust an ohmmeter test. Well, it finally did bite me.
Comments: Most of the time, silicon semiconductors stay broken once they fail but not always. In this case, for whatever reason, the diodes would work like - well diodes - for long enough to provide full output voltage but then one or both of them would turn into short circuits or at least develop high leakage. Thus, reducing the input voltage would lengthen this cycle as it would take longer for full reverse voltage to develop on the diodes as a result of the filter capacitors charging.
With switching power supplies it is always tempting to blame the controller, transformer, and switchmode transistor - because they are expensive, difficult to obtain, or both. However, for a supply that shows some signs of life, these components are rarely the cause of the problem.
Swapping parts between a working and dead unit - or between channels of a stereo amplifier or dual channel oscilloscope - is always an ideal way of eliminating selected parts from suspicion. It is a definitive test. There is a slight risk (maybe not so slight with power supplies and power amplifiers) that putting a good part into a circuit with some other fault will blow the good part. But, this risk can generally be minimized by using a series light bulb along with a Variac to limit current to the critical semiconductors.
Symptoms: Power-on results in nothing on the screen and the familiar friendly 'bong' is missing as well. Just some unidentified electrical noise indicating that it is getting power.
Testing: Nothing with the case on. It is obviously not operating as a computer and does not go through the normal boot sequence or even get to the point of asking for a diskette.
This is the 'classic' all-in-one style Mac, physically almost identical to the original MacIntosh computer and the Mac 512K. The much newer Mac Classic is constructed along similar lines. All require the special 'extra long Mac wrench' (1 foot long Torx) to get at the two screws under the 'handle'. Not having one of these (or actually, having lost mine), I make a suitable substitute by grinding down the end of a triangular file handle. It works quite well, thank you.
There are 5 Torx screws: 2 lower rear, one inside the backup battery compartment, and 2 under the handle (they are not all quite identical depending on if they screw into plastic or metal). Once the screws are out, a case splitting tool is supposed to be used but a wide straight blade screwdriver or other metal strip can be used **carefully** to separate the two sections of the case without damage.
With the case removed, I start by examining the large Molex connectors for damage and cold solder joints - there are none apparent (at this time).
How to identify voltages? Well, the floppy is pretty standard, so at least +5 and +12 should be easily found. OK, +5 is low and +12 is very low. Something is probably shorted. How about some ohmmeter checks? Since this is probably a monitor problem, the natural place to start is the horizontal deflection circuit. The small B/W monitor used in the Mac Plus runs off of +12 on the isolated side of the main switchmode power supply so at least this will not be a shocking experience.
Hmmm, HOT (BU406) is a dead short. It also appears to have seriously overheated as the circuit board at its legs is somewhat blackened. The most likely cause of overheating followed by failure is a bad flyback.
Nothing else in the vicinity appears bad based on the ohmmeter tests.
How does one test a flyback transformer?
Three ways:
Happily, (1) is an option as I have a good Mac Plus just sitting around doing nothing (you don't act surprised!). There appear to be several variations on the basic flyback model - 157-0042B/B but they appear to be interchangeable. Unfortunately, the ohmmeter comparison is inconclusive and cannot test the HV winding in any case.
So, I decide to swap the flybacks - it is only 8 or 10 solder connections, so quick and painless. I rummage around in my junk box (you probably get the idea that my junk box is as big as a rail car) and locate a BU406D. The built in damper diode should not hurt anything (there is an external one in the Mac already).
Installing the transistor on its heatsink and soldering in the flyback takes all of 5 minutes. Now for the smoke test. There is probably no need (and no easy way anyhow) to use a series light bulb or Variac to limit the current. The Mac switchmode power supply is current limited and unlikely to be able to kill the HOT in the few seconds it will take to verify that the screen comes up. I will know almost immediately if the voltages are more normal as the friendly bong should sound almost as soon as the power switch is flipped.
And, indeed it does. A few seconds later, I am greeted with the inquiring Mac Icon and inserting a boot disk results in the smiling Mac Icon and a proper boot sequence. The picture appears to be bright, well focused, and stable. A few tweaks to position and size, and it is perfect.
Now to order a flyback. $14.99 from MCM Electronics. I leave the BU406D in place permanently.
Three years later: it's back!
New set of Symptoms: single vertical line. This is a classic (no pun intended) problem with Mac monitors - bad connections to the deflection yoke. And, sure enough, whacking it brings back the horizontal, though it is somewhat erratic.
The cause is obvious: one pin of the Molex yoke connector has staged a Three Mile Island. It is totally melted and the normally white plastic is blackened and brittle.
Rather than replacing the connector, I elect to just do a bypass and solder a jumper from the remaining wire stump directly to its destination on the monitor circuit board. Who ever removes yoke connectors anyhow? The remaining three pins and sockets (1 horizontal and 2 vertical) appear to be in perfect condition so I leave them alone.
I like easy problems for a change of pace!
Comments: Old Macs, like JVC VCRs that lose parts and Sony TVs with bad tuner shield soldering, have a particular set of problems that are nearly universal. Run a Mac Plus long enough and you **will** see a bad Molex connector or dead flyback.
The flybacks usually fail either by shorted turns in the primary or secondary. Cracked cores or HV rectifier failures are also possible but not common). When it is a primary short, I believe there is a good chance the HOT will blow if not caught immediately. A secondary short may just increase the load enough to cause overheating but not immediate failure. Sometimes, there will still be enough high voltage generated to have some light on the screen but the picture, if any, will be highly distorted. (I have a few Mac flybacks at this point and it seems to be a toss up as to which set of windings failed.
I like it when the primary goes bad because I can then perform a flyback primary windingectomy and have a very nice core and high voltage winding for constructing neat and nifty high voltage invertors. Generating more than 12,000 VDC from 12 VDC is quite easy and reworked Mac flybacks used in this manner seem to be virtually indestructible. See the document: "Various Schematics and Diagrams" for a couple of complete designs using previously owned, low mileage flybacks.
Symptoms: At first, I just thought the camera work on the show I was watching was a little strange, maybe the lighting at dusk or something like that. But when the commercials also looked strange, it was obvious that the TV was the problem. There were no yellows or blues! All colors were in shades of red, orange, and cyan. This makes bananas look particularly icky.
Testing: I tried different channels, adjusting the user controls, etc. No change. Black and white programs were normal and turning the color control all the way down resulted in a normal B/W picture.
Therefore, the CRT and its drive are fine, no missing colors. This is a case of messed up colors - and there can be only one small area of the TV's circuitry that can be responsible - the chroma decoder. I suppose, a short between two of the primary color signals - say blue and green - could result in a somewhat similar symptom but it was clear by rotating the tint control that this simple explanation did not hold up.
For a while, I just watched my weird TV since until I could get the Sams' Photofact for it, there would not be much I could do. After a couple days, it didn't seem as strange but nonetheless, I didn't want to have to explain the situation to anyone who visited. So, off to the library. This is a good excuse to copy nearly the complete Sams' folder for the CTC111 chassis even though a relatively small area is involved (in this problem).
A single IC performs all the chroma functions including generation of the 3.58 MHz reference, gating of the color burst, I and Q decoding, and generation of the R, G, and B drive to the CRT socket board. A disconcertingly large number of discrete components surround this chip.
There are basically three signal inputs: luminance (B/W video), chrominance (color information), and a color burst gating pulse.
Since the B/W picture is normal, the luminance input must be fine. There is no likely scenario where a fault in a prior subsystem (i.e., tuner or IF) could mess up the chrominance in any way that would explain the symptoms. The gating pulse matches the Sams' waveform.
What about voltage measurements? These seem to be pretty close though at least one appears to be a misprint in the Sams' (I never do quite figure out if it is or not, it did not have anything to do with the problem but my control settings might not have been the same).
What else is there? The output R, G, and B drives we know are messed up but do they appear funny in any way? Nope, they are all unique and the amplitudes are similar - thus no apparent shorts between them or to anywhere else.
The chip could be bad. Yes, I should have known better but this was over 10 years ago and ICs in TVs were relatively new. Therefore, I obtain a replacement - $15, not too bad considering how many legs it has! I carefully unsolder the old one and install a socket (as I always do in these situations as damage to the cheaply made circuit boards is likely if it needs to be changed again or the replacement is bad).
With great expectations, the new chip is plugged in, the TV is turned on and-
That looks even worse than before! Not only are the colors more messed up but the contrast seems to be off as well. So, either the replacement is bad (yeh, right) or the chip is not the problem. While bad parts are possible, the symptoms looks suspiciously similar, if not quite identical. Therefore, I conclude that it must be something else. $15 wasted? No, I learned a lot: If the chip is good and the signals to it look good, there can only be one set of alternatives - a bad discrete component or solder connection in the vicinity of the chip.
Well, they all look like parts. No smoke has leaked out that I can see.
First, to determine which parts are likely to affect only the color. Based on the controls (color and tint) and identifying parts that would have an effect on phase or frequency response narrows it down quite a bit. There are some resistors, capacitors, and a couple of small inductors.
A methodical test of resistances between pairs of nodes finally turns up something. There is an inductor in what looks like a filter between two pins on the chip which measures open! That would do it. It is marked 6 on the schematic and that is probably the normal resistance - it certainly should not test open. On the parts list, I finally find it - a 39 uH inductor. Just as a quick test, I take a 1 M resistor and wind a very precise random number of turns of #30 magnet wire around it. The 1M is irrelevant but acts as a convenient form for the coil.
Now, finally, a change in the color. Nowhere near correct but this is the first time that anything approaching reasonable colors have appeared since the start of this affair. Still not quite right. I get a another 1M resistor body and wind a whole bunch more turns onto it. Now, that is a lot better. Actually, probably good enough but I have access to an inductance bridge at work so, resistor and #30 wire in hand, I finally manage to come up with a fair approximation to a39 uH inductor. Sure, you are saying, just go buy one. You know that is not my style!
Comments: There is no good excuse for an inductor in a low power circuit to fail. The only explanation can be that one of the connections to the outside leads was not made properly or the fine wire of the coil had been nicked and finally just broke. I attempted to repair it but unfortunately lost the wire inside the potting compound (it was something like #40 wire - very very thin). Just bad quality control, not an induced failure.
Although it cost me $15 to replace the (good) chip, in the end, this was probably well worth it as it definitively (well, almost) eliminated a large unknown from consideration. The TV worked well for the next 12 years and only recently developed the 'No Picture' problem to be dealt with in a subsequent Repair Brief.
Symptoms: No video. Output will sync the small monitor that came with it but absolutely no signs of any response to light. You could set off a magnesium flare 2 inches in front of it - lens or no lens - and there would be no indication of any change to the video.
Testing: There are no user adjustments beyond focus (there isn't even an iris on the lens). The camera was connected to a working monitor. Nothing, zippo, zilch, nadda.
This is a fairly typical 1/2" vidicon NTSC B/W video camera. 16 mm, f1.6 lens with focus ring, 24 VAC power. Output is baseband (RS170) video from a BNC jack. Apparently, it had been working but then at some point just quit. No one knows if it was a sudden or gradual failure.
First, some vidicon theory:
A vidicon is one of a number of similar camera pickup tubes based on a non- storage photoconductive target. An electron gun, not to dissimilar from the one in a TV or monitor CRT generates a beam of electrons. A number of electrodes shape and accelerate this beam toward the target. A pair of magnetic deflection coils provide horizontal and vertical scanning exactly as in a TV. A focus coil is used rather than focus electrodes (as are common in modern CRTs).
The photoconductive target is high resistance when dark but low resistance when illuminated. When the image from the lens is focused onto the target coating, the light and dark areas of the image results in low and high resistance areas on the target. As the electron beam scans, the target current is a direct analog of the brightness variations of the image. A very high impedance amplifier then boosts this signal to the level required for RS170 video (roughly .7 V p-p into 75 ohms) which is combined with the composite sync from the master timing generator.
Anyway, back to the story...
My friend Bill has quite a decently equipped lab related to his business (special analog integrated circuits) but when it comes to something a bit out of the ordinary, he is less than, shall we say, well prepared. To test this camera on the bench requires a 24 VAC supply for its power. You would think that locating a suitable transformer between a basement and garage full of junk (sorry Bill, that is what a lot of it is!) would be a piece of cake. Nope. We had to jerry-rig a couple of adjustable AC supplies in series to get something approximating 24 V. Oops, phase backwards. Reverse and try again. Finally, 24 VAC, and not too much smoke (though there was some - probably a dead cockroach or something bigger). :-)
From the outset, Bill is insisting that the tube is bad. How? "Oh, the heater will be gone". OK, where is the multimeter?
We use his 25 year old Lafayette VOM with the bent probes (one of which is missing the banana plug at the multimeter end so the wire is just stuffed into the hole). It is probably pins 3 and 4 of the vidicon. Yep, seems low resistance to me. When the camera is powered, in the dark, it is indeed just possible to make out the faint orange glow of the heater inside the tube but this was not obvious at first. The voltage is probably correct, something like 5 or 6 V DC.
Being the more conservative type, I suggest trying to trace out some of the circuit to determine what's what.
Bill, on the other hand wants to start poking around with the scope. OK, fine. At least, many of the connector pins are labeled with signal names. There are even various voltage test points on the circuit boards.
Well, first, let use check the marked voltages. Using the state-of-the-art multimeter, every marked voltage seems to be dead on. (Now, don't get me wrong. I also have an identical VOM which I still use quite a bit. However, it is in somewhat less battle weary.)
Unfortunately, all the marked voltages are power supply outputs - not pins on the vidicon tube which is what is really needed (as you will see later).
OK, what next. "Let's check deflection." Sure, humor him. These are clearly marked on the yoke connector. On the scope, the vertical looks like a decent sawtooth but the horizontal is a really short pulse. I, figuring the inductance of the horizontal coil suggest that this might be normal. Bill doesn't buy into this. I also suggest that even if the horizontal deflection were dead, there would be some light sensitivity - the response is real time with respect to wherever the beam is hitting. As long as it is somewhere on the target, there should be some response to light. The horizontal deflection coils are AC coupled - capacitor is good - so the beam could not be fully off target. Bill is still fixated on a deflection problem. Oh well, humor him some more.
At this point, it is late, I want to do this in my more methodical way, so I bundle the whole thing into a bag and take it home on the back of my 10 speed.
Now, I do not have the nice working setup that Bill does, but I do have parts. You want parts, I have parts. In particular, I have no trouble locating a 24 V transformer and a line cord! So that problem, at least does not exist at my place.
Since Bill won't sleep until this deflection thing can be put to bed also, I decide to trace the circuit to see if the pulsed waveform is entirely consistent with how it would appear to operate. I still believe it is and it is irrelevant anyway.... The circuit is very conventional, not too unlike a horizontal output circuit in any TV or monitor except that there is only an inductor in place of the flyback. Checking the input signal, it is quite clear that the circuit is doing what it should.
Then I get a phone call. Hi Bill. So we are discussing this result someone mentions that it would be easy with a current probe to determine if the deflection waveforms were correct. Current probe! Hello? Did someone mention the words 'current probe' by an chance? Of course. I have a Tek high frequency clamp on current probe - cost me a whole 10 cents at a garage sale. The last time I used it, Bill and I were trying to measure the instantaneous current pulse in an electronic flash unit (about 60-100 A). Why didn't we think of this earlier (Bill has one as well but I bet he paid more for his! Then again, with Bill, you can never quite tell).
This takes all of five minutes - the wires are clearly marked. And, what do you know, a perfect current sawtooth! Hi Bill, guess what? Horizontal current is a perfect sawtooth.
Next, I decide to attempt to figure out what each of the signals connected to the vidicon do. There are 7 pins, the internal electrode arrangement is clearly visible, and the names are printed on the vidicon socket board:
             ____ _____________________
           |                           \_____ ____
           |                                   ___
           |                                  |  _______K
           |                                    |< H+,H-
           |                                  |_______
           |                            _____ ____   G1
           | ____ _____________________/       G2
           |  G4           G3
           |
        Target
    (Video signal out on external contact ring).  Biased at around +10 V.
Touching or even going near the target ring at the front of the vidicon results in a hum signal in the video output. Therefore, the video amplifier chain is almost certainly working correctly.
Taking measurements while adjusting the Beam and Target pots seems to indicate that they have the expected effect. There is just no beam current!
What else? Maybe Bill is right - the tube is shot.
I start rechecking the measurements - probe slips, zap - what was that? Did I see a picture for a second or two? What did I touch? Figuring a cold solder joint, I start prodding in the vicinity. Nothing. OK, recreate the incident. The G2 test point and another pad are very close. If I momentarily touch the two, there is a tiny spark and a faint but recognizable picture appears for a few seconds and then fades out. This is entirely repeatable. What is that other pad? It turns out to be G1 - the beam control grid. Surprise, surprise!
At first I thought that dragging down the G3 voltage or the +300 V rail was having the effect but, of course, it turned out to be pulling up on the G1 voltage - making it more positive with respect to the cathode. In fact, shorting G1 to its buddy next door on the same connector, +H, results in a very nice picture. (Recall that +H is around +5 or +6 V).
For now, I will see if I can get it working consistently and worry about the explanation later. I grab a 1 M resistor and solder it between +300 V and G1. Now, it is possible to adjust Beam (and all the other controls I messed up) to get a quite decent picture. The resistor provides enough positive current into the BEAM pot so that the G1 voltage can easily be brought up to 30 V - well beyond what is needed.
As far as I can tell, the video is fine, the settings are stable. So, we have a case of a device that works in way it should not - which usually means that the 'fix' is masking some other fault. Without schematics with voltage levels or a spec sheet for the vidicon, there is not much more I can do. Bill will no doubt want the thing back anyhow and it will be hard to refuse in the interest of further research.
Comments: There are times when total comprehension is not required. It would be a simple matter to substitute a known good vidicon - if I had one. There is only so much time worth spending on something like a B/W CCTV camera. Based on on my testing, it works reliably. I have had it on for several hours without any change in behavior.
Almost certainly, there is still a fault - perhaps Bill was correct all along and the vidicon is indeed bad in some way - not the way he thought, but bad is bad except when it works! Or, maybe one of the voltages is indeed far enough off to be killing the video. Maybe it will drift further out of spec over time and the 'fix' will now longer be enough. For now, it works, move on. This camera will never be used in any mission-critical application, probably chip inspection, so if it dies, Bill will just have to unpack the Mark-1 magnifying eyeballs from storage.
Symptoms: No display or any other signs of life. No smoke either so at least that is a positive sign.
Testing: Switching through all ranges and modes results in similar behavior as in no signs of life.
Here is a situation that is not quite typical of a repair: a device which is in a totally unknown state. Was it constructed properly? Were all the parts good? Did some prior attempt to make it work blow something out? In many ways it is much better to be working on a device that was functional and then blew its top than to be dealing with something that never worked properly and whose history is not available.
Well, with every long journey, start with a single step...
I don't intend to spend a lot of time on this. If initial tests do not produce any revelations, shelve it. However, I do have the complete instruction manual and schematics so this will not be a totally blind challenge.
Since there is no action of any kind - not even a hint of a display - either the power supply is bad or the controller - an MK6013 - is bad. Hope for the power supply.
This meter is designed to be used on the bench or as a portable. It uses 4 C-size NiCd cells trickle charged when plugged into its detachable power cord. Checking on each of these indicates that they are charging. After a few minutes, there is greater than 5 V across the battery which should be adequate for normal operation. Still nothing. Unplugging, shows that the cells (despite some crystallization around the ends) do hold a charge.
The power supply runs off of the NiCd battery and uses a DC-DC convertor to generate all the voltages required for the circuitry except the +5 which is obtained from the battery through a pass transistor. The neon 7 segment displays require +/- 170 V and the analog circuitry uses +/-12 V. Listening carefully, it is just possible to hear the whine of this DC-DC convertor so at least it is starting up. Are the voltage outputs correct?
Well, the +170 testpoint measures about +70, the -170 V testpoint and +12 are also low and -12. Humm, -12 is nearly non-existent.
Putting a scope on one of the inputs to the convertor transformer shows a highly asymmetric waveform. This is a totally symmetric power oscillator. Therefore, such a skewed waveform probably indicates excess load on one of the outputs - probably on just one diode of the rectifier for that output.
Before I start mucking around in the power supply, I unplug the MK6013 chip and set it aside in conductive foam. I don't really want to blow it out (assuming it is still good) through some power supply screwup. All other parts are common and readily available. I probably would never get around to searching for a replacement for the MK6013, however.
First step: disconnect all windings of the transformer that are not needed to run the convertor oscillator. Fortunately, this is easily accomplished without removing the transformer. Suck the solder, make sure the pins are clear of the pads. Power! OK, now the waveform is a nice squarewave (much higher frequency and no longer audible). This proves that (1) the transformer is likely fine and (2) it is an excessive secondary load problem.
Which output?
First, I reconnect the high voltage (+/-170 V) winding. Still a nice squarewave. The +/- 170 V testpoints measure about 180 V and there is just a hint of a glow from part of the display. Without logic drive, this could be correct.
So, the problem is in the low voltage portion of the power supply or somewhere else powered from the low voltage. Good news and bad news. This narrows down the problem - to most of the circuitry in the entire unit! However, the fault is likely in the power supply.
Next, reconnect the transformer winding for the +/-12. Now, the bad waveform is back. The asymmetry of the input waveform almost certainly points to a bad rectifier as this is the only component that could produce a load current depending on the polarity of the input. Once rectified, excess load should affect both polarities of the input waveform equally and thus not result in the asymmetric waveform.
First, is it the positive or negative 12 V that is the problem? Pulling one transistor easily confirms that the +12 V output is not the problem I then unsolder each of the two rectifiers for the +12 V and nothing changes.
Now for the -12. Unsoldering D212 makes no difference but removing D214 restores the symmetry of the waveform. Even without this diode in place, all output voltages are now well within expected tolerances. A 1N4007 takes the place of its dead buddy.
Now for the acid test: replace the controller chip. And - Yes! - we have a display. It even looks somewhat correct. Obviously, the meter has not been calibrated but it does produce the expected results for DC V and Ohms. The + indicator and a couple of segments are out but some quick jiggling and tapping confirms bad connections. The bad segments are due to loose socket pins and easily remedied with a pair of needlenose pliers. I never do discover the actual cause of the bad + indicator but the problem went away after cycling the AC/DC switch several times.
Some quick calibration shows that it is in pretty good condition. There may possibly still be some minor accuracy problems with a couple of the ranges but in general - the @$#% thing works!
A bad diode! A stupid, 5 cent, bad 1N4002 diode! Can you imagine the frustration of the original owner who, after meticulously constructing the kit - following every instruction to the letter, double checking and triple checking - is unable to make it work because of a simple power supply problem? Keep in mind that this is not a modern DMM where the major parts consist of: case, selector, IC, LCD. This is 1975 technology with many many discrete parts on two 4" x 6" circuit boards. The effort probably represented several dozen hours labor with a hot soldering iron and the extensive use of choice 4 letter words.
Comments: A Heathkit IM2202 Multimeter is nothing to write home about by today's standards but is still useful nontheless. The significance here, if there is any, is in the type of situation in which one is attempting to make a newly constructed unit operational. There are subtle differences in the diagnostic procedures required due to the unknowns involved. In this particular situation, there was no way of knowing how much damage might have been done through prior unsuccessful troubleshooting or whether - as it turned out - some original parts were bad as well. This was obviously not the first electronics kit constructed by this person - there were a number of successful examples at the same sale. Therefore, I did have some confidence that the basic construction was solid and accurate and there would be some minor problem involved - which as it turned out, was correct reasoning.
Symptoms: I turned it on and - sound but no picture. No light visible on the screen. That is kind of strange. Except for the color problem 10 years ago, this has been a reliable set. (No tuner shield solder problems, knock on plastic!)
Testing: No user controls have any effect. The screen remains black. There is no flash of light when powering it off either. There is static on the screen however, so I suspect that HV is fine. Nothing is shutting down on its own either.
Since there is sound and HV static, I assume the horizontal deflection is running. As a simple test, I turn up the SCREEN control. This results in a raster. Therefore the power supplies, horizontal, vertical, high voltage, tuner, and sound are all in fine shape. Just no #$%^ picture. Well, that narrows the area of search considerably.
This will require the Sams' and a scope to trace - sure, no problem. I still have the photocopied Sams' from dealing with the previous problem and my scope is just dying to chomp on something interesting.
The only difficulty is that the bottom of the main circuit board is not accessible when mounted in the cabinet. However, maybe RCA thought of this - there are two offset screw holes which (whether by design or not, I do not know) permit the circuit board to be moved about 8 inches to the rear - and the cabling is even long enough. Now, with the TV on its side, everything I need to get to is out in the open.
With my isolation transformer - always a prerequisite - I can conveniently examine various points in the video chain. However, some testpoints are concealed under a shield soldered at multiple points. A slight annoyance - the soldering on this shield is really really good.
Just when I have settled in to try to determine where the video signal is getting lost, the picture pops on. Actually, it kind of dribbles on - first a weak rainbow pattern and then a second later the good picture. Could this be a bad connection? Perhaps, but no amount of wiggling, jiggling, whacking, or cursing, has the slightest effect. Cycling power also does not induce the problem. It is now as though the TV is not broken.
Hmmm. sounds like an electrolytic cap or thermal problem. (BTW, Bill - from Repair Brief 35: "Panasonic PV1414 Closed Circuit TV Camera with no Video is sure that the problem is a bad electrolytic cap and wants to destroy the ozone layer with a can of CFC based freeze spray to locate it.)
Let it cool for an hour.....
One hour later - picture comes on instantly!
Let it cool for a day.......
One day later - picture comes on instantly!
Leave it alone for a week................
Finally - no picture - for about a minute, then rainbow, then solid picture.
So, how does one go about troubleshooting a problem of this sort? Give me a problem that takes a minute or hour to show itself any day but one that is broken for only a minute or two? Not fun.
Well, perhaps even when it is working, there will be some voltage or waveform that isn't quite right. Maybe a visual examination will turn up some potentially bad electrolytic capacitors. Maybe one has lost some of its value and a capacitance check will reveal the culprit. Right, keep dreaming.
First step: narrow down the search area. At this point, I have no idea exactly where the video signal is getting lost - not even which subsystem! I do know that sync is stable - examining the raster shows that the lines are correctly interlaced when a proper channel is tuned. So, this puts it after the sync separator. Since this is fed from the video at the output of the video IF, I know at least that it is functioning to this point. That leaves the entire luminance channel - joy - as well as the chroma/luminance IC (the one I tried replacing in Part 1 of this story, U700).
I spend some time down one blind alley - the chroma input to U700. Suspecting this signal, I confirm that it is indeed always present even when there is no picture. A simple test of shorting this signal to ground at the chip input would have revealed that the most its absence would do is result in a B/W picture. One dead end.
Here is a rough block diagram of the video chain:
                                +--------------+
                        +-------| Lum Peak/Amp |-------+
                        |       +--------------+       |
                        |                            C v     U700
          TP-A  +-----------+    +------------+ B +-----------------+    RGB to
Video IF ---+---| Comb Proc |----| Chroma Buf |---| Lum/Chroma Proc |--- CRT
            |   +-----------+    +------------+   +-----------------+    Drive
       To Sync Sep.                                  D ^
                                 +------------+        |
              From Sync Sep  ----| Burst Gate |--------+
                                 +------------+        |
                                                       |
                               +----------------+      |
 From Vertical Deflection  ----| Vertical Blank |------+
                               +----------------+
I know that the video signal is fine at TP-A at all times. I also know now
that TP-B is fine and does not kill the video in any case should it disappear.
Next, I identify the pins on the Lum/Chroma Proc chip (U700) that can possibly kill the picture totally. It appears as though there are only five: 4 of these are controls or power supply voltages (constant DC levels) and the other one is the luminance input, TP-C.
One week, later, preparing for battle I am set to measure the 4 static voltages as soon as power is applied. The scope is hanging on TP-C as well to determine if that signal is present at all times. A signal here would eliminate all the stuff in the 'Lum Peak/Amp' box from consideration (and there is considerable stuff in this box - I have greatly simplified the block diagram).
Charge!, or, err, power!
Voltages: Measure, measure, measure, measure! These all check out within 5 percent or so.
TP-C signal: Yep, it comes up immediately and appears to be valid video and of proper amplitude.
There is no detectable change in any of these when the picture appears 30 seconds later.
That's just great. All five possibilities seem to be fine. Well, when the plausible are eliminated, check the implausible.
First, however, I breakdown and decide to swap U700 with my spare in a week when I apply power again. As expected (but hoped against), the screen remains black for the expected minute. When the picture appears, the color balance is somewhat off (recall, that in our last episode, there were more severe problems with this chip but that was when the actual fault had not been located). However, adjustment of the CRT drives fixes this. For all intents and purposes, the replacement U700 performs identically to the original.
So, there must be some other input to U700 that is messed up.
Well, there is another possible candidate. I had not paid serious attention to it before but it is all that is left - the signal derived from 'Burst Gate' and 'Vertical Blank'. I initially discounted this since there was a signal present even when the picture was blank - but was it the correct signal? Brief checks previously had shown it to healthy - but that was when there was a picture.
One way to find out: short it to ground and see what happens. And - yes - this kills the picture. What is also significant, is that when the short is removed, the picture comes back in a very similar way to when the 'problem' goes away - some initial rainbow effects before it stabilizes.
So, next power cycle (1 week) I am intent on catching this signal in the act! This signal should look like a 2 volt pedestal during horizontal blanking with a narrow 5 volt pulse riding on top. This is called the 'Sandcastle'. I am now thoroughly familiar with what the correct shape should be.
                             ___
               |\             ^
               ||             |
             __||_           7V
    ________|     |_________ _v_
1 Week passes......
Scope, are you ready? "At your service".
Look at that! The pedestal is there but the narrow pulse is missing. Finally a clue. Some quick voltage measurements of the 'Vertical Blank' circuitry shows that it is impossible for it to be at fault as the pedestal would not appear normal. Therefore, it must be the 'Burst Gate'.
This is a fairly simple circuit - a transistor buffer is driven into saturation by the inverse blanking signal. An RC delays its turnoff at which point the positive going pulse at the collector is coupled via a C-L-R network via a diode to U700. The following is somewhat simplified:
                                12V
                                 |
                                 /
                                 \ R744
                                 /
                                 |  C710     CR700      R747
                                 +---||---+---|>|---+---/\/\--- TP-D
    _____   __      R742       |/         |         |
         |_|    ----/\/\---+---| Q701     C         /
                          _|_  |\         C L703    \ R741
                     C709 ---    |        C         /
                          _|_   _|_      _|_       _|_
                           -     -        -         -
Next step: to determine if this transistor is working correctly. This time,
scope probes on input and output. The verdict: input and output are both
stable instantly at power-on. Having confirmed this, I immediately kill
power. Maybe these quick checks will permit whatever is being cured in
a minute to remain sick. Now what?
What about the other side of C710. Nothing. How can that be?
Coupling capacitor? Quickly bridging another one doesn't result in any change. Kill power. I cannot afford the bench space, need to get this wrapped up!
On a hunch, I check the resistance across L703. 20 K ohms, Huh? No way, it is marked 21 ohms on the schematic. Not another dud inductor! (Recall that this was the problem in Part I - messed up colors).
I pull L703 - it measures open. How could an open inductor result in a flat-line output? One might think this would increase the output. Well, with the inductor removed or open, the diode charges the capacitor as it would in a power supply and results in the diode output being clamped to zero volts. It actually makes sense.
First I try winding an inductor but even with as many turns of #32 wire as I can fit on a 1/2 watt resistor body, the value must be way too low as the output is still dead.
Rummaging around in my inductor drawer, I locate one that looks kind of similar. Unmarked, but of approximately the right size and construction (I really don't have a great stock of inductors.) The original is marked 471 which I assume to be 470 uH but I didn't photocopy the page of the Sams Photofact with inductor ratings, unfortunately. The results with my unmarked replacement are mixed - the picture is there (well, that really doesn't prove anything) but it seems a little bright. This signal looks fine, maybe the bright picture is my imagination. OK, try a different larger one. This even measures the same on my ohmmeter as the original should (like that means anything). However, the picture now appears normal.
Since the poor lonely inductor sitting on my bench still measures infinity ohms, I am confident that this is indeed the problem. Exactly what mechanism results in a delayed start inductor is not quite clear. It is not heat as there is no time for any thermal effects and the power dissipation in the inductor is about as close to zero as one can imagine. Is it simply the voltage pulses appearing across some kind of marginal semiconductor-like junction formed by corrosion between the coil wire and the leads that eventually results in good contact?
Attempting to 'disassemble' the broken inductor simply results in broken inductor pieces everywhere so I will never really know for sure what happened - until another one of the half dozen or so similar inductors in the TV decides to do its open circuit thing.
Maybe someday I will actually order the correct replacements for both of the dud inductors - this new unmarked one and the homemade inductor that fixed the previous messed up color problem. For now, it seems to be fine and the TV shows won't be any better with the proper replacement parts anyhow.
Comments: No doubt next time (sure, if there is a next time) I will test all the similar inductors first! What could possibly lead to a batch of unreliable inductors is another one of those mysteries of the universe. After all, an inductor is just a coil of wire soldered to a couple of leads. There is no thermal or mechanical shock and the circuit is very low power in any case. The TV is not in a damp location or subject to any other kind of abuse that I know of though based on the appearance of the innards of the inductor, some type of deterioration may have taken place.
How should one diagnose a problem of this type? In hindsight, I guess testing components in the vicinity of the Lum/Chroma Proc after waiting a week and with power off would make sense. But, some of the elapsed time was required to localize the problem to that chip. However, once it was clear that one of the signals to U700 was messed up, the ohmmeter checks would have greatly reduced the additional required debug time. Would freeze spray have worked? Perhaps - if anyone had thought to hit the inductor. There were no electrolytic capacitors anywhere in the circuitry around U700.
Symptoms: Pressing front panel power button results in a click but no indication of deflection or anything else. By listening carefully, it is just possible to determine that the 'on' and 'off' clicks are not quite the same sound. Therefore, the system controller thinks it is cycling power - this is not a shutdown problem. There is no response of any kind to any buttons on the remote control.
Testing: With the cover off, the first check is to determine if the horizontal output transistor (HOT) is shorted - it is not. Applying power (using my isolation transformer), the main filter capacitor shows the expected +150 V from the bridge rectified 115 VAC. Shutting power off causes this voltage to decay over the course of about 10 seconds - therefore, the power relay, its control, and main filter capacitor are probably good. Checking voltage at the HOT shows that it is present (though high - I suspect this is simply due to the fact that there is no substantial load with the set not running). Thus, this is a startup problem and not a catastrophic failure of the HOT, flyback, or some other expensive part. More importantly, startup problems usually have a definite cause and are not likely to reoccur.
The next step is to obtain the Sams' Photofact for this set. A trip to the library is in order. Until then, what about the remote control? Is it bad or is there something else in the TV itself that is not responding to the remote?
A quick check with my IR Tester reveals that the remote is not putting out any IR signal for any button presses. I double-check the batteries - they are good and will operate other remote controls. Opening the remote control is not as bad as some - one screw and some snaps along the sides. Nothing looks immediately amiss - no broken parts. But this is the component side of the circuit board. Depressing some catches around the edge allows it to be removed. Hey, what is this? Along one edge, a trace has been lifted off and broken by one of the catches. Did I do that? I thought I was being careful enough. Well, it needs to be jumpered and soldered in any case. That does it! The remote now puts out a strong IR signal - and operates the TV (to the extent that this is possible - at least it clicks in exactly the same way). I still have no idea of how the trace got broken or if I did it though this would imply an impossible sequence of events as I did not open the remote until *after* it did not work. But it did definitely fix the remote problem. For good measure, I also put a dab of glue on the ceramic resonator which is flapping in the breeze.
Now, back to the main event. Checking the Sams' index is disappointing - this model is not listed in the (1995) manual. However, a model with a very similar number is. Well, asking for the folder doesn't cost anything. Examining the schematics of this folder (for a RXX168-WA01) shows that there are enough similarities to justify copying costs. In fact, it appears to be virtually identical (I cannot actually locate any differences of any consequence). Generally, on the first round, I copy the schematics and any resistance charts and chip descriptions (block diagrams). Later, if I need specific information like part numbers, I will copy the appropriate additional pages.
Since there is voltage on the HOT, there is almost certainly a problem with the startup drive. Checking the base of the HOT shows that there is no drive present when power is turned on.
Checking the base of the horizontal driver transistor shows that there is nothing there either.
How is startup drive derived?
Various models of TVs and monitors use different techniques: multivibrator, deflection chip powered from standby supply, high value resistor supplies current to horizontal driver or HOT directly, etc.
For this TV, a single chip is used for sync and deflection, a TDA8305 - TV Signal Processor. However, after examining every pin on this chip, it is apparent that there is no DC power available until after the set starts up and the flyback supply is running. The supply voltages for the chip are all 13 V - rectified, filtered, and regulated off of a winding on the flyback. This leaves only one possibility - there is a high value resistor between the 130 V B+ and the base of the horizontal driver transistor.
The collector of the horizontal driver transistor has the expected +130 V B+ so the transistor is not turning on or is open (not likely).
First, I unsolder the base of the horizontal driver transistor so I can check the junctions with an ohmmeter - it appears good. Better make sure to reconnect that before applying power or else there will be 130 V on the IC!
Next, I test across R502 - startup resistor. It injects current into the base of the horizontal driver transistor. This applies a pulse to the HOT to initiate the flyback supply. And, what do you know! The resistor tests open! At first I thought I was just using the wrong scale on my VOM. However, it is indeed open - might as well be a pair of disconnected wires. It is a 47 K ohm 1/2 W film resistor. A quick power calculation shows that 130 V across a 47 K ohm resistor is about .3 W - close enough to suspect that simple heat dissipation and thermal cycling over time resulted in an isolated failure. In fact, there is no possible mechanism that would result in a forced failure of this resistor. Even if the 130 V supply was running high, the maximum dissipation is just about 1/2 W.
A replacement - with a 1 W resistor this time - restores normal operation. Not a bad set for $3 (+$2.40 in copying costs and a resistor).
Comments: These are the types of repairs that pay the rent for repair shops. A quickly identified cause with an equally quick and definitive cure. A return problem related to this repair is extremely unlikely. Realistically, a 15 minute repair from start to finish is possible.
This Sylvania TV is also nice to work on. Everything is on one circuit board, components are clearly marked, and it is possible to access everything without disconnecting more than the degauss and speaker connections (not needed for testing in any case). Too bad that a 2 cent resistor was specified with a marginal power rating. All too frequently, startup problems in TVs, monitors, and other switchmode power supplies, are caused by open high value resistors.
Symptoms: AM works fine but there is only low level static from FM. General whacking and prodding produces no reaction.
Testing: Exercised all buttons and controls, no change. An antenna seems to make little difference.
Getting to the **top** of the tuner circuit board is not too bad - just remove the turntable, uh, record changer (you know what they are, right?). Four screws and disconnect the motor and audio connectors.
However, even before that, I have to vacuum the thing! Why? Apparently, in packing it up (in a pillowcase, no less), some powdered laundry detergent or something similar was spilled into the thing. Yes, the adventures I have! Even my shop vac has difficulty getting every last particle out but for now, it will have to do.
With the turntable removed and set aside, the tuner and preamp board is readily accessible.
The FM tuning capacitor and front end are easily identified. Touching various points in this circuitry results in a large change in output but no selectivity. There appears to be a strong station which peaks around 102 MHz but it is obvious there is no heterodyning action as there is absolutely no selectivity. However, the front end is sensitive to my touch and therefore it is likely that the following stages are good.
I was just about to give up and head for the library and possible Sams when I decided to poke around a little more. My some quirk, I happened to press on a coil in the front end box and instantly good reception returned - as long as I kept my finger on that coil! Another bad connection? A wooden stick worked just as well as my finger (I was sure relieved since I didn't look forward to spending the rest of my existence holding onto that coil). So, probably a bad connection. When operating, reception seems to be absolutely perfect. Most probably the local oscillator was at fault.
Now, the fun begins.
Getting to the bottom of the circuit board is a whole lot more difficult than getting to the top.
First, the back panel needs to be removed. Then several screws holding the circuit board and a ground strap that needs to be unsoldered from a shield. Now it may be moved, but is still attached to the front panel via the dial cord. And you know how much I love to restring dial cords! For a while, I thought the cord would stay put even when pivoting the circuit board up enough to inspect and resolder but no such luck. With a thoroughly disheartening 'pling' the dial cord popped off of its pulleys. Well, at least the board is totally free and the bottom can be accessed.
I resolder all the pads in the vicinity of the coil since may of the connections looked questionable (though there were really none that I could say definitively were bad).
After flipping the board back over, reception now appears to be solid. Pressing, prodding, and pounding have no effect. Will it be permanent? I surely hope so!
Replacing the dial cord turns out to be easier than I had expected (unlike that time where I melted it with my soldering iron!) The only question was how many turns on the tuning knob shaft but there is obviously only one possibility (3) based on the total length.
Checking out the rest of the unit:
The tape deck appears to be functioning, Fortunately, none of the soap powder made its way into the tape mechanism.
The turntable, however, is a sad story. Soap powder everywhere. I remove the platter to find - more soap powder everywhere. It is necessary to disassemble, clean, and regrease the main platter bearing and changer gears.
Only then do I notice that the counterbalance weight for the tone arm is missing and the stylus is bent and would need to be replaced. Checking with the owner, it turns out that she doesn't play records (I can see why) and therefore, as much as it pains me, I will not bother to restore the turntable at this time (and probably never). It would be simple - I would have to come up with a suitable substitute for the weight and order a stylus.
Finally, I check out the dial indicators. One is burned out and another is intermittent (broken filament). The stereo light is burned out as well. These will come from MCM. At first I thought that substituting light bulbs I had in my stock would suffice but the cost of the proper replacements was so low that it wouldn't be worth it and mine would not work as well.
Comments: The world it seems is full of these 25 year old compact stereo systems. While audiophiles and snobs may look down their noses at them, the majority of people are perfectly happy with their performance (or lack thereof). Repairing one of these may not have the glamor of working on a laserdisc or projection TV but this lack may be more than made up for by the flood of enthusiastic appreciation from the owner - especially if they would otherwise not have been able to afford a repair.
Problems with compact stereos are very often low tech - lubrication, dirt, bad connections, dried up capacitors, burnt out light bulbs. A schematic is rarely needed and access to the interior is usually straightforward (though perhaps not as easy as one would expect as in this case).
Symptoms: Tape is accepted but attempting to play or even display a still results in a garbage picture - tracking is way off. In addition, play results in no tape movement and eject follows as if the VCR finds the content distasteful.
Testing: I tried several tapes but it was obvious that something was very wrong.
I enjoy the challenge of reviving a garage sale acquisition purchased for $1 but I really do not like having to fix something for which I paid real money!
Nonetheless, I have no choice. Actually, this VCR has always been a bit finicky about how a tape is inserted. If pushed into the cassette slot too slowly, it might grab the tape and spit it out. If the tape was accepted, there was a chance that it would not seat correctly and never advance. Therefore, I wasn't entirely surprised by the failure.
Despite all my advise about most problems being simple and mechanical, I was naturally thinking that **my** problem would be something esoteric!
Once the cover is off, the extent of the problem can be seen. This VCR uses a 'rapid access transport' which means that the tape is immediately wrapped around the video heads in the fully loaded position except that the pinch roller may not be fully engaged. Starting from this position is indeed quite fast - less than a second to enter play or any other mode except super fast rewind which unloads the tape back into the cassette. The tape is in very light contact with the spinning drum but with no tension applied - which winds down on its own after a few minutes to conserve motor life (wear of the video heads would be negligible in this state).
Anyhow, back to the story. Checking the tape position after loading reveals that the pinch roller is not moving properly over and down as it should. Further close examination reveals the reason: there should be two wings on a spiral plastic cam gear which guides the pinch roller movement. One of these has apparently broken off allowing it to lose contact with its mate. (I did find the broken-off piece - I really like to account for all parts so they cannot jam something at a later time.)
Fortunately, MCM Electronics has a repair kit for about $12 which includes the entire assembly with a new pinch roller as well as one belt. I guess this is a common problem. Inspecting the pinch roller reveals some fine cracks (somewhat unusual for a pinch roller of this age) so a replacement is worthwhile.
To be safe, I scribe timing marks on the 2 or 3 gears that might be disturbed during the swap. This is always a wise precaution if no service manual is available. As it turned out, this was not needed as the new pinch roller assembly dropped right in without moving anything.
Comments: Why does this sort of thing happen? Originally I thought that Mitsubishi saved 2 cents on the plastic reinforcements and thus timed it to fail after 4 years. Perhaps this is the case. However, the consensus now appears to be that the lubrication of the shaft on which the pinch roller assembly slides gums up or dries out resulting in binding and subsequent breakage.
In either case, the end result is an annoying repair.
I did make sure to liberally lubricate the sliding shaft but fully expect the problem to reoccur in a few years. Now, if I only would do the types of preventive maintenance I recommend to others perhaps this could be avoided!
Symptoms: Receive seems to work properly. Attempting to send a fax results in continual redials and the destination phone is never reached.
Testing: Initially, problem was not known. So I had to set up WINFAX on my PC to provide a suitable source/sink at the other end. See below. Once I unjammed the paper roll, receive seems to be fine. Attempting to send a FAX, however, results in repeated attempts to dial without success. Local copy function works correctly.
This fax machine was apparently acquired by my 'customer' as a result of the down-sizing of a local hospital. There is a user's guide but no installation or setup info. Well, better assume all the DIP switches are set correctly. Write them down just in case I should accidentally move one without realizing it (I actually did not do this and was lucky. However, it is a good idea).
At first I thought that the fax machine was never connecting to the phone line and I tried to identify which of the 4 internal relays was supposed to do this. Using a multimeter, the one whose coil was being activated was easily determined but there was nothing measurable across its contacts. Monitoring the phone like with a DMM showed, however, that it was picking up - the 50 V on-hook voltage drops to something like 5 V when dialing.
Further testing by monitoring the phone line both with the fax machine's phone and a separate extension reveals that the dial tone never goes away and the tones seem to be somewhat weak though apparently of the correct DTMF frequencies. The fax machine's built in phone does dial correctly, however. Interesting.
Time for some inspection. Disassembly is actually fairly easy - 2 screws to remove the bottom panel, 5 screws to remove the circuit board and a heat sink. Only complication is the roughly 10 cables that need to be disconnected to free the logic board from its wiring harness.
Oops, what is this? The backup battery is hanging by one lead. Apparently, this had been replaced relatively recently (I really have no way of knowing) and whoever did it was too lazy to access the bottom of the circuit board. Therefore, they attempted to solder in the new pack by heating the leads from the top instead of the pads. It may have worked long enough to close up the unit but was certainly not a long term repair. The other lead is somewhat loose as well.
While I don't expect this to fix the main problem, it is dealt with first. Additional wires need to be solder to the flimsy tabs on the battery pack since they break off as soon as I attempt to reinstall it in the circuit board holes. Some silicone sealer is now used to secure the pack to the board.
I reinstall the board with all 10 of its cables to confirm that **the** problem still exists and that it will now hold its time and other memory settings.
Now the machine is continuously trying to eject the input copy. What is going on? After some minor panic and confirmation that all connectors are indeed installed correctly, I realize that I am trying to run it on its side and there are some interlock switches that are gravity dependent. Setting the unit upright makes it a whole lot happier.
It now appears to hold its settings but as expected, will still not dial for fax transmission.
Out comes the board again.
So, what next? Tracing the circuit might be possible - it is a double sided board - but what about my usual approach - test all the semiconductors and capacitors in the area of the phone line circuitry. This has proven successful on more than one occasion (see Repair Brief #2: USR Data Modem Won't Dial, for example).
And, guess what? I found a little black diode that tested *open*. Now, that is unusual. What type? The part number is not listed in any of my databooks and cross references. Well, if it walks and talks like a 1N400x type, that is what I will try. The symbol on the circuit board is just a diode so I assume it is not something fancy like a zener or Tranzorb surge protector. So I put in one of my lonely looking 1N4007s - I dare you to blow! Hopefully, this wasn't supposed to be some kind of high speed or high efficiency type.
All other components that I can reasonably identify test out at least in-circuit with my DMM.
Reinstalling the logic board with all 10 cables is now pretty quick. I have the technique perfected!
So, now for the test.
Mode: Manual Dial. Telephone number: My PC's modem number.
Uh oh, behavior is the same. I am just about to scream or beat something over the CRT when I pick up my extension phone and hear: "Please touch 1 for sales, touch 2 for service.....". Huh? My PC does not have a voice mail system. It dialed a wrong number!!! Actually, I told it to dial a wrong number. After all, how often would I need to dial *my* PC? I didn't even remember my own phone number correctly.
OK, this will work. After transposing a couple of digits, I get it to dial the correct number but now WINFAX is not picking up. Not surprising as I never configured it for receive.
Finally, I am able to send a fax to my PC.
The customer will need to re-enter the other stored info like rapid dial numbers, their fax number, header and footers, etc., but it would seem that the fax machine is now functional.
Now where did I put the fax number of that pizza place?
Comments: This is yet another example of a simple problem bringing down sophisticated technology. I would have had no chance of successfully troubleshooting anything in the fax logic. However, phone line circuitry problems are quite common - especially after the storms we had the previous week. (I have a VCR coming in which failed during the storm as well). Without the circuit diagram, I have no way of knowing if this was, indeed, storm related damage but the probably is quite high that it was.
Symptoms: Tape plays but the bottom of the picture is snow and the remainder of the picture has an appearance similar to CUE (forward search) mode - multiple tracking noise bands are visible. However, the tape is clearly playing at normal speed as the audio is is normal.
Testing: Confirmed with several tapes. Same symptoms. CUE and REV result in similarly confused pictures.
The picture is broken up. The top two thirds has the same exact appearance as it would in search mode (CUE or REV) - 3 or 4 bands of noise with good video in between. The bottom third is snow. However, the sound is normal (but no HiFi sound) so the speed is normal and this is strictly a tracking problem. Once you have seen this set of symptoms a couple of times, the diagnosis takes about 3 milliseconds.
We did try to help diagnose the problem long distance. Unfortunately, his description of the picture was not clear enough or the email connection was bad - or something. This turned out to be hopeless. His interest in repairing things usually ends with changing batteries in the remote control anyhow. I am just glad he didn't cause additional problems by using sandpaper on the video heads or attempting to straighten the tilted guideposts with a pair of pliers!
So, next time in town, the VCR is dumped in our hardware lab....
It rattles! And, this is not even a JVC!
Upon removing the cover, the problem is obvious: the right side tilted guidepost has fallen out. It was probably fine as long as the VCR was in an upright position. However, the baboons who packed up his apartment probably had it sitting upside-down for the move so the guidepost worked loose. This is a 5 minute fix using 5 minute Epoxy using just the smallest amount - a dab on either side - then pressed fully into place and rotated if possible to distribute the adhesive (you don't want a continuous coating as trapped air in the cavity may cause the post to pop out before the Epoxy cures.) Tape path alignment should not be needed.
Comments: It seems as though older Mitsubishis are virtually guaranteed to have at least one loose guidepost. I have seen 3 or 4 in rapid succession. These often don't cause problems until the VCR is moved but the symptoms are quite obvious once you have seen a couple (even if you don't shake the VCR!).
Mitsubishis, JVCs, who else?
Symptoms: Play results in snow and shutdown in a few seconds. Record also results in shutdown. FF and REW work normally.
Testing: Multiple tapes result in identical behavior - just snow in play and then shutdown.
This is one of those VCRs with almost no controls on the front panel. Therefore, testing almost anything beyond play, record, and channel selection requires a remote control. I didn't get the remote control so I had to use one from another older Panasonic VCR. Some of the buttons behaved a bit, well, strangely. At least the basic functions seem to be standard.
With the top off, the problem is quickly identified. This model uses a tape transport that loads the tape half-way as soon as a cassette is inserted. A plastic lever called a 'sector gear' drives a metal lever with a vertical post called a 'control arm' which is supposed to pull the tape out of the cassette. (Thanks to Frank Fendley (Studio Sound Service, frank.fendley@datacom.iglou.com) for providing the correct terminology for these parts and for identifying the specific part numbers so I could obtain the necessary replacement).
The first observation is that the tape does not move after play or record are pressed and the microcontroller is shutting down due to lack of takeup reel rotation.
However, the underlying cause is not a common idler or belt but failure of the control arm to pull the tape beyond the pinch roller. Thus, in play, the pinch roller comes down and presses against the capstan but there is no tape there! Without the rotating capstan to pull the tape through, it just sits there. Without control pulses, I guess the blue screen circuitry kicks in and there is no picture. Eventually, the lack of takeup reel rotation results in a shutdown to the stop position.
So, what can prevent the control arm from doing its thing? If this were a late model Sony, it would be dried up lubrication but in this case the arm swings quite freely.
However, it appears to get hung up just short of the pinch roller. How does this work? A spiral multifunction cam gear that looks somewhat like a miniature washing machine agitator (supposedly called a 'Pressure Roller Lift Cam' by Philips who apparently invented the technique) is used to:
The pinch roller appears to do exactly what it should coming down and then pressing against the capstan - which does rotate properly during the time it is supposed to be playing.
Therefore, we are left with the control arm itself. This is driven by a cam on the outside of the main gear but not directly - there is another lever - the sector gear - which actually contacts the cam. This drives the control arm via a set of 6 gear teeth. As a result of the way the two levers are pinned, a slight change in cam position results in a large movement of the control arm.
Except that it is getting hung up on something.
Unfortunately, it is almost impossible to view the goings on with everything in place. However, I really don't want to take anything off that (1) might require retiming or (2) have circuit boards hanging by multiple cables (as would be required for this series of Panasonic and clone VCRs).
What appears to be happening is that the actual control arm (which is made of metal) is getting hung up. The sector gear is made of plastic and - guess what! - has a crack!!! It isn't a break and not even much of a crack but will need replacement.
However, is the crack the cause or the result of the current problems?
It is just a small crack so I assume that the overall behavior will not be as grossly affected as it seems to be. Could the crack have been caused by some other problem?
Mechanically, there really isn't much to this. The only way it could not work would be for the control arm to have changed vertical height somehow or bent, or for there to be some obstruction or gummed up lubrication preventing full movement.
It seems as though a projection on the metal control arm itself is supposed to fit into and clear the cam as it pivots. Imagine: Cam moves lever #1 (the sector gear); lever #1 meshes with the gear teeth of lever #2 (the metal one with the control arm post); and a projection on lever #2 then fits into a cavity on the same cam gear. Thus, this cannot be a timing or electronic problem as the mechanics are totally self contained and only depend on the relationships of the two levers. The gear teeth that mesh them are timed properly - the little timing marks align. But the projection just stubbornly keeps hanging against the cam.
I did remove the metal lever completely to check for cracks or bending - there was no evidence of either of these conditions. I also tried raising and lowering it a carefully recorded amount - no change except that when raised, it hit the pinch roller before getting stuck so it was obviously not too low to begin with.
Finally, I decide to remove the pinch roller assembly - this seems pretty harmless as it is fully up and everything should operate fine with my cassette cheater, pinch roller or not. This gives a clearer view of what is going on.
It appears as though there is considerable stress on the plastic lever as the crack widens significantly during part of its travel. However, upon unloading, the pinch roller does move fully as it should. Interesting. Careful observation now reveals that the projection must be entering a cavity in the cam which is not visible and the cause is now likely to be that crack in the plastic lever.
When loading, there is enough stress to deform the lever and due to the mechanical amplification of the lever system, shifts the point of entry of the projection just enough for it to miss the cavity every time.
However, during unload, there is less stress and thus it pops in place for at least part of the way.
With a little less spring torque on the control arm, operation seems to be reliable even with the bad plastic part. Thus, the crack was the cause and not the effect - which is comforting as I was not looking forward to a convoluted failure!
Once the replacement arrived and was installed, I confirmed the timing (I just avoided ruining my whole day as the agitator thing tried to jump up but I calmed it down), and then lubricated some key points as well. The VCR was then whisked back to its expectant owner.
Comments: Once again, a very simple common problem like a cracked plastic part can result in symptoms that are confusing. This would have been a lot easier if there was better access to the mechanism. Unfortunately, this series of Panasonic VCRs puts the main circuit board on top and while not actually covering the cam gear/pinch roller/loading arm certainly gets in the way. I don't like removing it because there are a bunch of cables that never seem to go back just the way they should - at least not without some persuasion.
Unlike the Mitsubishi broken cam follower problem (Repair Brief 40: Mitsubishi HS-U53 - Bad Tracking) which bears some similarity, there doesn't appear to be any real cause for this failure except just normal wear and tear and perhaps too flimsy construction of the plastic sector gear. The design with a projection that must enter a recess seems like some sort of interlock to guarantee that the tape is fully beyond the pinch roller before it comes down and would possible crunch it. In all fairness, there must have been some merit to this design. At no time was there any damage to the tape despite such a fundamental failure of the tape loading mechanism.
However, once a crack develops, it is likely to get worse as the stress is a lot greater on the part when that projection cannot enter its cavity in the cam gear.
Symptoms: Since this is a JVC, I don't even bother to plug it in before taking off the top cover and jigging the guide posts.
Testing: Jiggling the roller guide assemblies reveals that the right hand one is loose. Removing the bottom cover produces the missing brass pin.
I cycle the mechanism half way and pull the plug to gain access to the roller guide assemblies. It is important to take care at this point to prevent the relatively unconstrained roller guide from flopping up and hitting the spinning video heads - a relatively expensive lesson.
So far so good, a drop of Epoxy and that guide post is better than new.
Pop in a tape and...No picture. This was supposed to be straightforward. :-(
Both roller guides are seating properly but - wait - guess what? A missing tilted guide post!
Two dropped parts in one JVC at the same time! Fabulous.
Sure enough, the post is sitting quietly on the workbench minding its own business not caring one wit for being absent from work.
Break out the Epoxy once again. At least this post stays put once pressed into place (unlike the Mitsubishis that have the same problem but the cavity in which the posts are inserted are so closely machined that they trap air and the posts keep wanting to pop back out.)
Try #3: Ouch! The tape is grabbed on the wrong side of the roller guide. After carefully extracting the cassette, it is obvious that the roller guides are not fully retracting into the cassette. Thus, when the cassette drops, sometimes the tape is in front of the one of the posts. How can that be? In addition, sometimes the tape would not load, whirring motors, and it would give up and shut down.
The repairs look fine - brass post snug against the shoulder and nothing to catch on anyhow. What about the other one.
Now some history of this machine. It dropped the plastic pin on the opposite side roller guide linkage a couple of years ago. I replaced this and reinforced it with a tiny screw. The screw is quite secure but it appears to be this roller guide that is getting hung up, but on what?
At first, I thought that a plastic projection on the underside was hitting a sliding widget (great name, huh?) which it seemed to not quite miss as it should. When in the fully unloaded position, the projection on this widget keeps the roller guides in the retracted position. Apparently, it is doing it job too well and preventing it from retracting in the first place!
Carefully bending the plastic which allows the roller guide to pop home results in correct loading but failed retraction the next time EJECT is pushed.
Great! I have a VCR that can be loaded at the factory with one movie and will work fine as long as the cassette is not ejected!
So, is there a timing problem - something off by one tooth - or something else? The only thing unusual about that roller guide assembly is my reinforcing screw. Remove it!
And, sure enough, now loading and unloading is flawless. Apparently, the head of the screw added just enough height above the roller guide assembly to catch on the metal of the cassette basket in the down position. Lesson: when you reinforce the roller guide hinge, use a very thin headed screw.
I have no idea why this didn't show up after the first repair or maybe it has been a problem all along and the owner never realized it. Some careful filing leaving just enough head slot for a jeweler's screwdriver blade and everything appears to be happy.
Comments: This single VCR has has now had 3 of the 6 possible common dropped parts - drop off. In a professional service situation, it would really be prudent to head off the inevitable and reinforce or glue the others. However, they seem as secure as when brand new so I leave them alone. Perhaps, I just need material for a future Repair Brief!
Symptoms: Cassette platform is loose indicating a broken part. The owner apparently had someone extract the cassette - cover screws were missing (again - this is not the first such instance).
Testing: Cassette jams as soon as it is inserted. Fortunately, no additional damage is done.
Well, removing the cover is easy at least. Now, is the broken basket assembly the cause or the effect?
To remove the cassette basket assembly requires taking off the front panel (3 screws), video head cover sheetmetal (3 screws), and then 6 screws to actually unfasten the unit itself. The complete assembly can then be unplugged and removed to the convenience of my workbench.
And, hey, what do you know? There is a transverse shaft which keeps the two sides in sync - it drives the left-hand side from a motor and gear reducer on the right-hand side. The little right-hand gear is - missing! Not just fallen off but gone. Apparently, whoever extracted the cassette did a little 'clean-up'. No, it didn't fall off, it is **gone**.
Thus, I need one gear. Better make that two gears - its left-hand mate appears to have a fine crack just waiting to spread.
Frank Fendley of Studio Sound Service identified the part numbers - at first thinking I wanted the large drive gear which has a couple of projections and a spring. This mistake, however, got me to looking at that part and noticed that a plastic post had developed a crack and *was* in the process of breaking, so add one of those to the list.
Hopefully, there is nothing else wrong with the VCR that caused the missing gear to crack in half. However, without the basket in place, it is kind of difficult to be sure. I probably could have nursed it through the cycle even with only the one gear in place but I have confidence that this is indeed the main problem.
The parts arrive 2 days later. The two small gears fit perfectly but the large gear is apparently a slightly different revision and I need to ream out a section of the hole to accommodate a shoulder on the mounting shaft.
I, of course, violate my Rule #1 - mark everything before removal and a couple of email messages back and forth are needed to get the timing adjusted properly.
After a little lubrication with plastic safe grease and reassembly, normal functions appear to be restored.
When I returned the VCR to its owner, she commented: "So, that little plastic piece was the problem?". Thanks. No user serviceable parts....
Comments: The lesson of this story (aside from not messing up the timing) is to always check related components - mechanical as well as electrical - for possible stress or pending failures. This applies equally to capacitors in a power supply and plastic gears in the cassette loader.
Symptoms: Most ranges result in a random display alternating between large arbitrary positive and negative numbers. There do appear to be differences depending on mode - DC V vs. Ohms but not in any decipherable way.
Testing: Changing battery, applying various inputs, whacking it, using the DMM to hammer nails - no change. Though it might have been my imagination, the character of the screwups may have changed after pounding some 20 penny spikes!
I had taken a look at this multimeter to attempt to repair it a couple of years ago. At that time, I completely (so I thought) disassembled it to locate any standard chips hoping that if I could get pinouts, I could determine what was wrong. There were none except for a couple CMOS CD parts - one in the clock generator and the other in the piezo buzzer circuit.
Everything else was custom and what was worse was that I could not even locate the main A/D and display chip! It had to be there somewhere. since the 2 or 3 custom 16 pin chips I could find were not large enough and not in the proper place to perform these key functions (they turned out to be precision resistor networks - I think).
So, for two years, this thing sat on top of Jim's filing cabinet gathering dust.
Finally, with nothing better to do (right, I can hear you saying: "sure, likely story") I set out to solve the mystery.
After pulling off the LCD panel, cleaning its contacts, and reinstalling - with no change in behavior - I noticed a 'wart' on the backside of the PCB board behind the display. What's that? It has no business being there unless it were hiding something. This 'wart' was a couple of molded plastic pieces that with 20-20 hindsight was obviously clamping something in place.
Prying off the first plastic piece revealed - a second one.
Prying off the second plastic piece revealed - a little circuit card with a blob of Epoxy - chip-on-board - in the center and 40 or so gold pads on the long edges. Ah ha! The A/D and display chip at last. Of course, a lot of help this will be if I need a replacement - no markings of any kind. Connections were via those aligned rubber strips LCD watch manufacturers are so fond of - and which I always suspect for bad connections.
So, I clean the chip-board contacts and reinstall. No significant change.
OK, maybe a little deeper. Next, I remove the chip-board, its mounting, and the two rubber connector strips and clean everything with cotton swabs and alcohol.
Now, finally, a change. The display looks to be half way normal. In fact, at that point I thought it was entirely fixed. Checking with a handy .1 % resistor that just happened to fall out of the sky, the ohms scale seems to be dead-on. Hurray, but premature.
At this point, I go about cleaning up the case thinking that this was pretty easy.
Then, I tried it on a 1.5 V Alkaline battery and got - 3.43 V. Huh? Did I pick up an Lithium by accident? Nope.
My AC line measures around 250 V according to the meter. Since none of my VCRs have melted down, perhaps, there is still a problem.
Well, maybe there are still some bad connections. So I go through the entire exercise of disassembling the chip-board once again and double check all pads. Reassembling results in no change and jiggling, pressing, and other wise fondling the display/IC area doesn't alter anything.
What next? How can ohms be perfect and all other ranges (I also tested DC current and Diode check) be off by more than a factor of 2?
As noted, this thing has a chip-on-board IC - unmarked - for the A/D and display driver and custom Beckman parts for key resistor networks. Thus, it is virtually impossible to determine any circuit details (not to mention the 32 pole rotary selector which cannot be used with the unit disassembled for testing).
There is one pot - full scale adjust - which has about a 10 % range end-to-end and affects everything but resistance. Perhaps, resistance is calculated by performing a comparison with a known resistance. Then, they would both be off by the same amount. Maybe I could bugger this pot to drop it down but I would really like to determine the root cause.
Modifying the adjustment pot circuit turns out to be impossible since it is connected to the above mentioned unidentified resistor networks and any attempt would be a shot in the dark.
So, now it works fine as long as I multiply all my (non-resistance) readings by about .4. I thought I was able to 'fix' DC volts by installing a 1.3 M ohm resistor across a point found by trial and error. However, this did not help AC volts or any of the current scales. And, apparently it messed up the offset as + and - readings seem to differ by an unacceptable amount.
For awhile (like a overnight), I just let the problem bounce around.
Suspecting that the reference voltage was incorrect - low resulting in the higher than correct readings, I searched for anything that might be a voltage reference. There were a bunch of transistor-like things but one stood out since while it had three legs, two of these were shorted together. Jumpering across the unconnected pins with a high value resistor resulted in the readings increasing. Measuring across it with a working multimeter read .54 V. Disconnecting the part entirely resulted in readings that were now **low** by a factor of about 2.5. Since the present part at .54 V makes it read too high by a factor of just over 2, a reference of 1.2 V should be about right. I knew I had saved that bag of 1.2 V zeners for a reason! Sure enough, putting a 1.2 V zener in place of the unidentified part results in nearly perfect accuracy on all ranges I tested - DCV, ACV, DC mA and Diode Check. No doubt it could be tweaked now if I had some voltage reference that I trusted. And, Ohms is still fine (actually probably better since the higher reference will increase resolution).
So, I still need to identify the reference part: HCC 8069 J010? It is a TO-92 but doesn't show up in my ECG or SK databooks.
After posting symptoms to sci.electronics.repair, I did get some useful comments:
(From: Kevin Carney (carneyke@watson.ibm.com).)
"I've repaired many of the 300 series over the past ten years or so. The problem described sound like one of the finger contacts driven by the cam wheel is staying closed or not making contact. If this meter has these type of contacts it may be your problem. Solving it requires patience taking apart bending contacts putting together and testing. Good luck, Kevin."As noted, it does not appear to have been bad contacts in this case though this info is certainly worthwhile to keep in mind for the future. The unit had very little use and except for the one contact I bent putting it back together :-( (and subsequently had to unbend) the selector switches (all 32 sets of contacts) appear to be in pretty good condition.
Then, one Netter who prefers to remain anonymous replied:
"I have the part in stock. I will snail mail it to you if you send me your address. The Beckman part number listed in the manual is FG3000-231-102. It is a 1.2 Volt Zener in a TO-92 package. The markings on the part are LT1004 CZ-1.2."So I guessed correctly. My 1.2 V zener is marked LM305, BZ1-2, K002. I do not know if it is equivalent to the specified part so I accept this generous offer.
Comments: Test equipment is the stuff one depends on to troubleshoot other broken equipment. Therefore, it is disheartening in some ways to have to repair a DMM. To find multiple problems on a lightly used instrument is also disappointing. I suppose it is possible that my prior poking around searching for the random display problem caused the zener to fail but what an unlikely part to damage! I am not entirely sure the bad connections explanation is entirely correct or at least that it is a permanent repair but I will keep my eye on that.
Now all I need is a voltage standard to set its calibration.
Symptoms: Only the channel numbers work. In all other respects, it is a paper weight - and a big one at that.
Testing: No change when run up on a Variac. It remains dead.
So, Bill gives me a call at 7:30 in the evening: "I have this TV, about 13 inches. Only the channel numbers work, nothing else. Can I drop it off?" No, Bill, if you want to come and help to troubleshoot it, that is fine, pick a time. Otherwise, hold on to it. You can clutter up your basement. "OK, I will see if I can get dad to watch Bobby". Any excuse to get away from the kid. Five minutes later: "How about a half hour?" Sure, fine.
About 45 minutes later (30 minutes of Bill time), he comes lugging this huge TV down the basement stairs. At first, I thought it was at least 19 inches but measuring the CRT, 17 is about right. Well, at least it *should* be easy to work on - lots of empty space.
Plug it in and just as expected, only the channel numbers work. No picture, no sound, no static, no deflection whine. The thing has push button controls so I guess the standby power is ok. Time to check the power supply and HOT.
Eight screws later, the back comes off cleanly. There is a nice 3" x 4" parts layout diagram, still legible, so that is a help.
Check the fuses. One is black. Bill, which is the fuse closest to the back?
"Uh, looks like the B+".
Check the horizontal output transistor (HOT) with my trusty 25 year old Lafayette VOM. Case (collector) to other pins: 0 ohms. OK, bad HOT. What else?
Unfortunately, they saved a couple cents and soldered the transistor rather than using a socket. Bill, write this down: The yellow wire is on the right. "Done."
Removing the bad transistor is easy though we manage to lose one of the lockwashers. Well, as long as it is not on the circuit board somewhere.
I go into my HOT drawer and pull out a 2SD871. Nah, that is too good a part for testing *this* set, how about a BU208A? I won't be too unhappy if one of these blows. (Note: I have no intention of leaving either in place once the set works. I will order the proper replacement, a 2SD950.)
Installation is equally smooth with the yellow wire on the right. These is also a little insulating sleeve which I swear went on the yellow wire pin but Bill thinks went on the other. Oh well, I will put an insulator on both later on. Replace the fuse.
I go get the Variac and series light bulb widget and plug these in to my isolation transformer rig.
Starting with a 100 W light bulb.
Bring up the voltage until about 100 V - channel indicator lit - push ON button. Light bulb flashes brightly and set shuts off.
OK, Bill, unplug the degauss coil from the mainboard.
"What? Huh? Where is it?"
Locate the coil and work backwards. Here, this connector....
Try again. Similar result. Up voltage to 120. Now, it stays on, not to full brightness but more than I would expect if the set were working properly.
There is still no picture, no sound, no static on the screen. I think I can hear the deflection whine, however. The HOT is holding.
Try a larger light bulb!
I put in a 150 W outdoor flood. Try again. Turn Variac to 130 V (or whatever its maximum is).
There is still no picture, no sound, no static on the screen. I definitely can hear the deflection whine. The HOT is still holding.
Then, Bill says: "Shut it off. Shut if off. I see smoke...."
Sure enough, there is a wisp of smoke coming from the vicinity of the flyback. It stops too quickly to determine the source. There is a small electrolytic there as well and the smoke could be originating elsewhere. The odor could be burning plastic or burning electrolytic.
Now for the real smoke test! I go get a foot square piece of Plexiglas that was once part of a homemade HV capacitor to use as a shield if something should decide to blow up.
Power it up again. After about 20 seconds, the smoke appears but it is still not possible to determine if it is the cap, flyback, or something else.
Well, change the cap. It is a 1 uF, 160 V electrolytic. I will show it! I put in a .8 uF, 200 V polyester type. No change - still smokes. This eliminates the capacitor. Bill is sure it is coming from the flyback at this point anyhow.
Bill is getting ichy as he knows his dad won't be able to take much more of Bobby. So I suggest that we pull the flyback and I will test it later. The big pins are a pain but attempting to discharge the CRT HV under the suction cup thing yields nothing as expected.
Bill is about to leave. Hey, how about buttoning this baby up so it is not cluttering up my workbench. "OK," Just a couple of screws, put the other stuff in a plastic bag. "I think the flyback is bad."
Next day:
I get out my flyback tester widget - the 12 V chopper - and hook it up. Ten turns of wire around the core connected to its output. If the flyback is good, this should excite it to produce 8 or 10 kV with only a small load on the power supply.
I locate the HV return on the flyback by turning up the juice just enough so it is oscillating - barely. Measuring on the 5000 V scale of my Simpson 260 shows a couple kV between the CRT HV connector and only one pin on the base of the flyback. That must be it. The others show zero volts.
Now, turning up the input power to my normal 'full' results in a nice 1/4 inch arc between the HV output and the return. Is the flyback good? Just then, an arc develops between the return pin and its neighbor. What is this? Kill power. Did I pick the wrong return pin?
I drag out the TV chassis to confirm that the pin I selected was indeed the HV return. It was. The other pin is a winding for one of the auxiliary outputs of the flyback.
So, what is going on? A quick check with the multimeter solves the mystery: All resistance measurements are reasonable except one - and a fundamental one at that. I measure 1.76 K ohms between the CRT HV connector and three pins on the base of the flyback - and one of those is the pin that arced.
Therefore, this flyback is history. Apparently, internal breakdown between the output of the HV rectifier or multiplier and the low voltage windings resulted in destruction of the original HOT and blown fuse. This is a pretty spectacular failure mode!
I call Bill on the phone: flyback is bad as expected. Short, CRT HV to pins on base. "I already told him it probably wasn't worth fixing".
The flyback is definitely bad but could it have damaged other circuitry in the TV? After all, until the HOT popped, that HV was arcing internally to the low voltage windings. I suspect that it did not cause any damage, however. Despite the fact that the HV output is on the CRT capacitance and could really zap something, it is likely that the short didn't develop suddenly but over at least enough time for the capacitor to discharge harmlessly. The actually current available from the flyback HV output is quite small and the low voltage flyback windings have almost no resistance to ground.
We will probably never know since Bill talked the 'customer' out of spending the money for the expected repair parts. The HOT would probably be around $5 and the flyback is $26 from Dalbani. Add shipping and this will likely come to over $35 for a 13 year old TV. And, there would still be a chance that it would not work at all without additional parts or have long term reliability problems.
So, if anyone has a good TLF14617F flyback they want to sell cheap....
Otherwise, the set goes to the great TV spare parts graveyard in the sky (or actually in the attic of my garage).
Comments: I promised that not all these stories would have entirely happy endings. This is a case where determining the extent of the damage and cutting losses made the most sense. If I come across a replacement flyback (sure, like they are all standardized!) then it will be worth the effort to see if that is all that is needed.
Symptoms: VCR will enter Play and Record successfully but then shut down in anywhere from 10 seconds to 10 minutes.
Testing: I was able to confirm these symptoms and it didn't take long, about 2 minutes the first time, 10 seconds the next. I tried several tapes without any apparent change.
It was only two weeks since returning this unit to the 'customer' after repairing the cassette loader. These are classic symptoms of dead rubber but I knew the rubber parts were fine having replaced them not so long ago. And, observing the behavior as it shut down, there was never a problem with spilled tape or a weak takeup reel. This is confirmed by testing the takeup reel torque using a cassette cheater (shell).
The reel rotation sensors would be the next natural suspects. What about them? Well, there is only one, for the takeup reel. The tape counter does increment but on closer examination, there does appear to be some weirdness. Instead of counting 0000, 0001, 0002, 0003, etc. It occasionally skips counts. So the sequence might be: 0000, 0001, 0003, 0005, 0006.... I don't know how the microcontroller determines that the tape is moving but it might just test the least significant bit periodically. If the counter is skipping counts - say only doing odd numbers for a while - this could end up not changing for too long.
So, now I start playing with the takeup reel with the VCR in STOP mode. Fortunately, the counter is active and I can simply twirl the takeup spindle to my heart's content. It doesn't take long to realize that IT is behaving strangely. If I go very slowly, there will be times when the counter display will free-run, counting rapidly and continuously. This is, in fact, most likely what is happening - the reel is turning slowly enough that as it passes through these 'bad' areas, the counter skips a count or two. Why?
Putting a scope on the sensor signal doesn't reveal anything amiss - it changes smoothly from low to high and back again. However, when it is approximately in the middle of its range, the counter does its free-run thing.
I trace the circuit to a buffer on a little circuit board tucked in a very inconvenient spot needing to extricate it from several connectors. Examining this circuit shows that it is, well, just a buffer. No hysteresis or debounce. Its output is changing as expected. Tracing the output reveals that it is going to a large multilegged creature - the main system controller chip. So, if that does the debounce, I am kind of out of luck as I am not going to invest in a new microcontroller.
Well, I will show it! I build a little widget board with a single transistor (2N3904) and a couple resistors as an additional buffer and put this in series with the original signal. I then add a feedback resistor from the output of both buffers to the input of the first one. This adds just enough hysteresis to prevent the circuit from even likely lingering in the bad area.
At first, this works like a champ but then the sensor seemed to be losing sensitivity and its output refused to go low! Could a dying sensor be the entire problem? No, I don't think so. That free-running count problem would still exist even if the transitions were sharper - it might be unlikely during normal tape movement but could still happen if the tape stopped at a just the wrong spot.
Removing the sensor under the takeup reel requires popping the split washer and pulling the spindle - taking care not to lose the washers under the spindle. It could be worse.
The sensor is a roughly 3/16 inch diameter affair with an LED and photodiode pointing at a four quadrant aluminum reflecting pattern on the bottom of the spindle. Everything is clean and undamaged so perhaps the LED or photodiode is in the process of failing. It doesn't really matter which is bad as failure of either would render the device useless.
What to do? My usual places like MCM Electronics do not list a replacement and I really wouldn't have a minimum order anyhow. I check with Frank Fendley - he has it - but I cannot justify the $5 S&H for a $2 part.
I will make one from the guts of an optoisolator! I at least want to do this to further test my theory (though at this point I am nearly certain that the sensor is the **final** problem).
I totally destroy 2 optoisolators in the process but finally extract both an LED and photodiode intact. Fortunately, my friend Bill has bags of these left over from his switchmode power supply design days.
The circuit board is marked so it is easy determine which leads are the LED and which are the photodiode. It isn't pretty but with a bit of filing and other manipulation, using the correct chants, etc., it finally is positioned to have enough sensitivity to activate the counter. Unfortunately, the top of the LED rubs on the bottom of the spindle during rewind slightly scraping the reflecting pattern but not enough to affect anything. A bit more filing and a key incantation and it seems to be solid. The response does not quite seem to be as sensitive as I would like but operation appears to be consistent, reliable, and repeatable from one end of a T120 tape to the other.
In fact, I ran the VCR for about 20 hours in Play and Rec, end-to-end of tape, and at SP and EP speeds without any apparent problems. I know I can obtain the replacement part but for now my kludge is just fine, thank you. The @#$% VCR will probably now die in a couple months in some other interesting and creative manner.
Comments: This is my VCR from hell. It seems to have problems with multiple unrelated failures at nearly the same time. I have already had to replace the video heads (due probably to just plain wear and tear) and also suspect a bad connection in the video circuitry as well. Sometimes, I have simply needed to clean the video heads. In addition, the 'customer' insists on using old, worn, and damaged tapes.
Assuming that the cause of the aborted Play and Record was a weakening sensor and/or bad debounce circuit inside the microcontroller, there is no way of tying these in with the prior failure of the gear on the tape loader mechanism. If it were just out of warranty I would credit Goldstar with timing multiple parts to fail simultaneously but it is at least 8 years old at this point.
Symptoms: Switching power on results in absolutely no indication of life either from the front panel LEDs or motor movement.
Testing: The output of the power brick is marked and I was able to verify that it was approximately correct - 20 VAC. Since it is a simple transformer, it is probably good. Attempts to evoke a response from the printer without opening the case were all dismal failures.
You probably know me better than to believe I paid a whole $5 for a broken printer. Well, I did get a PC power supply and a bunch of old hard drives and controllers as well. As of this writing, the power supply and at least one of the hard drives are known good.
Unfortunately, I neglected to ask what the original problem was. But from his attitude, the printer must have died totally. Otherwise, he would have likely mentioned that it was probably a minor problem (and attempted to charge more than $5).
Anyhow, the printer is in a box sitting on the ground and somewhat waterlogged. I don't know if the stuff was out all night and it rained or what.
First test, as noted, was of the AC adapter which is apparently just a transformer. Its output read a bit higher than the listed value that is typical of an unloaded wall transformer.
After drying the case off, I plugged the printer in and turned it on.
Nothing. No sign of movement from any of the motors, no lights on the display, and no response to any buttons.
OK, time to get inside. Some HP engineer probably won an award for the mechanical design of this thing. (I seem to recall reading about this product line in a past HP report.) Indeed, it is easy to get apart and the subsystems are readily accessible. The top of the case is held in place with 4 snaps. There are only 5 modules inside: power supply, logic board, print head driver board, printer mechanism, button and display panel. Except for the fact that HP seems to used weird size philips head screws, the entire thing can be disassembled to the module level in about 10 minutes. However, I would have preferred screws to hold the top of the case in place rather than snaps as it is necessary to deal with the snaps every time the top is removed - which during troubleshooting is quite frequently as the paper tray is part of the top cover.
Back to the story. All I have done to this point is remove the top of the case. However, the next time I switch it on, the print head whomps to the left end of its travel and seems to be trying to fling itself off into space.
Power off. Let's try that once again. Power on: Whomp-whir! Power off.
Then, I notice the puddle of water on the logic board!
First, I try to deal with in-place by mopping up what I can get to. Then, I start up the old air compressor and use that to blow and dry the water. Well, it isn't really up to the job so I start up the 3 horse shop vac on blow. However, I cannot get under the print mechanism where the bulk of the logic board is located.
Removing the print mechanism requires only disconnecting of 3 connectors and a ground strap (one of those darn HP philips head screws!).
Now, it is easy to get to all parts of the logic board. I also remove the EPROM and dry out under it to be sure.
I replace the print mechanism.
Ready? Power on: Nothing. OK, we try that once again. I said power on: some lights on the display. There is no response from the buttons and no motor movement. Several more power cycles results in somewhat random lights but no other action.
OK, I will take out the logic board so I can inspect the underside for water. This requires removing 7 or 8 screws and the power connector. The board is fine. I also reseat the power connectors.
Reassembling - ready? Power on: Now, I get lights AND the print head seems to be doing something reasonable, like the reset sequence. Back and forth, prime, and then the On-Line light comes on. Its pitiful brain thinks that everything is fine and ready to print. Is it?
Along with the printer came about 15 sheets of somewhat water damaged (but now dry) paper. This should be good enough to test it even if every third sheet jams and tears.
Now, how to do a self test? Fortunately, the complete HP users' manual was part of the deal. "Hold the FONT button while turning on power". OK, no problem.
Now, the printer goes through all the expected motions of initialization and then proceeds to load a sheet of paper and....
Nothing. Actually, as far as it is concerned, the self test worked fine. But, there is no ink on the paper! Well, the cartridge could be empty but it doesn't feel that way. Based on my past experience, it is nearly full. The nozzles could be clogged but sucking on the business end of the print head (yuck) results in some ink drops appearing.
At this point since I do not have another cartridge to try, I decide to strip it down completely once again and do a thorough inspection. Somehow, I don't think the water was the cause of the original problem. All connectors are reseated (including those to the print head which are the flexible printed variety).
Everything looks fine except for the solder around the DC power connector output pins of the power supply. There may be a hint of cracks around several of them. Well, my soldering iron makes short work of those!
Put it all back together once again. No change. There is always a chance that operating the printer with the waterlogged logic board may have damaged something - always fear the worst, right? Therefore, I decide to do a little exploratory probing of the print head driver board since everything seems to be fine except there is no action from the ink jet nozzles.
A bit of ink jet theory: There are something like 50 thin film heating elements inside the micromachined chamber at the business end of the print head. These heaters are pulsed at precisely the right time by the logic to vaporize the ink in direct contact with them and expel a drop of ink toward the paper. If a heater is bad or a nozzle is clogged, there will be a missing line (out of the 50 possible lines) on the paper. Priming is supposed to assure that the nozzles are clear, loaded, and ready to go.
First I test for power - there is both +5 V and +20 V. I assume the +5 is for the logic and +20 for the print head nozzle heater elements. There are something like 50 nozzles and I have no intention of testing them all but it is fairly easy to determine that the print head receives +20 for power and the nozzle driver pull low to turn them on. Probing with a scope while the printer is supposed to be doing the self test confirms that there are pulses at a representative sample of the nozzle wires.
The only thing left to do is try a new cartridge. But, that has to wait until I can 'borrow' one from the office.
Two days later.
None of the cartridges we use at the office are exactly the same part number but they do have the same array of gold pads and the same size print head itself. I take one of each of the two types we have (one is the super-high capacity type - all right!.
I first try the cartridge that looks exactly the same as the one that came with the printer (though the part number is different).
And, what do you know! The self test is nearly perfect. There is one missing line. This could be a bad driver (hope not) or defective cartridge (yeh, right!).
Next, I try the PaintJet 'high capacity' cartridge and this also works but now there are 2 missing lines. :-(
Going back and forth, they are consistent. I am not sure if one of the two missing lines are the same on both cartridges. Could something be marginal or is the priming not working? However, all other nozzles seem to be rock solid. Reseating the connectors to the print head makes no difference. If I knew which drivers were involved I could look at the signals but it will be difficult to trace the circuitry from the driver board to the actual nozzle.
Comments: I suspect the original problem resulting in the dead printer to have been a cold solder joint on the DC power connector which I repaired. I don't really think that the nozzle problem was caused by the water since the print head driver board was never wet. Since the data connection to the print head driver board is a 20 pin cable, this must be a common bus and thus it is unlikely that any failure on the main logic board could manifest itself as a single or pair of bad nozzles. Stay tuned.
Symptoms: I was told by the owner that he had to open the VCR to extract the tape. I asked: "You didn't do anything that I will be cursing you out for, did you?". The answer was 'no' but he did not sound all that convincing....
Testing: No take-up reel movement in FF, CUE, or Play modes even with a cassette cheater and no load on the take-up reel. Not that I am terribly surprised.
If this had not been a HiFi VCR, I would probably have passed as I have enough Panasonics of that era. However, I also know that those machines can be kept going with minimal effort and investment almost indefinitely.
The first step is virtually automatic: replace the idler tire.
Removing the idler on this VCR can be accomplished without any disassembly beyond taking off the top cover - but this was easily done as the owner never replaced the @#$% screws. Grrrrr.
Pop off the split washer (careful - don't loose it. Yes, I know, you are not supposed to reuse these....).
Since I don't happen to have the proper size tire in my inventory, I first try to turn the old one inside-out but this little bugger refuses to cooperate. I finally find one that can be stretched to fit until I obtain a replacement (actually get one from my secondary inventory at work).
FF and REW now work fine. Play, however, results in a picture which is nearly total snow with a distorted picture showing through and no HiFi sound. I use my Mark 1 thumb on the heads - no change. I then clean the video heads using cleaning sticks and alcohol - no change. Then, I realize that I have not tried to adjust the tracking control and on some machines, if tracking is way off, the picture will not just have noise but will be totally unwatchable. Sure enough, the picture and HiFi sound now come in clearly.
CUE (forward search) works fine. REV (reverse search) results in snow and then shutdown. Then, I realize that I have not replaced the split washer on the idler. I don't know if this was the cause, but replacing that washer results in REV working fine after this. Maybe, the idler assembly was creeping up on its shaft.
For good measure, I also check the two belts under the deck. They are in good condition. Therefore, I just clean the belts and pulleys. I also give the top side a general cleaning - capstan, pinch roller, roller guides, fixed guide posts, full erase head, and A/C head stack. The only detectable oxide/dirt buildup was on the capstan and pinch roller and even this wasn't that significant.
Recording seems to work as well. I leave it recording for several hours to be sure that there are no thermal problems.
Comments: This VCR is about 11 years old but in excellent condition. Older Panasonic VCRs were built very solidly with a lot of metal in the transport and reliable electronics. As noted, little tends to go wrong - rubber parts, power supply capacitors. Thus, keeping them going requires minimal effort. While these machines don't have spectacular features by today's standards, they will outlast a bucket load of the cheaply constructed junk that passes for many modern VCRs.
Symptoms: Ink-jet nozzles #45 and #47 do not work resulting in a pair of white lines every 1/8" or so on the printout.
Testing: A variety of new and used print cartridges produce similar results except that in some cases, only 1 line is missing (??).
As you will recall, this printer was dead (and somewhat waterlogged) when I picked it up for $5 at a garage sale. Drying it out and soldering a few suspicious connections resulted in everything working except for 2 nozzles on the print head - #45 and #47. Well, 24/25ths of it works, what do you want for $5?? :-)
Interestingly, when using a new PaintJet cartridge, only 1 nozzle appeared to be bad...
The electronics for the DeskJet is divided between two circuit boards - the main logic board and a smaller print head driver board. Due to this way of partitioning I did not think that the water I found on the logic board could result in damage in such a way that only 1 or 2 nozzles were affected.
(From: Paul Grohe (grohe@galaxy.nsc.com) in reply to Repair Brief #49: HP DeskJet Professional Printer, Part 1 - Dead.
"I concur. If just *one* jet is not firing, then it is on the driver/flex-cable/connector/cartridge side. All the nozzle decoding is done on the driver board, so the 20 pin interconnect cable is okay. The DC (well..really 20VAC) power connector does take some abuse in normal service, this could have aggravated the cold joint."Given this behavior, there are several possibilities:
"I assume you have cleaned the contacts (with a Q-tip, on both cartridge and socket). Use a magnifying glass and check *each* of the gold 'bump' contacts. Repeated cartridge swapping, or improper insertion, can cause a crack to form around the base of the 'bump' and the pad (or the pad and the trace). The 'bumps' can also be 'flattened' by cartridges that were forced in at too much of an angle. There should also be some 'give' or 'sponginess' to the contact area to assure even contact with the cartridge."I have done this inspection - everything looked ok (at least as best I can without removing the flex cable).
I removed the driver board and gave it a thorough visual inspection. As expected, the soldering was perfect. Leave it to HP.
(1) would be difficult to find until I had a complete wiring diagram of the driver board, flex cable, and print head. Therefore, I defer on this until I have exhausted other possibilities.
(2) would be rather disappointing as this would mean that I have already blown two new print cartridges ($20+ each) in testing (and that the problem was probably in one of the 40 pin HP ASICs). At first I was *sure* this was the case (of course, always fear the worst!) as testing between certain contacts on the print cartridges resulted in unexpected readings. Most of the resistances were around 32 ohms except for 1 which was open (blah) and another which was high (51 ohms).
Then I examined the pads under a magnifying lens and found that the open contact was indeed - open and not even connected to anything by design. The 51 ohm reading was too consistent - all 3 of my cartridges (including the original that came with the printer) measured nearly the same value. If this were due to a partial burnout, it would be an amazing coincidence.
The shorted driver theory was finally put to rest when I took one of the cartridges into the office and confirmed that it functioned properly in a working printer.
(From: Paul Grohe (grohe@galaxy.nsc.com).)
"Check for broken/bad traces in the flex-cable that goes from the driver board to the cartridge. Ohm out the cable between the supply commons and the individual driver lines (at the PCB) with the cartridge in place. I think the jet resistance was about 50 ohms (It's been a while). There were four separate jet sections (commons). All four commons were tied to the +20V supply through four separate (12 ohm?) series current limiting resistors. The driver outputs seemed to be grounded emitter, open collector (w/clamp diode?). The jets themselves are driven individually and are not multiplexed."This (3) seemed like the next step. I drew a diagram of the two 28 pin connectors on the driver board. Then I identified the 4 common lines (1 for each 12 or 13 nozzle heaters). These went to some common 10 ohm resistors to the +20 V power supply. I then measured between the nearest common and each pin to the print head. When I was on a heater fed by that common, the resistance would be about 32 ohms. When to one fed from a different common, it would be around 52 ohms (32 + 2 * 10). In every case but 3, these made sense:
The retainers on the flex cable at the connector-end just snap into the open position and the cable comes free. Four screws release the print head cover and the cable then pops free of its indexing posts.
Under the contact area is a rubber pad with a little bump for each contact. All the bumps seem to be in good condition and minding their own business.
A careful inspection of the flex cable shows that it is in virtually perfect condition as well with no cracks or wear at any locations including the 56 contact points.
However, the indexing holes seem to be a bit deformed. Could the cable have worked out of position slightly resulting in poor contact to a couple of pads? Wishful thinking, maybe....
While it is it out, I confirm connections between the two open pins and the corresponding contact pads - finally correctly locating them. Following the many fine traces is a bit tricky to say the least.
Reassembly is equally straightforward. I take care to center the flex cable on its indexing posts. Is it my imagination or are the contact pads now sitting flatter and more uniformly than before?
On a hunch - I really did not expect anything to change - I check the two open pins. And, what do you know? They now measure 32 ohms. At this point, I am now, of course, absolutely confident that the printer will work!
The first few lines out of the self test are disappointing as it appears as though there are now many marginal nozzles. However, guess what? The top line of text which previously listed the numbers of the bad nozzles is the normal printout - ID E. Before it was: 45 47 ID E. The printer's pathetic brain thinks all the nozzles are working fine. Then, half way into the second page, the print died out totally. OK, maybe that cartridge needs to be cleaned and primed. It has been bounced around, turned upside-down, and otherwise abused. A little blowing into the vent hole (drip, drip - love that dreaded black finger disease) and a wipe - and we try again. Now it is perfect - no missing lines, no smudges, run, drips, or errors. I have a working printer!
Comments: Once again, that actual problems turn out to be exceedingly simple: bad connections in both cases. As noted previously, the HP DeskJet series in general is a well engineered design with only a half dozen basic components. While my printer is one of the oldest, the fundamental design has not really changed dramatically in the last several years as evidenced by the fact that print cartridges for some much more modern printers work just fine in this old machine. The print quality with a new cartridge is nearly laser-quality. Yes, HP seems to come out with a new, faster, cheaper, color, etc., printer every few weeks. But, looking inside newer printers shows that their basic design and construction is quite similar.
Symptoms: Drawer is constantly trying to close. Shutting off power and pulling the drawer out half-way results in drawer closing and motor spinning its wheels.
Testing: A universal CDROM interface card (Panasonic, Sony, Mitsumi) was used to confirm that this was not a case of there just not being an interface card present. See the text below.
This drive was sent to me as non-working having been removed from a PC after it failed with the symptoms described above. An IDE CDROM was purchased to replace it so it was not known whether the interface (probably a sound card) was at fault.
I first began testing drive simply connected to a spare PC power supply (with an auto headlight to provide the required minimum load for the supply).
It's behavior was consistent - the poor little drawer motor just continuously tried to close the drawer regardless of pushing the any buttons. The Busy light remained solidly on. The motor was getting quite toasty in the process.
Note: this drive has two front panel buttons that serve multiple functions. to open and close the drawer and start and advance tracks for audio play without software. While I was not sure of their exact function at this time, neither button evoked a response of any kind.
So, I wonder if my magic spit will have any effect? Some careful trials on the interface connector revealed a pair of pins where pressing with exactly the *correct* concentration of magic spit(tm) would cause the motor to quit and the Busy light to go out momentarily.
Hmmm. Maybe the interface card is required after all. There might be nothing wrong with the drive. The original interface may have been bad. Since the replacement used IDE, this would have gone undetermined.
What type of interface is it? Originally, I thought I was actually told IDE but a close examination of the pin configuration showed this to be impossible as the grounds were in the wrong place. It is a 40 pin connector, so SCSI is ruled out. Therefore, it must be one of the proprietary interfaces: Panasonic, Sony, or Mitsumi.
Since I am not willing to cannibalize one of my working PCs to obtain an interface, this waits until the next time I am in the office. A co-worker (OK, actually, the boss management weeny) who insisted on having a PC built for him but rarely uses it and never has to the best of my knowledge used the CDROM won't notice if the card disappears for a few days: "What, your CDROM drive doesn't respond anymore? it must have gone bad from too much loneliness.... I will get to it as soon as possible." HeHeHe. :-)
The interface card is a universal type - a jumper will select between the three types. It is obvious from the pin configuration that the Mitsumi interface is the only one that makes any sense with one complete row of ground pins.
With the interface installed on my state-of-the-art DTK 286 mainboard, the behavior is unchanged. The drawer still insists on attempting to close forever.... With the cable installed, the magic spit no longer has any effect so the pins involved are probably being driven from the interface.
Thus, the drive is really and truly bad. I assume that what was happening was that my magic spit(tm) was triggering a master reset and thus disabling all operations. This is encouraging in some ways - the drive is not completely hosed.
What next? Checking the drawer switch is fairly easy and it is definitely good - zero resistance at either end of its travel.
To get at most of the circuitry on the board requires removing a sheet metal shield - 3 solder connections, no big deal.
I expect that if the drawer switch signal goes directly to an LSI chip or ASIC, this drive becomes spare parts as such a multilegged creature is not likely to be easily obtained, inexpensive, or replaced without a great deal of cursing even with proper soldering equipment.
However, on this drive, the drawer switch signal goes to a 74LS244 octal buffer in a surface mount package (joy!) and a pullup resistor. Checking at the buffer input, the signal swings very nicely between 0 and 5 V.
Checking at the output we have - stuck around 2 V. Is the buffer bad? That is what I thought at first but then I realized that:
The enable signal looks sick - it is floating at around 1.5 V. How is it generated? Would you believe, a surface mount 74LS00??? Most of the circuitry on this board is in a few large custom chips and yet there are still a few jelly beans as well! Grumpf, there is no accounting for designers' tastes. Better for my chances of repair. Interestingly, there are absolutely no adjustments of any kind on the mainboard - probably a digital servo system.
Checking the LS00 shows that the gate in question has its inputs on pins 13 and 12 and its output on pin 11. Pin 13 has a nice periodic pulse on it but pin 12 looks as dead as pin 11 - not a solid logic low but close enough to ground that the output (it is a NAND after all) should be high and it is not. Lifting the output pin makes no difference so it is not being loaded down. Power and ground connections to the chip seem solid. Checking the other 3 gates of the chip show that they are equally screwed up with outputs that are in never-never land and do not change significantly (though there is some slight response) when the inputs switch. My suspicion is an internal power problem with the chip, not that this helps us.
                                              _  1/8 74LS244
                                             | \
                Door Switch o----------------|   >o----X-------o Data bus
                                             |_/         (Break at X and
                                13 _____      o Enable    pulse data bus)
         ___|___|___|__ o---------|     \ 11  |
                                12| NAND |o---+ Dead - about 1.5 V
                1 _____       +---|_____/
             +---|     \ 3    |                NANDs are sections of
             |  2| NAND |o----+                74LS00 in SMT package
   Ground o--+---|_____/  Dead - about 1 V
To see if the relevant output of the 'LS244 (the bus line) actually has an
effect, I connect a fine insulated wire to it while it is still disconnected
from the 'LS244 and power the drive. Now, momentarily touching this to ground
will sometimes get the drawer to stop and even sometimes the CD will try to
spin up (accelerating past Warp 10 and never actually succeeding in reading
the directory (I presume since it never stabilized). I expect this is due
to the fact that I am overriding whatever else is supposed to be on that
bus line and it is getting really confused. Poor thing. :-(
At first I thought a neighboring 74LS04 (hard to believe, huh?) was also bad but the designer morons at Aztech or Mitsumi or whoever actually did this board did not tie many of the unused inputs to valid levels so they were just floating. (With LS TTL, unused gates should be forced to a constant output by tying their inputs to ground or through a pullup to Vcc, whichever is appropriate for the logic.) So that was a false alarm.
In fact, only 2 of the gates on the LS00 are used (1 of these as an inverter, see the diagram!). Only *1* inverter on the LS04 even connected to anything. What a waste!
My initial thought was to wire up the unused LS00 gates to substitute for the bad ones but these, too, were deader than the proverbial dodo. I thought about wiring some unused sections of other jellybean chips (there was a mostly unused 74LS08 across country) to create the needed logic. But sanity prevailed and I decided to try to locate a replacement. I finally found an old PC I/O card (that might even have been bad) with a 74LS00 in the same SMT package.
Fortunately, at the office, we have a PACE rework station so removing the old LS00 and its replacement goes smoothly using a tip that heats all of the pins simultaneously. After cleaning up the pads, I use a super-fine tip soldering iron to tack pins 11 and 4 and then solder the rest of them without too much difficulty.
Now for the test: Although I did not take the rest of the drive, I should be able to cause the Busy light to go out if I can convince the drive that the drawer is actually opened. And, sure enough, momentarily grounding the drawer switch signal results in the Busy light going out. Furthermore, the behavior is slightly different on every other push of the Open/Close button indicating that it is actually trying to read the disc when it thinks the drawer is closed. Of course, with no optical pickup attached, this might be rather difficult!
The initial functional test will be made with an audio CD since that should be good enough to confirm basic operation. Apply power: drawer closes and stops, Busy light goes out. OK, we are cooking (no smoke!). Insert disc, press the button. Drawer closes, discs starts spinning, sort of. Well, actually it starts spinning in the wrong direction (counterclockwise). Then, apparently it thinks better of it and accelerates clockwise. While it does not go ballistic, it is certainly spinning faster than the 1X speed. Of course, I really don't know what it should be doing not having an instruction manual! A little experimentation with the buttons and then it seems to be spinning more slowly. Maybe I hit the combination to play the audio CD. Time for the headphones.
And, sure enough, track 1 is playing, a bit scratchy, but nonetheless, there is music! A little more experimentation with the buttons reveals that the left hand button advances the tracks and will cycle back to the beginning once the last track is played. The right button pauses the play with one push and ejects with a second push. Of course, if I could interpret the icons on on the bezel, I might have been able to figure this out without trial and error!
The scratchy sound is a little disconcerting knowing that data readout is more critical. Furthermore, it seems to have problems accessing the outer tracks. Stopping the CD results in similar strange rotation before it finally decides to open the drawer.
Well, the CD I am using has seen better days, being a casualty of a couple other Repair Brief CD experiences. So, I get a good CD. Unfortunately, now my Vivaldi is not even recognized! Grrrrr.
I clean the lens.... No change.
There is one other possibility that doesn't involve thousands of lives and millions of dollars - I have not yet replaced that sheet metal shield. Perhaps there is some interference between the electronics and the pickup.
Sure enough, after soldering the shield into place, *all** detectable problems vanish - even the peculiar wrong-way rotation.
Now for the computer. Rather than putting together my state-of-art DTK 286 system again, I will install the CDROM in a real PC (OK, well a real PC from about 5 years ago).
Hardware installation is a snap. What about a driver? Since it has a Mitsumi interface, I assumed it would work with a Mitsumi driver. Wrong. After finally finding the correct I/O address (as my interface card is not marked well - just jumpers for Bits 1-4 but what position is Bit 1 and is a jumper a 1 or a 0?), it will still not initialize properly though it does find the card - the light on the drive flashes. No combination of IRQ or DMA makes any difference.
Internet to the rescue! A Lycos search turns out to be totally worthless not even being able to quickly locate the Aztech homepage. Did you know that there are 4 or 5 companies with Aztech in their name?
However, using Yahoo, an entry of "Aztech CDROM" results in the third or forth entry being a link to the Aztech Utility/Driver FTP Directory. Sure enough, there is an entry for my CDA268-01A, ATCD268.ZIP, Install Disk V1.35, 53,561 KB. (Link has long since decayed, a Web search should find it.)
Download, unzip, pop into the PC's A drive and 5 minutes later I have a working CDROM. No runs, no drips, and no errors. I was tempted to install Win95 but I figured that wouldn't work really well on a 4 MB 386!
Comments: Despite what I had to say about the Aztech engineers, this drive seems to be a very clean design. There are virtually no discrete parts and no adjustments of any kind on the mainboard. The layout is fairly wide open on a double sided printed circuit board. There is also an LSI chip on the optical pickup itself - perhaps the focus/tracking servos and front-end decoding.
I expected this CDROM to either have a trivial problem like a bad connection or bad drawer switch or a fried custom irreplaceable chip. I would never have anticipated that a jelly bean 74LS00 would up and die. But that it is what it did as there is no evidence of any kind of trauma, spike, or spill. One assumes that 20 year old technology will be reliable. This is yet another example where the initial expectations and fears can be totally unfounded.
Symptoms: Running the drill at anything near full speed results in a spine tingling squeal.
Testing: Putting a drop of oil in the rear bearing will quiet it down for a few minutes but this is not a long term cure.
This is a classic case of cost cutting (or how much the Marketing department controls the Company) resulting in early failure. Simple bronze bushings are used at both ends of the motor shaft. At the gear-box end, this is acceptable as this is enclosed and shielded against contaminants. However, at the handle end, all kinds of stuff can find its way into the motor and bearing. In particular, when using the drill with a sanding disk, fine powder easily infiltrates the motor absorbing lubrication. (Please, no comments about using the proper tool for the job. The fact of the matter is that electric drills do get used in this type of service.) The result is a dry bearing which rapidly wears if not attended to. It is hard to ignore as the result is a spine tingling squeal whenever the drill is running.
How to deal with it? I could probably have purchased a replacement bronze bushing from Sears Parts or used the good one from the other end of one of the drills to fix the other. However, what is really needed is a double sealed ball bearing instead. The seal is the important part though at the speed at which the motor runs, a ball bearing isn't a bad idea in any case.
I have upgraded a couple of these drills to ball bearings. The substitution is straightforward requiring disassembly of the drill - removing of the front gear reducer and then one side of the case. At this point, the old sleeve bearing is easily freed from its mounting (just the plastic of the case) and pulled from the shaft. The shaft is likely undamaged unless you attempted to continue running the drill even after going deaf.
The drills I upgraded had bearings that were 7/8" OD, 5/16" thick, and with a 5/16" ID center hole. The old ones were worn by almost 1/32" oversize for the center hole but the motor shaft was undamaged. I found suitable replacement double sealed ball bearings in my junk box but I would assume that they are fairly standard - possibly even available from Sears Parts as I bet they are used in the next model up.
If the gear reducer needs to come apart to access the motor, take note of any spacer washers or other small parts so you can get them back in exactly the correct locations. Work in a clean area to avoid contaminating the grease packing.
The bearing should be a press fit onto the shaft. Very light sanding of the shaft with 600 grit sandpaper may be needed - just enough so that the new bearing can be pressed on. Or, gently tap the center race with hammer (protected with a block of wood). Make sure that the bearing is snug when mounted so that the outer race cannot rotate - use layers of thin heat resistant plastic if needed to assure a tight fit (the old sleeve bearing was keyed but your new ball bearing probably won't have this feature).
These drills now run as smoothly as Sears much more expensive models. Of course, the chuck will probably fall off at any moment...
Comments: I had to do a similar upgrade to a cheap shop vac which had basically the same problem - the top bronze bushing had lost its lubrication resulting in accelerated wear and failure. Unfortunately, access to this was quite a bit more difficult requiring almost total disassembly of the motor/blower unit. These sorts of failures are common with inexpensive hand-vacs as well.
This isn't rocket science but a simple modification like this can significantly extend the life of a tool that would otherwise be discarded. Of course, if it were designed properly in the first place, such upgrades would not be needed.
Symptoms: The thing was sitting on the edge of Dave's desk when I showed up in the morning. All the pieces were there, some assembly required. I could not really get a coherent description of the problem - I thought it had something to do with the drawer opening... Sound familiar? (Recall Repair Brief #52: Aztech CDA-268-01A CDROM Drive - Drawer Continuously Closing).
Testing: I had to reassemble it first! Then I suggested I take it home since I really didn't have time to deal with it at work.
First, I give it a careful examination but find nothing. I then reassembled it to the point where power can be safely applied. I did not bother with the interface, just the power. For these occasions, I have an old switching supply conveniently mounted under my PC desk - and one that doesn't even require one of those quaint headlamp minimum loads! At first the drive appeared hesitant to spin the CD but then after a couple of minutes, seems to be fine - the 2X and Busy lights flash on momentarily as the disc spins at what I assume to be 2X speed. It seemed to behave all night as I would every so often push the Eject button to open and close the drawer.
At this point, I figured the problem had gone away or was solved or something. Suspecting bad connections at the flex cable connector, I disassembled the unit once again and cleaned and reseated these. I cleaned the lens as well while it was accessible Testing showed it to still be fine at least in so far as the basic reading of the disc identification was concerned.
Email to Dave: The CDROM seems to work, I will try it when I come in next.
Next time at the office, I installed the drive in a PC that we had been using for various CDROM and CDR projects which was conveniently in pieces.... It was running Win95, so I assumed that the CD would be found automatically. You know, Plug 'n Pray!
The drive has what I assumed to be an IDE interface - the missing pin was in the correct location. I finally found the info on jumper setting where one might actually expect to find it - on the label!
However, trying all reasonable combinations of jumpers (Slave, 8/16 bit) with the harddisk set for Master on a single IDE controller did not result in any recognition by the New Hardware Wizard. The first time I tried it - with no jumpers resulting in the CDROM being set for Master - I did see harddisk errors and the Busy light on the CDROM drive flashed as the harddisk was being accessed.
Then, I noticed that it did not seem to be initializing properly, again - the red and orange LEDs did not flash on when I inserted a disc. Hurrrumph.
"Hey Dave, well I thought it was fixed but now it is dead again."
Back home and with the top cover off, I watch as it is supposed to be spinning up. Now the disc will not turn at all! However, if I give the spindle help, it will seem to try for a little while but never get to the proper speed. Ah ha! Can we spell - are you ready: Spindle Motor?
Disassembling the drive further to access the bottom of the optical deck reveals a cheap brush type permanent magnet motor - essentially the same as those used on our favorite Pioneer CD players and changers. We know what a joy they are!
Testing with an ohmmeter results in readings between 12 ohms and 0 as the motor shaft is slowly rotated. This is one sick motor.
First, I tried spraying it with tuner and control cleaner through the ventilation/brush access holes in the rear. This did not seem to make any noticeable change.
I can use a power supply to attempt to clear the short. First, I unsoldered the red wire so that there is no chance of blowing any of the circuitry when external power is applied.
First, I got my genuine Heath variable power supply but this proved incapable of spinning it as the current limit kicked in at 700 mA. Into a dead short, this was not enough and the voltage stubbornly remained near zero.
So, I got my trusty "destructo-proof give it all you can take" variable power supply. Now we are in business!
Turning it up to about 10 V allows the motor to spin at high speed hopefully flinging the metal whiskers or other crud off of the commutator.
That did it! Now, the reading varies between about 15 and 20 ohms which seems much more reasonable. I resolder the red wire.
This will work now!
Sure enough, spinup is once again consistent. At least now, I am sure it will remain that way for a little while at least.
So what about trying it on a PC at home. Now, which PC to use.... Paul Grohe suggested the 'blue one' when I asked him if he knew of a proper software driver for the NEC. OK, where is the blue paint? :-)
After giving up on my version of Netscape trying to download a .EXE file, I finally used ftp to get NEC-IDE.EXE, a self extracting .ZIP file containing README.TXT and NEC_IDE.SYS which is a universal driver for NEC IDE CDROM drives under DOS/WIN31. (Win95 has these drivers built in but my newly painted 'blue' PC is only a 4 MB 33 MHz 386.)
After following the instructions on modifications to the CONFIG.SYS and AUTOEXEC.BAT files, I am ready. The jumpers are set for Slave and 8 bit.
Long pause.... "No drives found - initialization aborted". Boot completes
Grrrr, maybe it is 16 bit...
Long pause.... "No drives found - initialization aborted". Boot completes.
Double Grrrr, let me remove the Slave jumper, at least that will confirm if the drive is recognizing IDE commands as it should conflict with the harddisk and cause harddisk errors or cause the boot to hang with "HDD Controller Failure".
Long pause.... "No drives found - initialization aborted". Boot completes.
Wait, that messed things up when I tried it at work (before I figured out that the Slave jumper was needed at all). What else could be wrong....??
Maybe, power needs to be cycled to reset the drive.
Slave, 8 bit:
Long pause.... "No drives found - initialization aborted".
One more time - Slave, 16 bit:
Short pause, Busy light flashes, "One drive found....." Success! The drive is now accessible under DOS and Windows.
Semi-documented software is soooo much fun! :-)
Email to Dave: The drive works, same spindle motor problem as Pioneer changer. I cleared it for now but changing motor will be a slight pain....
I never did notice any problem with the drawer.
Comments: It somewhat amazes me that many CDROM drives still use the same cheap brush type permanent magnet motors as Pioneer and many other CD players. When driven at more than 1X speeds especially, these are prone to metal particle migration or metal whisker formation or whatever - more commonly known as crud buildup. Thus, the same problems that are so common with many brands of CD players are destined to appear on CDROM drives - and the same, at least temporary - cures are effective. The use of a brushless spindle motor - even common in some basic CD players - would totally eliminate the possibility of this failure mode. Even some cheap Walkmen tape players use brushless drive motors. Perhaps, these drives are *not supposed* to last that long by design, good excuse to upgrade.
Symptoms: The TV will power itself on/off and/or lose channel lock for random amounts of times at random times.
Testing: Whacking did not seem to have any definitive effect - but this TV is quite solidly constructed so it is not clear that the whacking reached the relevant components.
I got involved with this after Bill had initially attempted to repair the TV for what he thought was a simple case of a blown horizontal output transistor (HOT). He had replaced it with something from Radio Shack that they called an HOT. :-) The transistor ran extremely hot and lasted about an hour. Now we know why Radio Shack called it a HOT! (I don't even think Radio Shack lists higher power transistors in its current catalog - I wonder why!). Next, he replaced it with a TIP552 which has decent specs. An additional heat sink was added as well (although we know this should not be needed with a properly functioning deflection circuit). Nonetheless, this seems to be holding up.
However, Bill then noticed the onset of the erratic behavior and believed that the blown HOT somehow caused the set to start acting weird.
I suspected that the erratic power cycling caused the original HOT to fail. Thus, this was a symptom of another problem, not the cause.
The behavior took on a variety of forms. Among them were the following:
Bill and I decide to spend a little time on it. Bill drags out a rickety typewriter (you remember them, right?) table to put it on. Will this hold, I ask? "Sure. If it collapses, we won't need to repair it." OK, keeping my distance. It holds. However, the TV operates fine for the few minutes we have allocated.
Bill (who used to design switching power supplies) is attempting to come up with some explanation involving a problem with the power supply or control logic.
We, of course, know better. From early on, I was working on the hypothesis that bad connections were involved but where were they? No amount of wacking seemed to evoke a response. And, the TV never would perform on demand. We even dragged it over to my place and I would run it whenever I was around but it never screwed up - until s couple of weeks after it was lugged back to Bill's house. I kept telling him that it wasn't fixed. But, Bill is the kind of guy who figures if it doesn't screw up immediately, the problem probably went away. Yeh, right.
For about a year, he was using the TV on a switched outlet. He would shut it off totally when not in use and live with the erratic behavior when it was on. During the course of an evening, it probably would only misbehave once or twice.
At least the HOT seems to be surviving.....
Finally, it became too much and it was relegated a corner of the basement where it sat for another 6 months or so. Every so often he would mention the TV but I wasn't really that eager to deal with it.
Then, while on a cleanup crusade, "Sam, take this thing. If you cannot fix it, trash it. I will go get a 27 inch set on sale."
So, we lug it back to my work bench. Even though it is only a 19 inch set, it is quite heavy and somewhat bulky. Since the only way I can get it off my bench will be to fix it, I start the search....
Unlike some more modern sets that can best be described as a CRT with a wart (the main board), this has one circuit board for deflection and video, one for the tuner, another for the A/V inputs, power supply, etc.
Checking each in turn (I didn't start with the tuner hoping - more like wishful thinking - that the problem would be elsewhere since the tuner required more disassembly):
Almost immediately, some suspect pins come into view. However, they are not obviously bad. First, I try to measure for resistance changes as I flex the board and/or press on each pin. This turns out to be impossible as there is no convenient place to hang clip leads and my DMM's response is too slow anyhow. The only way to find out is to now prod each one with power on.
There are three main blocks of large pins. Viewed in the normal orientation, these are at the upper left, middle top, and upper right. Starting at the upper left results in immediate gratification: tapping lightly with my solder sucker causes the set to power on and off in a manner very similar to the original symptoms. There is definitely a hairline crack around at least one of these pins. Well, there is only one way of knowing for sure. I resolder all five of the pins on this connector. Now, it is rock solid. Hitting it with a (insulated) hammer has no effect.
I also solder all the other similar size connector pins on the board.
Comments: While this is not the infamous CTC175/176/177 tuner solder problem, these older RCAs seem to have a less severe case of the same disease. I have seen others with cracked solder connections often in similar locations. Unfortunately, the only way to be sure of the repair is to let Bill start using it again. One can never be quite sure of a repair to an intermittent problem that happens so infrequently.
Symptoms: Indeed, audio is somewhat weak but not as bad as I was led to believe. I expected nothing. When pressing START, the audio seems to fade in rather than coming on at correct volume every time.
Testing: Playing various tapes at multiple speeds exhibit similar symptoms to a greater or lesser extent.
First, I tried cleaning the tape path. This seemed to make a slight improvement but not much. Adjusting the azimuth setting on the A/C helped a bit more (but I found out later that it was the VCR on which the recordings were made that was misaligned.)
As a more extensive test, I let it record for a couple of hours. The beginning of this tape played back somewhat weak but was otherwise quite listenable. However, about halfway through, the audio dropped out totally over a span of a few seconds. After this, only silence.
As another test, I play a tape (Battle of the Bulge, if you care) and after about an hour and a half, the audio starts fading out to be replaced first by silence and then a sort of whine/buzz.
Interestingly, the video is rock solid and perfect under all conditions.
Could this be an electronic problem? Perhaps, the audio driver/preamp chip or its power supply is failing due to heat? We always tend to suspect the hard-to-locate or expensive problems first.
A careful examination of the tape path reveals the problem but at first not the cause: the tape is moving up on the A/C head so that the audio track is no longer aligned with the record/play head. The control track is wide enough that enough overlap is still present and there are no servo problems. I can only surmise that alignment is such that a combination of the audio and its guard band are in contact with the audio head. Very gently pressing on the edge of the tape restores full audio volume but eventually it wanders off again.
The tape movement is also not mirror smooth - it is rippling between the A/C head and right roller guide. However, no tape edge damage seems to result.
So, what is the cause?
At first, I thought that there was some actual mechanical alignment problem. It could not be with the roller guides as the video is perfect (this is a non-HiFi VCR so there is no issue of HiFi head alignment). Roller guide tilt, fixed guide post vertical height or alignment, even A/C head tilt, can affect this.
Careful experimentation with the adjustment of the A/C head doesn't result in any noticeable improvement.
Could one of the fixed guide posts have shifted? Not likely, they are screwed down tight and locked.
What about the capstan and pinch roller? I had cleaned them but could the capstan have shifted position changing it angle or something like that? Again, not likely - the 3 screws are secure and this VCR did not fall off of a 10 story building as far as I know.
This leaves the pinch roller.
The pinch roller seems to be in reasonable condition but not perfect. So, as a test, I will grind off the outer deteriorated (oxidized) layer which is hard and shiny instead of resilient, dull, and rubbery. Removing the pinch roller is very easy - just pull up on the plastic cap and the pinch roller is freed.
I used a #8, 2 inch machine screw and nut to mount it in my drill press. Then, a file and fine sandpaper were used to remove the outer somewhat hardened (oxidized) rubber layer. Care must be taken not to upset the perfectly flat cylindrical shape of the rubber surface.
This appears to result in a substantial improvement. The audio is still a little weak but much more consistent. It is now possible to play a long tape to completion without audio problems.
Although resurfacing the pinch roller is generally considered a temporary fix I have used the VCR this way (though only occasionally) for several years.
I recently obtained the correct replacement from Frank Fendley since he was able to identify the exact part number.
In addition to replacing the pinch roller, I had to construct a battery compartment cover for the remote control since this was missing. Can you believe it? I really expected more for $13! :-)
Comments: When I got this VCR, I wasn't as aware as I am now that old rubber parts - even if they look good - can result in these sorts of symptoms. Of course, we all know that erratic audio, random speed changes, and crinkled tapes edges can result from a hard worn pinch roller. Therefore, the usual cleaning, inspection, and replacement of dead rubber parts should be performed first before contemplating exotic mechanical or electronic problems.
Symptoms: The printer will be happily going its merry way when within the space of one line of text, the ink will fade out across the page. After this, only blowing into the vent hole (with resultant possible mess) will result in any ink on the paper. This may occur after only a few lines or several pages.
Testing: A number of cartridges and text files were tried with similar results.
As you will recall, this printer was dead (and somewhat waterlogged) when I picked it up for $5 at a garage sale. Drying it out and soldering a few suspicious connections resulted in everything working except for 2 nozzles on the print head - #45 and #47. Well, 24/25ths of it works, what do you want for $5?? :-) This problem turned out to be bad connections to the cartridge due to the flex cable with the 56 contact points shifting position.
Just when I thought the printer was fully functional, what do you know? Halfway down a page of text, the type dies out over the course of a couple of lines. Now, keep in mind that I had been using the printer without incident since finding the bad connections in the print head.
My first thought was that something electronic was changing - perhaps a power supply or pulse width - resulting in too much to too little juice to the nozzle heaters. This would be a @#$% to find unless it were one of the power supply rails. Even then, a few seconds shift in level would be all that was needed to mess up the carefully orchestrated operation of the nozzles.
I went to far as to monitor the +20 V while printing without seeing anything out of the ordinary - just a few mV change in value depending on the load (number of firing nozzles/amount of black ink on the line). I removed the print head driver board and examined it for cold solder joint. There were of course none as is typical of HP's quality manufacturing. I wiggled anything I could think of but nothing correlated with the drop-outs.
(BTW, never stick anything into the vent hole. I found out the hard way that this may result in failure of the vent valve and ink all over the place since it depends on the cartridge being sealed above at normal operating pressure to keep the ink in place. I salvaged the cartridge (maybe) with a blob of silicone sealer over the vent hole. I do not really know what the long term implications of this might be.)
At this point, I even sent an email message to Paul Grohe asking if he had seen the symptoms described above since from his postings and email it is obvious that he is knowledgeable on the subject of DeskJet printer repair.
The problem in detecting this was that as noted, whatever was happening would only need to occur for a second or two to then require manual (by blowing into the vent hole) priming.
Come to think of it 1, why didn't normal priming work?
Come to think of it 2, did normal priming ever work?
Although it never quite registered until now, normal priming cycles never seemed to accomplish much of anything. I always had to blow to get anything to print if a cartridge had lost it 'charge'.
OK, so how does priming work? Very cleverly actually.
There is a kind of 'service station' where the print head is positioned for priming. When in position, a rubber cup seals against the face of the print head and connects with a drain tube below. In the base of the printer is a positive displacement roller and tube pump - a set of rollers (I assume they are rollers as I did not entirely disassemble the unit) rotates against a compliant plastic tube (like the blood pump in a heart-lung or dialysis machine if you have ever seen one of those). The direction of flow is determined by the direction of rotation of the rollers. This is controlled by the position of a spring loaded 'feeler' which enables one of three 'shift levers' to be lifted to engage the sucking pump (Maybe, one of them blows - I didn't entirely figure out what they all did). The position of the 'feeler' is determined by print head location which is under control of the print head servo system. Thus no additional electronics is needed. Slick.
The priming action, which operates off of the paper advance motor takes place between pages - when there is no paper being fed. With my printer and the drivers being used, it appeared as though it should prime between every page.
Was it working?
I removed the print mechanism and found a drive gear I could rotate by hand. With the number one shifter lifted, the pump should have been sucking. Was it? Using some of my Magic Spit(tm) in the drain tube, I could see it being pushed out of the tube - away from the print head. Darn, it is working. But then, when I let up, it appeared to get sucked back in. Huh? Maybe something was blocked.....
After removing the cartridge, I got a syringe with some water and loaded up the little cup so the water was even with the top.
Shift, rotate, rotate, rotate. Nothing! It should have sucked that water away in the first pass.
I got a toothpick and attempted to insert it into the bottom of the cup and locate the hole for the tube. At first, it would not go anywhere but eventually, I found the hole. Still nothing. I then rounded off the end of a resistor lead to use as a probe. With this, I was able to push it (gently!) down and into the semi-transparent tube so that I could see it. A little manipulation (sort of like root canal if you have been unfortunate enough to be familiar with that) cleared out the channel. Well, at least, any dentists reading this will know what I am talking about.
Finally, rotating the pump by hand resulted in obvious movement of the water (now mixed with ink). Enough rotation and I was able to clear the cup of liquid and dispose of it via the drain. Obviously, dried up caked on ink was blocking the hole and tube connected to the cup. Priming could not possibly have worked.
Now for the test.
I installed my original old cartridge which had never worked properly under any circumstances. And, what do you know?! I get quite a nice printout on the first try without doing any of the manual blow priming I had needed previously.
I sent another email to Paul Grohe starting something like:
"By now you are probably saying "what a moron". I cleaned out the priming tube which was totally blocked with dried ink. So far so good."
The next day I received a lengthy reply outlining some other problems of a similar nature that are common with DeskJets. These will be added to the FAQ.
So, the priming had not worked for as long as I have been mucking with this printer!
Now, hopefully, this is the last Repair Brief on this printer!
Comments: This is probably monotonous by now but once again, this was a simple mechanical problem. Not an expensive chip. Not a power supply. Not even a bad connection. Just dried up caked on ink. What is amazing is that it worked at all. Perhaps, the filled cartridge had enough pressure from the weight of the ink to not be as finicky but when it got used up somewhat began to cause problems.
Symptoms: Power is alive - the front panel LEDs come on but discs are not recognized though they do spin.
Testing: Tried various CDs, whacking, cursing. Nothing changed.
First, a description of the FD2000-SL01:
While we have become used to CD players of all shapes and sizes with various levels of feature-mania, let us not forget their roots. The Magnavox Model FD2000-SL01 is probably one of the earliest consumer CD players. It is a design more reminiscent of a linear tracking servo locked turntable - which is probably one of its close ancestors. The engineer was probably told: "We need a consumer CD player - yesterday. You have designed linear tracking turntables. Make it operate like one of those."
The service manual (included in the $2 price) has a date of 1983. The manual was ordered in 1988 (I have the invoice for that as well).
The front panel buttons include the usual PLAY, STOP, PAUSE, >>, <<, and REPEAT. There are even STORE and CANCEL buttons. However, there is no time display, only two rows of 15 LEDs.
The top row LEDs are illuminated to show the complement of tracks on the disc while the bottom row LEDs indicate the current track that is playing and/or the next track to which it is seeking. The top row LEDs go dark to show which tracks have been played so this is similar to the traditional calander or linear displays of modern CD players - but in LEDs instead.
Pressing PLAY while playing serves as a track forward (>>|) button. There is no track reverse (|<<) seek.
As noted, it is a top loader, about as large and heavy as a full size VCR. The see-through double action lid permits one to watch the CD spinning - what a concept! The interior is pretty much packed with electronics - as opposed to any modern CD player or compact stereo you might encounter!
Internally, the FD2000-SL01 consists of the following modules:
We now return you to the present:
With the bottom cover removed, the optical deck comes into view. Pressing PLAY does result in some action - the pickup bounces to the far end, then back to the home position - perhaps a couple of times - before giving up. During this time, one can hear some high pitched whining as the servos attempt to locate the disc directory.
After a few minutes of wiggling and prodding, I am successful at getting the disc directory to apparently be read - the number of LEDs corresponding to the number of tracks on the disc are illuminated. Expectantly, I connect the audio outputs of the player to my handy-dandy Heathkit compact stereo. However, the speakers remain disappointingly silent. :-(
At this point, the servo systems appear to be working - if a bit erratically. I assume there were/are some bad/dirty connections in the cabling or socketed chips. In fact, in the end, there is still at least one bad connection I have yet to locate.
Seeking to the next track reminds me of an inch-worm moving along: zeek, zeek, zeek, zeek, zeek,....., zeek (though inch-worms don't, I suppose, make these sorts of sounds). I assume what I am actually hearing (the 'zeeks') are the sounds of track ('track' here referring to the spiral groove or line of pits on the CD) crossings. If the positioner is moved by hand, you can hear the same track crossing sound - almost like dragging the stylus across an old LP - but much more closely spaced of course. With a practiced ear, it is even possible to count the tracks. Let's see... This CD has exactly 17,243, or was that 17,244? :-)
It takes about 20 seconds (and 40 to 50 zeeks) to seek from track 1 to the last track on a typical CD using a coarse-fine search strategy. So while the rotary actuator should result in a very short seek time, the designers had not taken advantage of their superior technology. Audible search (>>, <<, at least I think it should be audible), makes a more conventional dit, dit, dit, dit... sound.
Some careful tweaking of the focus and tracking adjustments shows that these are probably optimally set already. Since seeks work and the disc directory can apparently be read, it is likely that the optical components including the laserdiode and photodiode array are fine. As a double-check, I put my scope on the RF test point. The 'eye' pattern is stable and free of noise.
All power supply voltages check out.
To go further, I need to get to the top of the circuit boards. The cover comes off easily enough - the owner had been in there already and lost most of the screws. Grrrr. The only connection to the cover is the interlock switch which is easily bypassed. In order to get the CD to spin properly, I remove the clamper magnet from the lid and set it on top of the CD. The laser beam is safely blocked by the CD so there is no danger.
Getting to the demodulator/audio board requires removing the metal shield by prying it out with a screwdriver. The servo board is underneath this (the foil side is accessible from the bottom after its shield is removed but since the servo systems seem to be working for the moment, I should not need to get to it).
Since I have the schematics, I first go for the audio signals out of the left and right channel (separate) D/A converters - nothing.
Working backwards from the D/As indicates that there is no activity on the digital lines into the D/As. This confirms a digital problem in the readout or decoding logic. The audio circuitry is likely in good condition. Woopie!
There is a mezzanine card mounted in the lower right corner of the servo/logic board which does the EFM decoding. It includes some sort of controller, static memory, and some logic and I/O buffers. There is no activity on the outputs of this board - or on its local bus. In fact, although the clock is running, nothing else seems to show any signs of activity. The main chip is a CX7934. I have been unable to identify its internal functional block diagram or even a pin description. So, while all power and as best I can determine, all inputs are correct including the EFM input (buffered squared up eye pattern), audio muting, clocks, and power. I do not know for sure if this chip is dead but it sure appears that way. I believe it is also is running somewhat hot...
Thus, for now, I am shelving the unit. I may return to it in the future. In the meantime, the only sound produced by *this* CD player is the zeek, zeek, zeek of the rotary actuator.
Comments: This was an entertaining experience since many interesting signals are actually accessible with the level of integration used in this design. Modern CD players use 2 or 3 chips to do all of the processing with serial data running between them. Here, there are actual bits you can hold in your hand!
I would still like to get this machine operational. It is a wonderful example of early CD player design. I would be interested if anyone has one of these complete CD players or individual components that are likely to be functional sitting in an attic, basement, or junk pile. I am pretty sure I need the mezzanine card (possibly designated 30-892-C16) at the very least.
Symptoms: Initially, the TV appeared totally lifeless.
Testing: External whacking had no effect. However, some prodding of the mainboard would occasionally get it going. Once running, it might continue to work but with erratic messed up color and occasional vertical jitter.
This is one of those GE chassis affectionately described as 'bad solder connections held together by copper traces'. I, however, wasn't familiar with these at the time, so the troubleshooting took some time - make that lots of time!
Among the problems were:
Most connectors seemed to be firmly seated and without detectable problems.
A couple of power transistors in the vertical deflection hanging out in midair (by design) were connected via 3 pin plugs. These seemed to have some weak contacts so I extracted each pin and bent the contact to increase the spring force. This helped some with the vertical jitter but the erratic startup and color problems remained.
Prodding also had an effect on the color problem but it was not possible to localize it.
Off to the library to copy the Sams' Photofact for the set. Silly me. I thought that would actually help!
It took me more time than I care to admit before realizing that this was a double sided circuit board and those stupid rivet things where not just test points or wire connections. I had not checked the top side wiring!
Now more about this disaster called a TV:
The wiring on the circuit board uses what are called 'rivlets' - poor man's through-holes or vias. For each connection through the circuit board or to a wire, a metal rivet is first set in the board and clinched. Then, the wave soldering machine is supposed to complete the electrical connection by soldering the rivlet to the circuit board traces. This has to be done on the top as well as the bottom but with solder from the bottom. The only problem is that the temperature probably wasn't high enough or not enough or improper flux was used. Initially, the connections were fine and the TV worked reliably for anywhere from a few milliseconds to several years.
However, repeated thermal cycles finally resulted in numerous intermittent connections.
Removing the mainboard requires unplugged 8 or 10 connectors. Fortunately, most were keyed and labeled so I got away (by accident) with not drawing a picture of how they were arranged. I had copied the Sams' Photofact schematic for the set but not the entire folder with the parts and connector placement. The mainboard may be removed without disconnecting the CRT anode as the flyback is mounted to the frame.
What I finally did to more-or-less fix the set was to use a soldering gun with fresh solder and flux to rework every rivlet I could find on both the top and bottom (basically going over it twice) of the board. In some cases, components had to be temporarily removed as some rivlets lurked underneath.
This did cure all three of the major problems.....
Until I buttoned it up. A couple days later, the picture faded to black over a period of 15 seconds - and then came back over the same amount of time. Oops, forgot to rework the CRT driver board. Sure enough, I found an obvious bad connection to the CRT filament - this one I could actually touch.
A couple of years later, the convergence deteriorated suddenly. You guessed it. I hadn't reworked the little convergence board.
A while later, the poor color problem returned intermittently. On initial power-on, the color would be fine but would then drop out and shift toward blue/green. It was sometimes possible to obtain correct color by turning the COLOR control all the way up and the TINT control to one end.
I finally bit the bullet and resoldered the entire mainboard yet again.
Now it is working again (crossed fingers). Anyone need a great TV?
Comments: The 'proper' way to reliably repair this chassis would probably be to remove all the solder from each rivlet, scrape the solder mask from the traces in the vicinity, and add bare wires through the rivet hole and to the traces to complete the through-hole connection. Then, fresh solder and flux with a hot iron. One could spend their waking life on one such set! There are probably only a half dozen actual rivlets that are the problem children. However, there is often no visible evidence of the bad connections. Even with the schematic, locating them based on would be difficult and there would be no way of knowing where the next one would crop up.
Symptoms: Buttons and LCD display do seem to work but there is no paper movement, it keeps insisting on paper problems 'Check Paper' when attempting to copy. It was also flashing 'Load Ink Sheet'.
Testing: I only have about 2 feet of the semi-special paper this machine uses. It is a thermal wax transfer type print mechanism with a full width ribbon. I try copy mode but there is no action. Even paper advance complains (once I located the correct button with no manual and those 'universal' icons).
You might call this a plain paper fax - but one using a special ribbon, a wax transfer type. The ribbon seems to be mostly used. The 'Load Ink Sheet' message was caused by the marking on the last few feet sensed by an LED/photodiode sensor. Hopefully, there is enough left to at least test the machine while troubleshooting. Better yet, I just rewind it a few feet. So what If I get the previous owner's faxes in negative (like a used carbon ribbon from a typewriter or impact printer) superimposed on my test! Actually this could be interesting. :-) I don't even know if one can buy this type of ribbon anymore.
The paper seems ordinary - perhaps a roll of shelf paper would work just as well as the kind Canon no doubt sold for this unit.
In all fairness, it does seem to want to cooperate - just that the paper is not moving. So, what operates the paper advance (and the cutter, for that matter - it makes a horrible grinding noise and seems sick as well - there is likely a common problem).
In order to access the electronics, I need to remove the cover. This turns out to be relatively straightforward - 2 screws in the front and 2 on top. The phone itself unplugs but is not needed anyhow as the keypad remains with the main chassis.
Now, I can see the gears. My first observation is that one gear is just twitching when the paper should presumably be doing something. Sound familiar? Try Repair Brief #1: Daisy Wheel Printer - Carriage Gets Stuck.
It seems that getting to the electronics takes a little more work - two more screws in front and removing the rear panel. Then, the entire mechanical assembly swings up enough to get at... the driver board for the paper advance motor. It is a small separate board, easily detached from the frame. Very convenient.
Of course, pressing paper advance with the machine in this state results in the paper actually advancing - what a concept!
Prod, prod, flex, flex. Oops, there it goes into spaz mode again. So, how about those bad connections? I reseat the connectors - no change. A visual inspection of the back of the board shows a number of solder pads that may be suspect but no smoking gun. Running my finger over individual pins has no effect other than to draw blood. However, flexing the heatsink/board combination does seem to make the problem come and go. Well, there is only one way to find out.
About 10 minutes and a hundred or so solder connections later (just to be sure, did nearly every one), the paper advance function is now stable. Flexing and prodding the board has no effect. Hurrah!
OK, so do I have a working fax? With my precious 2 feet of paper, I set out to copy a page - seems like some old assembly language program. Well, as they say, a page is a page is a page.
Sure enough, copy mode seems to work and the quality isn't half bad.
Will it work with a phone line. Simplest is to transmit a fax to my PC but that would involve disconnecting from the Net! No way.
I send a one page fax to work - "To sam - Fax Test #1". I am in no hurry.
Next time at the office, sure enough, the fax was sitting in my (physical) mailbox.
This fax will prove convenient for sending though I will have to find a not exorbitantly priced source for the roll paper. For now, I rewound the ribbon about halfway to provide more than enough for any of my needs. Let's, wasn't that a wedding invitation that just went by? :-)
Comments: The motor driver circuit board does not appear to plated vias (I cannot even recall now if it is double sided). In any case, there was clearly inadequate support for the leads of the larger component - just a thin film of solder. The holes were grossly oversized and with no plating, did not provide adequate mechanical support for even slight thermal expansion and contraction cycles. As soon as touched with a hot iron, the solder pulled away from most of the pin - I had to add a fair amount of fresh solder to produce a decent bond.
Symptoms: Even unpowered, it did smell really bad. :-) I had to borrow a Sony AC adapter to test it. The unit was totally dead. Applying power didn't help the aroma either.
Testing: Using the proper Sony 9V adapter results in no action, not even the display does anything other than all segments being black.
So Sharon (not her real name), our purchasing person (before being laid off), hands me this Sony portable CD player. "A friend of mine, Larry, would like to know if there is any hope". Sharon appeared kind of embarrassed to ask me to deal with this dead fish. :-)
Even with the cover closed, it is obvious that something unfortunate happened. I don't believe I was actually told that an improper power adapter was used but this would become obvious pretty quickly. The sorts of catastrophic failures I found do not generally occur spontaneously.
This is one of the early Sony portables - solid metal construction. The bottom comes off easily revealing a scorched surface mount part. Hmmm, maybe this won't be so bad after all. Wishful thinking. A little tracing reveals that the crater where the part used to live is basically across the 9 V DC input. Protection diode. I scrape its remains off of the board clean with alcohol, and replace with a 1N4007.
No change - surprise, surprise.
Furthermore, it still smells really bad.... It might even be a little worse.
So, how do manufacturers of portable devices protect against accidents or stupidity?
There is often some kind of protection in the form of one or more of the following:
What next? I still need to locate the source of that really bad smell.
Nothing else on the readily accessible solder side of the mainboard seems to be in distress. Unfortunately, getting to the top side components requires unsoldering a bunch of skinny wires (labeling them) and a flat printed cable (the focus and tracking drive, which I managed to eventually rip from repeated assembly and disassembly).
This done, I still don't see anything smelly on the top of the board. Then, I notice *the box*. It is a sealed metal enclosure about 1" x 1/2" by 2" housing the DC-DC converter which powers most of the player's circuitry. Although, there is no visible charring (how can metal char?), this is the only possibility. Fortunately, only 4 or 5 pins anchor this module to the circuit board. Once removed, it is obviously the source of the aroma. Yum!
I use an Xacto knife and soldering iron to remove the cover - soldered along the edge. Then the damage becomes clear: the largest transistor is totally melted, split in two, and unidentifiable. Traces on the little circuit board are also destroyed. The insulating cardboard *is* nearly charred. However, other small transistors and discrete components appear to test fine using my multimeter.
I try a generic NPN power transistor - no output from the DC-DC converter. It appears not to be enabled as the on-off switch is a logic level going to the main microcontroller which appeared to be dead. I even tried to substitute external power supplies for the voltages provided by the DC-DC converter. Again, no change.
Tracing the input power connections show that they go directly to a large multilegged chip. Generally, reversing power on integrated circuits is not a good thing to do as they rarely survive.
Obviously, something more powerful than a typical AC adapter had been used Usually, such damage is the result of something like attempting to use an auto cigarette lighter adapter to power the device.
Nothing I have received so far in my quest for dead optical pickups, portable CD players, CDROM or optical drives, has been in anywhere near the sad state of this poor Sony. :-(
I sent Sharon email:
"Larry probably tried to power this thing from his cigarette lighter, huh?Actually, with the blown up parts removed and the circuit boards cleaned with alcohol, the odor has mostly disappeared. I still have it as a reminder that AC adapter connections and ratings are not the same as data cables which can often be reversed without damage. But not always - like those 44 pin min-IDE connectors used on laptop harddrives - they smoke really expensive parts if plugged in backwards because power is also on the connector at one end. :-(It would probably have survived for a while on the 12 to 15 V of the auto battery instead of 9 V from the adapter. But, he probably got the polarity reversed. With the virtually unlimited current capacity of an auto battery, the microcontroller was toast before it knew what hit it. Any fuse would have been too slow to prevent terminal damage even if the circuit traces didn't vaporize first.
If Larry wants it back, no problem. It still looks like a CD player. If he takes it in for repair, the technician (while holding their nose) will even probably agree that it was a CD player at one time."
Sharon forwarded my email to Larry who confirmed my suspicion. He was attempting to use the player in his car.
I did remove the optical pickup and tested it. The laserdiode, focus and tracking coils, and motors were fine (I have not tested the photodiode array but expect it to be undamaged as well).
The DC-DC converter isolated most of the circuitry from damage. Unfortunately, at least that one large IC, presumably the main system controller, ran on the wall adapter DC voltage directly and appeared to be toast.
I also have a bag of smoked digital clocks, a smoked clock radio, and a smoked cordless phone (which I have since repaired) from Larry (now Sharon's former friend)..... I will discuss those in a future Repair Brief. Stay tuned for: "Clocks, Clock Radio, and Cordless Phone - Smoked." Till then, you can attempt to guess what happened. :-)
Comments: those voltage, current, and polarity ratings marked on portable equipment are there for a reason. The voltage rating should not be exceeded. Using a slightly lower voltage adapter will probably cause no harm though performance may suffer. The current rating of the adapter should be at least equal to the printed rating. The polarity, of course, must be correct. If connected backwards with a current limited adapter, there may be no immediate damage depending on the design of the protective circuits. But don't take chances - double check that the polarities match - with a voltmeter if necessary - before you plug it in! Note that even some identically marked adapters put out widely different open circuit voltages. If the unloaded voltage reading is more than 25-30% higher than the marked value, I would be cautious about using the adapter without confirmation that it is acceptable for your equipment. Needless to say, if you experience any strange or unexpected behavior with a new adapter, if any part gets unusually warm, or if there is any unusual odor, unplug it immediately and attempt to identify the cause of the problem.
Some devices are designed in such a way that they will survive almost anything. A series diode would protect against reverse polarity. Alternatively, a large parallel diode with upstream current limiting resistor or PTC thermistor, and fuses, fusable resistors, or IC protectors would cut off current before the parallel diode or circuit board traces have time to vaporize. A crowbar circuit (zener to trigger an SCR) could be used to protect against reasonable overvoltage.
Not this one, unfortunately. All the smoke has been released....
Symptoms: Occasionally, mostly during the first few minutes but possible other times as well, picture is replaced will solid blue screen with retrace lines.
Testing: Running the set resulted in occasional blue flashes. Tapping the cabinet did not have any effect.
My cousin (the one with the 3 kids, 2 dogs, and 13 goldfish), was walking the LARGE poodle when she came across this TV sitting on the curb. The owner was about (or perhaps she knocked - that wouldn't be out of character - so the symptoms were available. "Screen occasionally turns all blue".
Upon my return from garage sale-ing, I get this call. "Are you interested in a Zenith TV"? How big? "Big". OK, I will check it out. My usual rules are that (1) I don't tend to bother with consoles, (2) TVs with knob tuners unless they fall into my lap, (3) those that are excessively abused, or (4) those that are really old but not old enough for antique status.
This one turned out to fit the requirements - a table model only slightly larger than the CRT. No remote - darn. Have to send her back for that! Fortunately, I have a half broken remote from one of Bill's dead TVs (you know, the one that had a totally white picture that I may talk about in a future Repair Brief, then again, maybe not, it isn't pretty) It is (was) a Zenith A-line chassis TV but fortunately the remote seems to work. Of course, Bill lost the battery compartment cover - typical. :-(
Getting it home wasn't too bad - only half a block away, fit the back seat of my car.
At first, the supposed symptoms didn't show up. Great! Maybe the ride home has cured it!
Then, after screwing around with a broken CD player for a while, came back and turned it on - and - what do you know? Picture came up all blue and flashed to normal.
Removing the cover is easier than some - 8 screws, back slides off and set is fairly stable though I wouldn't want to sit on it.
Now, of course, no amount of tapping or prodding can make the picture turn blue. Turn it off and wait.
A few minutes later, powering on results in a few flashes of blue - and - more importantly, tapping on the CRT neck seems to affect it. Prodding the CRT driver (neck) board or anywhere else has no effect.
The detailed symptoms appear to be:
I fabricate a temporary isolated filament (heater) winding by wrapping 3 turns of insulated bell wire around the flyback core. Carefully, I unsolder the picture tube filament connections to the CRT driver board and jumper the temporary winding to this. My multimeter is connected between the filament and signal ground.
Now, applying power should result in the blue gun video drive voltage appearing on the filament when the short occurs.
Sure enough, after a few on-off cycles with no problems, the meter jumps to a reading greater than 100 V. With the heater isolated, no apparent change takes place to the picture.
To do a permanent repair, I first determine that 3 turns is satisfactory: Reducing it to 2 turns results in a dull orange glow from the filaments and slightly fuzzy slightly dim picture. 3 turns was correct - the glow is bright orange. (I could also have compared it with the original.)
I locate a couple of feet of well insulated wire and make a more permanent winding, routing the wires well away from the high voltage connector and any hot components. I carefully cut the traces on the CRT driver board right at the filament socket - maintaining the spark gaps to a couple of other socket pins. Then, the new winding is soldered directly to the filament pins.
I could also have probably reused the winding on the flyback and just isolated it from the ground on the CRT driver board but this would result in more stress on the flyback - probably irrelevant but the homemade winding was easy enough.
While the set is open, I adjust the position of the CRT as well - for whatever reason, perhaps since new, it is tilted and off center on the bezel. If I hadn't removed so much dust, I would have suspected it to be a replacement CRT but probably not.
I call my cousin: Do you want the TV? It is fixed. "No kidding, how?". So I told her: There was a short in the picture tube but I rewired the set. "It won't blow up or anything?" Nope, just not something every TV repair shop would do. "Sure, I can give the one in the living room (Repair Brief #12: Sylvania TV with no Horizontal Sync) to the nanny and this one will be fine for use with the VCR (Repair Brief #21 - Sharp VC7864U VCR Erratic). The kids will like a bigger screen." This is also convenient as there is already a universal remote at that location being used with the VCR which will be fine with this set.
Comments: The owner probably called a TV repair shop (or perhaps lugged it in) and was told that with these symptoms the CRT was shot and fixing it would not be worth the time and money. However, there is really nothing wrong with the isolated filament. In fact, the stress on the red and green guns is actually less as the difference in voltages between the cathodes and heaters is on the average smaller and the maximum voltage difference is less as well. As long as an H-K short does not occur with the red or green, there should be no problem.
Symptoms: CD player erratic - sometimes won't recognize discs, sometimes shuts off and resets in the middle of a disc.
Testing: Tried multiple discs (classic to rock) just to make sure it isn't just a matter of the player not liking Ralph's tastes in music (which most other humans don't like either.
Ralph was our 'Nedrie' type (from the movie 'Jurassic Park'). Visualize a Sun workstation with Coke stains all over the keyboard, empty Coke cans and half eaten week old pizza, manuals and other stuff cluttering his desk and the immediate area. He is, however, an excellent software engineer which is why all this is tolerated.
Anyhow, Ralph treats his boombox about like the two vicious dogs he keeps locked in his basement at home - firmly. :-) Perhaps, I will discuss the ruggedness of old Realistic portable CD players at some point in the future. One of his (previous) dogs thought it was a bone. The CD player looked pretty beaten but continued to run. I don't know about the dog.
He used to have a pet iguana as well.
Anyhow, Ralph keeps a typical small Sony boombox in his office (2 doors from mine). Thankfully, the volume is turned down and/or he uses headphones. Otherwise, I *would* be very creative about seeing to it that the CD never worked quite right. Oh, your CD is acting up - again? That is really a shame.... ;-)
I had taken a look at this boombox once before, even partially disassembling it, but then the problem went away. This time, the top is squashed in about 1/2 inch due to Ralph's constant beating in an effort to get it to cooperate.
The main problem is gaining access to anything. In order to remove the CD player assembly, one must remove the front cover (six recessed screws - at least the locations are more-or-less marked), LCD display/LED/button card, cassette deck, power supply, and part of the audio/radio section. The CD player including the optical deck and electronics board can then be extracted but actually running it in this condition is difficult or impossible. However, I did manage to set everything carefully propped up and run the player sitting on the table. It, of course, ran fine all day in this configuration. Well, maybe Ralph would not notice the additional disarray......
At first, I thought the erratic problem was due to marginal power as the display LEDs fluctuated slightly in brightness while the CD was seeking. However, the line transformer is built into the boombox rather than being an external adapter so at least there is no way to use an improper adapter. Testing voltages internally seemed to indicate that power was fine.
Next, I removed the CD player completely and went over the solder side of the electronics board carefully looking for bad solder connections. On one connector, there was a suspect joint or two which I repaired. These were probably the source of the erratic shutoff problem. I also tested the interlock switch for intermittents - it was fine. I then ran it for another few hours without incident which, of course, proved little.
Reassembly required another 15 minutes or so but was straightforward. The interior is relatively open so cable routing, at least, was not a problem. I installed only two cabinet screws and left the cassette deck in my desk drawer for a few weeks so access would be easier should the problems return.
Ralph never noticed.
It has been a couple of years now and I have not heard of any complaints. One time I thought there was a problem when I went into his office and attempted to play a CD but it must have been a bad CD because he has seemed happy (at least with respect to the boombox). Ralph has recently left for greener pastures though I am sure I will hear from him if the CD fails again!
Comments: One wonders why product engineers cannot take a few more minutes to design an enclosure that is easily serviceable. I suppose the quick answer is that these are deliberately designed to be throwaway products in any case. There is no way that anyone can justify the cost in time to gain access to fix a miserable cold solder joint. The whole thing probably cost $100 retail. Of course, one wonders further why cold solder joints are still so common even on ordinary (not large pins) components. Then again, Sony's manufacturing engineers haven't met Ralph!
Now I see that an AM/FM/cassette/CD boombox is on sale for $60. I wonder what kind of construction it uses....
Symptoms: I was told that the player would not finish the tape. In fact, what was happening was that it would not play channels 3 and 4 resulting in a high noise level but no proper audio.
Testing: I tried the tape provided as well as a regular stereo audio cassette. Only 2 of the 4 channels worked properly.
This 'customer' has provided me with quite a lot of 'business' in the past (keep in mind, I don't charge for anything beyond parts in these cases). Mostly, previous problems were due to unintentional abuse. These have included bad solder connections on a classic as well as more modern Radio Shack multiband radio and a sprung reel clutch on a cheap boombox.
This tape player is a nice well designed unit with large rugged controls. There is no sign of external damage but that may not mean much.
Since I at first thought that this was a case of the tape not finishing rather than not playing properly, I first checked for takeup reel and capstan motion and torque. Both were fine and thus I rather doubted that it simply stopped playing a tape. Then I tried the tape channel selector.
Recall that a standard stereo cassette has 4 channels of audio - L+R forward and L+R in reverse. Book tapes use all 4 channels individually. A switch selects between the L (1 or 2) and R (3 or 4) channel is being played. (OK, it might be the other way around.) Flipping the tape over selects 1,3, or 2,4.
Anyhow, after a little testing, it was obvious that channels 1 and 2 were loud and clear but 3 and 4 resulted in some background noise - greater than the tape hiss of channels 1 and 2 but not hum or oscillation.
What could it be?
Keeping in mind that there is only one channel of amplification in this unit and the switching is done mechanically, not much.
One might suspect the electronics - but this is probably impossible as the same electronics is used for both channels.
One might suspect the tape head - easy to check.
One might suspect the wiring - quite likely given a well used possibly abuse tape deck.
To test for output from each tape head channel, all that is needed is a small pointed tool like an awl or jeweler's screwdriver. Touching each of the 4 terminals on the tape head should result in hum or buzz on at least one of them - depending on the channel selector setting. (This also works for normal stereo cassettes - you should get a hum or buzz out of the appropriate channel when its tape head terminal is touched.)
I didn't even need to go that far as the cause came immediately into view once I was able to access the tape head terminals.
The designers of this tape player did a good job. Unlike many similar devices, there is a pop out plastic piece which covers the tape head - presumably to allow access to the azimuth adjustment screw. As soon as this was removed, the broken wire came into view. Since the entire tape head assembly moves, some slight flexing must take place at the point of soldering. It should not be much as the cable is clamped to the moving part but there may still be some flexing so over time, the wire simply broke off.
Someone searching for an electronic fault would have had the guts of this thing strewn all over the workbench and shop floor before finding the true cause! It was tight, but just barely possible to strip and solder the wire back in place. I probably should have put a drop of semi-flexible sealer over the connection to stabilize it but did not. Well, in another 10 years I will know what to do!
Comments: This is not one of those 'cast of thousands' repairs. Nonetheless, for those who depend on talking books for their education and Pleasure, a working tape player may be more important than a high tech entertainment system.
Symptoms: Everything works fine except for the CD player. Insert a CD and close the door. The disc starts spinning clockwise (correct), then changes its mind, reverses direction, and goes into warp drive in the incorrect (counterclockwise) direction. Eventually, it shuts down with a 0:00:00 display.
Testing: Multiple discs behave in a basically similar way. None succeed in reading the TOC.
Jeff brought this beauty to work. "Sam, I have something to keep you busy". Not the printer...? (The previous week, he showed me this Apple LaserWriter NT that was making a horrendous noise. Since I concluded it was from the fan in the power supply underneath, I really did not want to deal with it. It would require half the day just to get at it Apparently, the printer was behaving - Jeff now only turned it on when needed. "No, my dad's boombox."
This boombox appears to be in excellent physical condition (unlike the one described in Repair Brief #63: Sony Boombox CD Player - Erratic Operation which was slightly crunched. Indications are that it just stopped playing CDs without an provocation. No scratches or dents.
Well, since it is not even possible to view the lens without some disassembly, I warm up my screwdrivers...
It requires removal of 8 long screws to separate the front portion with the all the CD player components, speakers, and cassette door (yes, just the door) and the rear half with the rest of the electronics. Four cables link these two sections: speakers, CD power, CD control, CD display/button panel. Four more screws and it is possible to separate the optical deck from the CD electronics board. It is just possible to arrange everything such that the unit can be run with access to solder side of the CD electronics board. This is definitely much easier than that Sony boombox which required removal of almost everything to gain access to the CD player.
With the system disassembled, it is possible to observe the following as it attempts to read the TOC of a disc:
So, first I clean the lens -- no change.
Next, I disconnect the optical deck from its intermediate circuit board and go over all the solder connection on it -- no change.
OK, bring in the heaving equipment - I drag a scope into my office.
There are marked test points including RF, TE, FE.
The RF test point is - well - strange. When power is applied, it jumps, then momentarily is of high amplitude but then decays to a much lower amplitude signal with somewhat random characteristics. In fact, I cannot make any sense of it.
At this point, I decide that other tasks are of more immediate concern (like lunch) and will button it up and take it home to work on at my leisure. I tell Jeff. "So what are you going to do." Oh, probably stare at it some more, a little cursing, then give up. Jeff knows better but just laughs.
Next day, I start by disassembling it once again (of course, I had only installed 2 of the 8 cabinet screws) but going further this time:
The connections to the optical deck look to be the same as for some of the optical pickups I have been accumulating but no cigar - nothing that I would risk swapping until I get desperate. I could easily blow the laserdiode or electronics if they are not quite the same and I don't even know for sure that those other pickups work. After all, they were guaranteed to be dead. :-) I will postpone that decision.
Confirming that nothing has changed - nothing has. The RF test point which should have the eye pattern is still strange. With easy access to the disc to stop it from spinning by hand, the 'gritty' sound is unmistakable - the focus servo, at least, appears healthy.
My test disc is one of those zillions of AOL free 15 hours CDs. While I don't expect to be able to listen to the data, most CD players will recognize the TOC of a CDROM - though the resulting display will be meaningless. Thus, I don't need to worry about damage to the disc - there are a semi-infinite supply of these! Of course, should I succeed reading the TOC, I will need to use a music CD for audio tests and adjustments.
OK, well, Mr. AOL CD behaves the same as the others.....
Now, do I dare tweak anything? There are three readily accessible adjustments: Laser Power, Focus Offset, Tracking Offset. (There is also a Tracking Gain pot which I noticed later. However, the gain controls are usually of secondary importance so I never do bother touching it.)
I generally do not touch laser power adjustments until I am sure there are no other options.
What about focus or tracking?
This smells like a tracking problem. However, the fact that the eye pattern's amplitude doesn't remain fairly constant suggests that there may be some sort of focus problems. Toss a coin.
Normally, this is the point at which I would insist anyone doing any adjustments mark the positions of all controls. Yep, you guessed it, I violate rule #1. What the heck...
Starting with T.OFS, just a hair in each direction - and what a change!! The RF signal remains at high amplitude for much longer AND the disc now tries to spin clockwise for a much longer period of time. My goals now are twofold: (1) to get the disc to spin in the correct direction at roughly the correct speed of 500 rpm and (2) to maximize the amplitude/length of time that the RF test point signal remains at high amplitude.
Then I realize something else that is in the FAQ: I really should use a non-metallic screwdriver as the slot seems to be electrically connected to high impedance circuitry and the behavior is changing when I touch it with my cheapo jeweler's screwdriver. A quick remedy which seems to be adequate is to wrap electrical tape around the handle.
A few minutes of going back and forth between F.OFS and T.OFS finally - I see the display change to what is obviously it pathetic attempt to interpret the time/tracks of the AOL CD. Of course, not thinking, I press PLAY and am greeted with a loud hum/buzz - the 80X86 object code of the AOL SETUP program or something. Hit STOP.
OK, so how about a proper music disc.
I have an 'I don't really care much about this disc' disc for just this purpose. One of those 'Intro to the ballet' or something. You know, it sounds like the Salvation Army orchestra on a bad day. But serves my purposes....
Although the TOC is read with a bit of hesitation, the player seems unable to locate track one. OK, so the current settings may not be entirely satisfactory.
A little more tweaking. Still just some whining and clicking sounds once I hit PLAY. Well, maybe it will like an outer track better. (I have no idea why it had no problem starting to 'play' the AOL disc.)
This seems to do it. It is finally successful at locating track 5 or 6 and starts playing - a bit scratchy. Now that it is stable, I can carefully adjust both F.OFS and T.OFS for maximum amplitude of the eye pattern. After a couple of false starts where it got confused and shut down, I have both set optimally and the player now seems to work normally.
I also note that touching the metal frame seems to cause some static but I assume this is due to the poor ground through the cable - normally the electronics board is screwed directly to the frame of the optical deck.
I finally did risk tweaking the laser power to obtain a 1 V p-p eye pattern at the RF test point. Without service information to know what the proper setting is, this can be risky (even a dirty pot could conceivably blow the diode). I just adjusted it up from about .9 V to 1 V p-p. It was clear from the response to my screwdriver - I could have increased it much further, probably to the point of burning it out - that the laserdiode was not weak. If the laser was dying, the power would have topped out about where it had been set as the feedback would be doing all that it could to maintain constant power.
After fine tuning the focus and tracking adjustments yet again, the behavior seems relatively normal. I rather suspect that there may still be some kind of problem as the tracking adjustment did not have as distinct a peak as I would expect, but who knows?
I will have to embellish the repair description for Jeff. I cannot just tell him I adjusted something. Maybe: "Well, I transplanted the laserdiode from an extra 25X CDROM drive - I figured you would consider the boombox more important than such antiquated technology" or something juicy like that. :-)
Comments: Would Aiwa Service have replaced the optical pickup? Perhaps. I have no idea why adjustments were so far off as to render the CD player useless or why this happened suddenly (as far as I know) without any warning. Perhaps it was dropped and there was indeed a change in the optical alignment. Perhaps a bit of dirt caused one of the controls to change value and my twiddling really just cleaned the track on that pot. Perhaps the original adjustments were marginal. Whatever the cause, It now works and appears stable. The eye pattern looks fine. The music sounds fine.
Symptoms: Initially, all channels resulted in a white screen. After some warmup, overdriven video (AGC bad) appeared on one channel. After some more warmup, a couple of channels were fine.
Testing: Let it run for a while. Whacking on the cabinet didn't seem to have much effect.
A little tag came with this TV: "Tuner/IF Block, $99". I assume the owner took it in for an estimate (or maybe just called someplace on the phone). Obviously, $100 to repair a $150 TV is a bit steep. Now my usual rates, on the other hand....
These are classic symptoms of the Sony bad solder joint problem afflicting many models of middle aged TVs - not to be confused with the GE/RCA tuner bad solder/EEPROM problems which are similar. :-) See the document: "Sony TV Tuner and IF Solder Connection Problems".
Fortunately, on this set, getting to the tuner and IF boxes is pretty easy once opening the case is overcome - snaps are used in four spots rather than screws. Give me screws any day! On the other had, you cannot lose snaps. Note that on some larger screen Sonys, the engineers in their infinite wisdom placed reinforcing plastic at exactly the wrong place to block access to the pins on the solder side of the mainboard. :-(
The tuner module has about 8 thick pins and 5 shield connections to the mainboard. The IF module has about 11 thin pins and 4 shield connections. Both come off easily (no bad connections visible on the mainboard pads.)
I resolder all the edge pins (though most did look fine), all shield connections, and anything else that appeared marginal. I wasn't convinced that I had located the cause of the problem. There was no smoking gun...
Indeed, the symptoms are essentially unchanged.
Now, I start prodding each of the metal boxes. The tuner box is rock solid but I can get the problem to come and go by pushing gently on the IF box.
Out it comes again. Now I get out the heavy artillery - bright light and magnifier. Then I spot *it* - one lone pin not particularly noteworthy in any respect except that there is clearly a broken solder connection and the pin even moves visibly. This is apparently a common location for these problems - one pin of a coil. I check over everything else once again but I am confident that this is *the* cause of the erratic behavior.
Indeed, once reinstalled, reception is flawless - even playing bongo on the TV has no effect.
Comments: As I have noted before, you would think that after several decades of manufacturing consumer electronics, soldering would not be an issue. But, this certainly seems not to be the case. The demands of the bottom line as well as manufacturing issues of mixed through-hole and surface-mount technology combine to make reliable assembly quite a balancing act. At least the Sony and RCA/GE bad solder problems are well documented and straightforward to repair.
Symptoms: Record changer load and eject functions totally inoperative.
Testing: Cycling mechanism results in no change. It does play records if the tone arm is positioned manually. The stylus also wants to eat the vinyl.....
Since the changer did not respond, I directed my attack to this mechanism. Unfortunately, the owner was not available to explain if this was the main problem - it could possibly be something else.
On an older mechanical device, be it a dinosaur such as this or reel-to-reel tape deck, lubrication, deteriorated rubber parts, or broken parts, are the prime suspects.
But how is this one supposed to operate?
A large metal cam gear actually moves and raises and lowers the tone arm. This is engaged by a smaller nylon idler gear which is moved into position by the OFF/ON/EJECT knob or the movement of the tone arm to the end of the record.
In this case, the idler was failing to engage most likely due to gummed up grease. Once it was freed, the large cam gear was so tight that either the motor slowed and stopped or the gears teeth were skipping - thankfully without lasting damage.
To free up the large cam gear, required removing a bracket and using some WD40 to loosen the dried grease. Once this was accomplished it was worked free. The shaft and bearing surfaces were cleaned. That seems much better.
Darn, the eject is now ignored.
Oops, not the correct timing - there are two possible positions for the relative relationships of the cam and idler. Try the other one.
Well, although it now cycling correctly, the record does not drop. The spindle mechanism is - what? Totally frozen!
Upon closer examination, it would appear that the load/eject mechanism had been glued into a fixed position - the parts of the spindle that normally drop the record were immovable. At first I thought this was simply dried up grease but I am quite sure it is really some adhesive - possibly Epoxy.
Disassembly requires removing the entire platter bearing assembly from the changer, clamping it in a vise, and twisting and pulling to free the spindle. It would appear that this, too, was glued in place!
At first, I try freeing it up with WD40 but this proved inadequate so I use a punch to remove the roll pin. The assembly now comes apart easily - and I promptly forget how it goes back together! One would think that something so simple would not be a problem but it took another 10 minutes or so to come up with a logical arrangement of all 6 parts and several more minutes on the floor searching for a 1/16" shaft that popped free.
However, once cleaned, lubed, and back together, it does appear to be much happier.
Replacing the platter bearing assembly goes smoothly except for accidentally stripping the hole of one of the 3 mounting screws - replaced with machine screw and nut.
At first, everything appeared to work correctly but then the motor shut off before cycling. In fact, it will only stay on erratically, sometimes only when the control knob is held in the EJECT position. While I was tempted to suspect that I didn't get something back together correctly, sanity prevailed and I examined the motor switch. It seemed that the lever that operated it did not quite push far enough and the contact was marginal. After disassembling the switch and cleaning the contacts - and bending one slightly - operation is reliable.
Perhaps, this was the actual complaint since there is no way the changer could have ever worked in modern times!
Another quirk seems to be that when cold, the motor takes a few seconds to come up to speed. At first I thought this was an idler rubber problem but then discovered that the motor seemed to be running at half speed even with no load.
There is no starting or running capacitor to go bad, it is simply a shaded pole motor. Interestingly, it acts as the power transformer for the amplifier with an isolated center tapped low voltage output. I cleaned and lubricated the motor but I do not believe this is the problem. The speed does seem to recover so I am not going to lose much sleep over it.
One final adjustment: The tone arm tracking force was set so high that I was afraid the stylus would dig a trench entirely through the record on the second or third playing. It took a minute or two but I located the tracking force screw and set it to a more reasonable value - high by audiophile standards but a 3000% improvement.
Comments: There are still many people who depend on this sort of ancient technology for their listening pleasure and are probably better off than many of us who worry about signal-to-noise ratio, dynamic range, and whether Shannon and Nyquist really knew what they were talking about. They are much happier to have their old record player restored to health than to have to learn or afford new-fangled technology like compact discs and (gasp!) DVDs.
Repairing this equipment is generally going to be a seat-of-the-pants affair due to lack of easy or convenient availability of documentation - which is generally not needed in any case if a few brain cells are assigned to the task. Causes are nearly always simple in principle - dried up grease, deteriorated rubber parts, broken parts (hope you can fabricate replacements!), or previous attempts at repair.
Symptoms: Dead. What more can one say?
Testing: Plugging into the wall outlet results in no action of any kind. No display and no sound.
So Sharon walks in with this bag of stuff. "I have some presents for you. Larry was working on the wiring in his house."
Is Larry the same guy who toasted the CD player? (See: Repair Brief #61: Sony D14 Portable Compact Disc Player - Smoked). "Yep, he accidentally connected the 220 to the 110...."
Geez, you really have to work at screwing up to achieve such a spectacular disaster. Then again, Larry does have a track record. :-)
What happens when 110 V devices are connected to a 220 V line?
Actually, it is quite predictable as I found out. The transformer primary melts and opens. That is it. Period.
I tested each device by providing my own low voltage AC from a Variac feeding a 24 V center tapped transformer substituting for the original smoked power transformer.
In all cases, there was absolutely no damage to the electronics despite the application of an input voltage twice what was specified. In the case of the clocks and the clock radio, there are is no internal voltage regulation. I can only assume that either the components were able to withstand the excess voltage - which must have lasted long enough to burn out the transformer primary - or that the transformer core saturated and limited the output voltage to something much less than double.
The cordless phone was too good to pass up. Instead of attempting to locate a UL approved transformer to install inside like the original, I located a 9 VAC wall adapter of suitable current capacity and wired this into the phone circuit board. It has been operating this way for several years now.
I didn't bother actually repairing the clocks and clock radio. All I did was confirm that they worked with my jerry-rigged power. The clocks I keep as reminders. I cannot easily use the wall-wart trick on them as a center tapped transformer is required. The clock radio required at least two separate center tapped power inputs.
Comments: I, at least, would have expected more damage from such an overvoltage. However, it would seem that just-good-enough design has its merits if indeed core saturation saved the electronics.
Obviously, this should be a lesson to anyone doing major rewiring: don't do it live - both for your own safety and the risks to your appliances! Have the main power disconnected (by a licensed electrician or the utility company if necessary). Turn all the breakers to the 'off' position or remove the fuses. Before applying power, double check the wiring. With main power restored, check the voltages on the circuit feeds and subpanels. Then energize the branch circuits one at a time and check for proper operation.
I can only guess that one of the power line Hot cables touched the Neutral bus feeding the branch circuits. It wouldn't need to be there very long.
Interestingly, at least one VCR survived with only a blown fuse - similar to an incident where a lightning strike totally obliterated a TV but only blew the fuse in a Panasonic VCR.
Symptoms: Dead. Normally, I would not plug a piece of dropped equipment in until I had inspected it but apparently, this had already been done. What the heck. In any case, nothing.
Testing: NA. Inspection comes next.
Indeed, it was not necessary to go very far to locate the problems, many problems....
First, one of the case fastening tabs was broken off. Otherwise, there is no visible external damage. At least it doesn't rattle!
Next, the mainboard was visibly bent around the area of the flyback transformer which of course is the heaviest component. Depressing a lock lever allows the mainboard to be slid about half way back and out of the chassis before stopped by some cabling. But that is quite enough! The major damage comes into view - a crack clear through the board running about 3 inches from the rear near the center. It is obvious that numerous traces have been severed.
At this point I drag Susan in to see the extent of the damage. I explain that even if I can repair all the traces - which I expect would take several hours - there is no assurance that the CRT has not suffered some trauma which would result in the color purity being messed up (popped or deformed slot mask). She says "keep it". Lest you think I am taking advantage of her, Dave and I have just repaired a nice 19" Sony of hers with the classic bad tuner solder connections problem. Now, if she would only get it off our lab bench....
Of course, you know, I am not going to let it go to the dumpster (actually my parts bins/boxes/cabinets/piles without a fight!
About 6 months later, I finally manage to drag it home. I remove the back and them turn it upside-down with a cardboard box under the rear to prevent a, shall we say, unfortunate accident. To get at the full extent of the damage, I only need to pull off the degauss connector and the mainboard slides out far enough for my soldering iron.
Where through-hole pads connected to the broken trace are conveniently located on either side of the crack, I run a short length of #24 tinned wire to the pads. Where there is any chance of shorts, I use insulated wire.
If this is not possible because the pads are nowhere to be found - too far away - I scrape off about 1/2" of soldermask (the green coating) on either side of the break and use a 1" length of tinned wire to bridge the gap. This isn't as hard as it might sound since the surface tension of the molten solder tends to align the wire on the bare copper. These should be quite strong. Since the board is actually supported from the rear edge by the plastic cover (at lest under normal conditions), I believe no additional reinforcement is needed.
Where there is a convenient pad close to one side of the break, I wrap the wire around that but still remove the soldermask and solder to the copper on both sides of the break.
I think I have found everything. One last inspection. No shorts. Time for the smoke test. In order for the front panel power button work, the mainboard must be pushed all the way back into the cabinet. Grrrr.
And - yes! We have snow. With the addition of a pair of rabbit ears, we even have a - totally messed up picture. :-( The colors are all wrong and not uniform across the screen. Could the CRT be ruined? Well, not to give up yet. It is still sitting upside-down (though I did remember to plug the degauss coil back in). There are no field adjustable ring magnets for purity and static convergence. Better hope these are not messed up! Waving a speaker magnet around the screen seems to help some. OK, turn it over. That seems to be much better. Some more waving (I am too lazy to drag out a degaussing coil) and the picture is not half bad.
Is the repair solid? I start pressing on the circuit board and - oops - the set goes off. Then comes back on when I release it. I must have missed at least one.
Out comes the mainboard.
Oh, the crack passes under a surface mount resistor apparently lifting one side loose resulting in a bad connection. To fix this, I add a bit of wire looping over the resistor end cap and connect it to a nearby through-hole pad.
Lights! Camera! No change. Pressing on the mainboard results in exactly the same behavior, maybe a little worse. @#$%@
Out comes the mainboard once again.
Now, how could I have missed that?! A second crack, nearly as long as the first, runs from the edge of the board near the flyback under the flyback severing a half dozen more traces. For that matter, how did it work at all?
A half hour later, I am sure it is finished.
Sure enough, pressing and prodding now have no effect. The edge of the board even seems straight enough to not require reinforcement. The plastic back of the TV has prongs which will support the board. I am confident that the repaired traces will resist anything short of another 5 foot fall - and perhaps even that (but I don't intend to find out).
When testing the next day, I thought a new problem had developed - I was getting 2 bands of snow drifting up the screen mostly on VHF channels. What is this? A power supply problem? After poking, prodding, and cursing, I went to plug it into my isolation transformer to do some probing and guess what? The snow disappeared! It didn't return even when plugged directly into the wall. Flakey EEPROM? No, it turned out to be interference from a power massager being using elsewhere in the house! That device must use a non-RFI protected interrupter.
Comments: You have probably seen the TV advertisements - I don't recall what they were for, an insurance company, perhaps - where a late model TV is dropped out a many story window on a bunjie cord. The set rebounds once undamaged and without hitting a baby in a stroller passing under the window but then smashes to smithereens on the sidewalk once the stroller had moved on. Needless to say, this is generally not a recommended way to treat a TV set!
Ok, so your set survived in slightly better condition.....
If you take it in for service, the estimate you get may make the national debt look like pocket change in comparison. Attempting to repair anything that has been dropped is a very uncertain challenge - and since time is money for a professional, spending an unknown amount of time on a single repair is very risky. There is no harm is getting an estimate (though many shops charge for just agreeing that what you are holding was once - say - a TV, or was it a fishtank?)
When making repairs on printed circuit boards that have been cracked or broken, do not be tempted to just bridge the breaks with solder even if the board has been glued and reinforced. Solder is not compliant, bad connections will develop over time and you *will* be returning to your handywork many times in the future. In the case of this set, the total time to repair was about 3 hours - time well spent to assure reliability.
Stay tuned for "Magnavox 31 Inch TV - Fell on its Face". :-(
Symptoms: No response to button. Owner claims new batteries installed in both button unit and base station.
Testing: No amount of fiddling with the buttons has any effect. The battery contacts seem springy, clean, and free of corrosion.
This unit is similar in many ways to a garage door opener Tx/Rx pair. The button unit has a five position DIP switch, presumably to set codes (and as I discovered later, to select between chime sounds for front and back door use). A 9 V battery powers the code generator (a single chip Motorola SC41343) and the RF transmitter (all contained in a little shielded box) except for a trimmer capacitor (which I don't dare touch).
After checking to make sure the batteries were indeed fresh and checking that the button was indeed operating its contacts, the next step is to determine whether the problem is in the button unit or base station.
How to do this?
The operating frequency is not marked and I don't really have anything to conveniently detect a low level RF signal at no doubt hundreds of MHz anyhow.
Therefore, I punt and go on the the base station!
This is powered by 4 D cells and a single AA - what this is for, I have no idea. There is no backup memory as far as I can tell! Removing 4 screws from the bottom allows the cover to be removed exposing the solder side of a 2-1/2" x 7" circuit board. The antenna is connected to a point at one end.
Running my finger along some pins near the other end results in some faint clicks from the speaker. OK, it is not totally dead.
Time for Magic Spit(tm).... Moistening my Mark 1 thumb and using this as a probe evokes some more clicks. Placing it on suspect transistors finally results in triggering the chimes. Therefore, I expect that this transistor is the gate from the RF/decoder circuitry. I can fairly repeatably trigger the chimes in this manner. A 56 K resistor from the base to collector will also do this. Thus, I know the chimes are working.
Now for the front end. There are several ICs on the non-chimes side of the circuit board. The two that seem to be interesting are an MC1776 which is an op-amp and a Motorola SC41342 which appears to be the decoder mate to the IC in the transmitter. It is connected to a four position DIP switch.
That op-amp looks promising. Even with just a DMM on pin 6, the output clearly jumps when the remote button is pressed. Time for the scope.
The waveform at pin 6 is clean and stable when the button is pressed. It is 9 low pulses followed by 7 high pulses repeating. How does this change when the DIP switches settings are altered?
Answer: Not much. At least, not every switch setting produces a unique bit pattern. In fact, most of them are the same as this one which probably isn't really even valid.
The op-amp signal goes into pin 8 of the SC41342. Pin 10 goes via a resistor to the base of that 'trigger' transistor. As expected, there is nothing on this pin.
Next, I decide to try all combinations of the four common DIP switches on both transmitter and receiver as well that lone fifth switch on the transmitter. The majority produce the same waveform. However, 3 other combinations of the 4 switches prove interesting:
I decide to check the battery once again - it is a little low, perhaps 8.5 V. The owner did mention something about putting in a new battery but the button being stuck in the depressed position. So, maybe the battery isn't so fresh after all. This really should not matter but what the heck. However, a new battery seems to clean up the erratic pulses.
So, in all likelihood, the SC41343 is bad resulting in a whole wad of missing codes - only one pair seems to work - and marginal operation with a slightly weak battery. Can a chip wear out from being on for too long? :-)
Unfortunately, an initial check shows that my usual haunts don't seem to carry this chip. Then I email Paul Grohe: I was just wondering if you had any datasheets for either of the following Motorola chips: SC41342 and SC41343?
"AH! Never blindly trust Motorola's search engine! (Ya gotta know where to dig!). Here ya' go:Sure enough, the pinouts match perfectly and Dalbani and Allied list the MC145026 transmitter chip. With an actual datasheet in-hand, I go back and scope all the pins but this only confirms that the chip is almost certainly bad.This datasheet contains the RC Tx/Rx parts. The 'SC' #s are low-power versions of the 'MC' parts."
- MC14502 Product Summary (Link has long since decayed, a Web search should find it.)
It is likely that these chips are used in a number of garage door openers as well. With a total of 9 possible input bits, each of which may be set to any one of 3 states (low, high, open), this results in 19,683 possible codes. That number of combinations seems to ring a bell (no pun...) with ads I have seen.
Comments: This is not the first time I have come across a situation of this type. My cousin's Sears garage door opener decided to ignore at least one of the 8 DIP switches. It would work fine as long as that switch in the transmitters and receiver was set to a 1. In the case of this doorbell, it would appear that a much more drastic failure has occurred.
For now, I will return it to its owner but will order the replacement part. The only problem with selecting the only working code would be if a neighbor has the same model set to the same code! At least, it is not the default.
Symptoms: The set will randomly shut off and then come back on after a few seconds. There appears to be some correlation with high temperature or high humidity but not much.
Testing: The appearance of symptoms is so infrequent that I do not do anything until it seems to quit for good....
Finally, it goes off and stays off. Oh well, something finally died....
So I unplug it and take it down to the workbench.
Plug it in - still dead.
Whack it once, whack it twice - and - it springs to life! Ok, where are the bad connections on this one?
The previous problem had to do with startup drive to an SCR based power supply. Once started, however, the circuitry involved was not active so the new problem must be, well, new.
I remove the back and start the hunt.....
Soldering is pretty good except for a few spots - one is a just visible crack around the base pin of the horizontal output transistor. Hey, that looks promising....
Unfortunately, I am unable to confirm that soldering this pin is *the* solution since it is so erratic. Although I was able to restore operation with my special whack(tm), I have never been able to make it go off in this manner. While I am in there, I also resolder a few other power components and the video source select switch because it had such an ugly soldering job. :-(
I also replace my startup resistor since the one I was using seemed to have a power rating just a tad too small.
However, the cause of the erratic behavior was almost certainly the crack at the HOT.
Operation *is* now solid but only time will tell if the problem returns. FWIW, the TV has been running for several months without incident.
Comments: This isn't a standard bad tuner solder shield problem but similar nonetheless. Large components heat and cool stressing the solder connections ever so slightly each thermal cycle. After awhile it is just enough to break the solder bond to the single sided circuit board. Then, this expansion and contraction cause the two parts to shift ever so slightly sometimes breaking the connection. With some kind of stress relief or reinforcement, this would not happen. But that might cost a few cents....
I was initially prepared for a long troubleshooting adventure with this set. There is no Sams' Photofact for this model - none even close. I just checked the Tandy info at http://support.tandy.com/video.html and a model that might be this one (the number is slightly different - 160-232A - but everything else checks out) is there. (This Web site is no longer available as of 2006. --- Sam.) However, only a parts list seems to be available. I was thinking at first: HV shutdown or heat or humidity sensitive component and was not at all disappointed when it turned out to be something simple.
Symptoms: Clock does not run even with fresh battery. No audible signs of life either. These don't go 'tick-tock' but there is usually some faint click each second.
Testing: Battery is fresh and contacts are springy and clean. Gently whacking and twisting will not start it going.
I know, most people would toss a clock of this type when it started acting up. This one is important to the person who owns it. Some people have rabbit feet; she has a favorite clock!
The problem with these things is that everything is small, made of plastic, and fragile.
Anyhow, To get at the guts requires removing the back (2 screws) and popping out the plastic 'crystal'. This done, the hands can be removed and set aside, Now, the solder side of the circuit board is accessible.
First test: check the solenoid for continuity. I had one where the fine wire broke - thankfully at the terminal and it was repairable. This solenoid is fine.
Without it mounted in the case, I need to locate a substitute battery holder to apply power.
Next, I look for pulses on the solenoid. I have already noted that the alarm works by moving the hands to set it off. This confirms that the quartz crystal is oscillating and the huge 8 pin chip is working, at least to some extent.
Putting a scope across the solenoid terminals reveals alternating positive and negative nearly 1.5 V (the battery voltage) pulses at what I presume to be a 2 second rate for an entire cycle. This would seem to indicate that it should be working.
Therefore, the problem must be mechanical. In fact, gently rotating the second hand shaft seems to point to a problem with the gears.....
I have to go deeper! Popping the gear cover finally reveals the problem: the rotor of the motor is a teeny tiny cylindrical magnet glued to a plastic pinion gear. The glue has failed. Can you believe it wasn't constructed to military standards! A 1/4 drop of household cement and it should be as good - no - better than new.
It is interesting that while this is a 2 pole single phase motor, the starting direction is not ambiguous. How? It seems that there is a little plastic tab on one side of the rotor. When the clock is mounted in the normal upright direction, this is just enough unbalance to force the rotor into a known orientation when unpowered and between pulses (it will be settle with this tab at the bottom or perhaps just balanced at the top but not on one side). From this, the N-S pole relationship is guaranteed to force the proper clockwise rotation of the hands (at least in this part of the universe). Clever and simple.
Reassembly is not as difficult as I feared - the gear shafts are guided to the holes by conical bevels on the cover.
And - it works! I even got that little plastic tab oriented correctly.
Comments: OK, so you are saying "Why bother?". Maybe it is the challenge. Maybe it is not being able to say no. Maybe I have too much junk already and I would never throw it away if I couldn't fix it. The owner will be happy. And, I (and perhaps, you as well) have learned something about quartz clock movements. Not a bad deal for 1/2 hour's work.
This is the first of the "Request for (dead) optical pickup series" of Repair Briefs. This classic Sony was donated by Zev Berkovich (ah392@freenet.toronto.on.ca).
Note: I am still looking for additional samples of this model and other portable CD players, CDROM drives, optical pickup assemblies, and other optical disc technology technojunk. I will pay slug mail shipping (e.g., UPS Ground Commercial).
Symptoms: Inserting a disc and pressing PLAY results in the pickup moving toward the center but the disc directory is never read and the player gives up after 10 seconds or so.
Testing: The behavior is the same with several discs. It doesn't appear as though it is even focusing correctly....
First some history - here is the dialog between Zev and myself:
From Sam: Original posting (summary):
Newsgroup: sci.electronics.repair Subject: Request for (dead) optical pickup assemblies.
I am interested in complete or partial optical pickups or optical decks, portable CD players, CD ROM or optical drives for parts. I will be slightly disappointed if they are fully operational. :-( Obviously, I do not want to pay much so no offers of new Sony pickups at retail prices please! Since I do not not make money on most of my repair activities (family, friends, charity, the Internet, personal amusement), I am only willing to pay for slug mail shipping and perhaps a wee bit more if there is enough fascination value in it. In return, you *will* get priority replies to your repair problem postings! :-)
From Zev:
"I have a non-working Sony portable CD player (it is designed for 3" CD's, but will also play 5" CDs with part of the disc sticking out of it). I have the complete service manual with schematics.From Sam:Since this unit would be of little use to me even if it worked, I have not really put too much time into it. However, I have used it to play around with and try different things on my scope. The laser, BTW, is fully operational and is drawing exactly the right amount of current. I am pretty sure with some time put into it the thing will work perfectly, I just have no use for it, and I would be happy to let you have it.
The laser unit is not compatible with later sony discman models."
Thanks, that sounds perfect - it satisfies my criteria for optical pickups and would appear to be a really interesting item. What is its current status?
From Zev:
"Originally I had very carefully adjusted the focus and gain settings, and I did manage to get it to work. After it played for a few hours though, it just quit on me. I may have gone a little wild after that tweaking the dials, so it's possible that they are all out of adjustment."After I received the package...
From Sam:
When one compares the newer models to these, it is amazing how far the manufacturing has come - a couple of ribbon cables/connectors and the entire optical deck pops out - none of this flying lead stuff! BTW, that pickup looks to be similar to those used in a number of quite new non-Sony model portables and boomboxes including Emerson (whoever makes them -- Mitsumi?), Aiwa, etc.
The other portables I have received based on my request for dead optics have all had good optics! :-( They have seemed to have power problems - one was smoked by too much voltage, another has an overheating problem.
From Zev:
"Hmmm. I never thought about comparing the optics to other brand names. I just compared it to the newer Discman models (D121 and up), which use a totally different connector (one ribbon cable and a couple of two prong snap on connectors) which I can pop in and out in a matter of seconds.Initial testing confirmed that it failed to access the disc's directory (TOC). An internal inspection, revealed that the unit was still set to test mode but was behaving more like normal mode. Interesting....What is also quite amazing is that when you look at the evolution of Discmen even over the past 5 years, they have gone from multiple circuit boards that take up all available internal space, down to a tiny board which only inhabits a fraction of the interior."
Since Zev sent along the original Sony service manual along with supplements, I at least have a starting point. Given that it seems to not want to go into test mode now, I figure I will check some basics from the service manual.
Resetting the test mode jumpers was a royal pain! This was just the start of pain. The jumpers are itty bitty solder pads, already slightly abused from Zev's previous efforts through no fault of his. I proceeded in further damaging one trace and had to add a jumper wire to bypass it.
Changing the jumpers made absolutely no difference! I double checked the soldering... Everything appeared correct.
It didn't take long to identify an anomaly: One of the adjustments is for +5.4 V. Once I located the test point, it measured only 4.1 to 4.2 V and the adjustment had no effect. Hmmmm.
From Sam:
I started to measure some test points and found that the 5.4 V was not being generated and the 5.4 V Adj. has no effect. This is produced by a charge pump running off of the servo chip - it seems that the servo chip thinks the voltage is enough but it is only 4.1 V. Reducing the input voltage results in the DC-DC converter running but never getting up to any reasonable voltage. Unfortunately, since it will not now go into test mode, operation is only for a few seconds at a time.
I checked the jumpers. You left it in service mode but I guess with the inadequate +5.4 V it behaved as though in normal mode and putting it into normal mode made no difference.
BTW, don't you love how much pain it is to go back and forth resulting in lifted pads etc. after awhile? Why couldn't Sony put in a switch or at least a single jumper?!
From Zev:
How about providing an external +5.4 V supply to see if that helps?
I guess you can see now why I got rid of it. I've repaired quite a few of the newer Sony Discmen, but those older ones are a real pain."
How are the various voltages generated in this thing? Quite cleverly in fact: After some careful examination of the schematics (that is, once I located the set that corresponded to the PCB revisions for this model), it appeared as though a little circuit boosted the 4.4 V source to 5.4 V. This simplified circuit is shown below:
                    +4.4 V in
                         o                          +---o +5.4 V out
                         |                          |
                         C                  +-------+        +----||----+
                         C L703             |       |        |          |
                         C           L704   |       \ R708   +---/\/\---+
                         |  D701     ::::   |       / 62 K   |          |
                2SD1048  +--|>|--+---^^^^---+       \        |  |\      |
                   Q704  |       |          |       | +5.4 V +--|- \    |
       |\     R706     |/ C     _|_ C705   _|_ C706 \  Adj.  |  |    >--+---o P
 D o---|  >o--/\/\--+--| X-6    --- 10 uF  --- 4.7  /<----------|+ /
       |/      1K   |  |\ E      |          |  uF   \        |  |/
        IC701       /    |       |          |       | R701   /
       TC7S04  R707 \    +-------+----------+-------+ 22 K   \  (The amp is
               10 K /    |                  |       |        /   part of IC504)
                    |    |                 _|_      |        |
                    +----+                  -       +--------+
One of the large chips is the controller for this switching DC to DC converter.
Of course, I at first suspected this many legged surface mount chip! However,
I should have known better. The voltages associated with the converter were
way off and the drive output to the boost circuit appeared mostly dead. This
came directly from the large chip, IC504.
The regulator includes a difference amp (reference-fraction of output voltage), pulse width modulator (sawtooth clock and comparator), and a driver. I finally was able to convince myself that the amp was working since it output and feedback components are external and I could see the output change when the relative values of the two inputs were adjusted.
The leaky integrator provides the control voltage to the pulse width modulator that drives the DC-DC converter. The op amp circuit is internal to the motor driver chip, IC504). The output, P, is compared with a sawtooth derived from a clock signal. The result is the charge pump drive.
Then, I thought the driver was dead. However, upon close examination, there appeared to be an occasional burst of activity - but no corresponding change in output voltage. The inverter was the complement of the driver output. So, maybe that boost transistor circuit is not working.
Unfortunately, Q704, R706, R707, and C704 are all mounted on the underside of the circuit board - all surface mount and inaccessible from the top. Getting to the bottom is a real treat mainly because two printed cables and numerous thin wires interconnect the main logic board with the optical deck and microprocessor board (the control panel in the hinged top of the case). However, after undoing a bunch of black tape and pulling one of the printed cables, I can *just* get to the required components without needing to unsolder anything.
Tests with DMM: Resistors - A-OK, Capacitor - Not shorted.
Transistor - What have we here??? Finally something that is a bit strange: The B-C junction has a normal .682 V drop on my DMM but the B-E junction is 1.29 V? I double check. Yes, indeed, the junction seems to be bad. Joy! It is an SO23 surface mount part, barely visible let along replaceable.
Now, where can I find a replacement? It is probably just a vanilla flavored transistor - a 2N3904 would probably be fine. (In fact, I checked while writing up this Repair Brief and the 2SD1048 is a general purpose switching transistor). However, I would rather use an exact match to be sure.
Now, where can I find one? Hey, remember that smoked Sony D14 (Repair Brief #61 - Sony D14 Portable Compact Disc Player - Smoked)? I bet it has some usable body parts that were not damaged. After all, most of its circuitry was on the output side of its DC-DC converter module (but not the controller, unfortunately.
Sure enough, there are numerous similar transistors - type X-6.
I manage to mangle one of them because they are glued in addition to being soldered to the board. Finally, using a combination of my soldering iron, SoldaPullit, jeweler's screwdriver, Xacto knife, and needlenose pliers, one comes free in good condition. Confirming this with a multimeter is fun as well since it is barely possible to even hold the thing without it popping out of existence.
The broken transistor is removed more easily since it is not glued - heating the solder while prying on one side frees it.
I use a set of tweezers to position the replacement and a wooden clothes pin to hold it in place while soldering. You would have to see this setup to believe it. :-)
Now for power!
At first I thought there was no change. Did the new part blow already? But then I realized that I had been playing with the +5.4 V Adj. pot and left it where the two inputs to the op amp were just about equal - which would yield around 4.1 V even with the DC-DC converter operating properly.
And, indeed, now the +5.4 V adjustment has an effect. I would have been surprised if the player had actually started working as you will recall that the internal adjustments are probably way off. In fact, the behavior doesn't appear much changed at all. :-(
However, now, I can try some experimenting with the adjustments. I solder a wire to the RF test point for my scope.
Nothing. OK, let's see if Focus Bias (offset) does anything. Nothing. What about Focus Gain? Nothing. How about back and forth? Oops, what was that? Is that an eye pattern? Well, of sorts. Can I persuade it to stick around.
Adjust. Adjust. Adjust. Adjust. Adjust. Tweak. Tweak. Tweak. Tweak. Tweak.
Finally, it seems to be fairly stable though not the prettiest eye pattern I have ever seen. Will it play? I have been using my trusty AOL CD which really leaves something to be desired in the audio department... Of course, it isn't much use for getting on-line these day either. :-)
Sure enough, my 'Strauss Greatest Hits' disc does play - a bit noisy but recognizable. It seems to have some trouble locating and playing outer tracks so a little more tweaking is in order. A slight shift to the PLL free run frequency and it now is somewhat happier.
Someday, I will perform the proper servo alignment though I do not think any of the adjustments are far off. Nonetheless, I might as well take advantage of the luxury of having an actual service manual!
Unfortunately, another disc played with a lot of noise and it seemed to be touchy about my even going near the player! I checked to make sure the +5.4 V had not died again - nope, exactly correct. Oh, well, enough for now. Stay tuned for: "Sony D88 Portable CD Player, Part 2 - Erratic Audio Noise".
Since I did not attempt any adjustments prior to replacing the transistor, I really don't even know if the correct voltage on that +5.4 V bus really made any difference but I am not complaining. I also do not know what caused the original transistor to blow - it might fail if the drive were on for more than a few microseconds as the inductor is the only thing limiting collector current. I left if playing on repeat mode to see how robust it is.
Comments: This is a really cute CD player - not really very practical but probably one of the neater examples of solidly built Sony technology which still contains some metal in its structure!. I would be very interested in obtaining other samples of this or similar vintage CD Sony players.
Would a repair shop ever have taken the time I did to analyze the circuit and locate and replace a surface mount part? No way. Only a Sony service depot would likely get that deep into anything of this sort and then again, probably not even there.
This is the second of the "Request for (dead) optical pickup series" of Repair Briefs and is the continuing saga of this classic Sony CD player donated by Zev Berkovich (ah392@freenet.toronto.on.ca).
Symptoms: After locating and replacing a bad SMT transistor and retweaking the servo adjustments, the player works but playback with some discs in particular is noisy at times - sometimes very noisy. Seek times are sometimes excessive. Moving near the player seems to have a significant effect as well - often to the point of killing tracking and playback entirely.
Testing: I substituted another AC adapter just to make sure it wasn't at fault. Tweaking the servo adjustments has minimal effect.
As you will recall in Repair Brief #73: Sony D88 Portable CD Player, Part 1 - Does Not Recognize Discs, this player was totally dead when given to me. Zev, the original owner, said that he had tweaked the servo adjustments and it worked for a few hours and then died. He then did some more tweaking without success.
After a feature length troubleshooting session, I was able to locate a bad surface mount transistor - part of the +5.4 V boost DC-DC converter - and replaced it. I was then able to get the player to work somewhat even if it does appear to have an attitude problem......
A few days after the initial success I decided to try another disc and was greeted with terrible noise which seemed to correlate with the disc rotation rate. What's up? The eye pattern didn't look great. In fact, come to think of it, the eye pattern looked terrible. Therefore I decided to do a little more investigation. (As it turned out, a lot more investigation - an entire afternoon's worth!).
With service manual in-hand, I checked the laser current and eye-pattern amplitude;
However, on closer examination of the eye-pattern with a better scope (350 Mhz bandwidth), its ugliness became even more apparent. In fact, there seemed to be a 100 MHz oscillation superimposed on the signal. Is this an artifact of my scope probe? I do not think so. Could the laserdiode actually be oscillating at 100 Mhz? Oh come on, that is grasping at straws.
Another interesting behavioral quirk was that the disc didn't like me! Recall that this is a strange player - 5-1/4 inch normal CDs hang over the side. If I moved my finger *near* the spinning disc, the audio becomes noisier and will cutoff entirely when close enough. This did not appear to be mechanical - I could be 1/2" away from the disc and still detect a significant change in the audio. At first I thought this was a problem with a component in the player but it was the disc - placing a strip of aluminum I was holding near the disc produced the same result! Well, after some thought, the only conclusion could be that my finger was capacitively coupling to the aluminum of the disc's information layer and *that* was capacitively coupling to the metal parts of the optical deck. Shouldn't these be connected to an analog reference point or analog ground? Of course - and there was even a hint staring me in the face - a taped unconnected wire. However, there is no mention of this in the service manual or schematic!
There is a shield which is part of the printed flex cable which carries the laserdiode power/feedback and photodiode signals and this is soldered to the metal cover plate of the optical deck. However, it wasn't connected anywhere else! At first I ignored that dangling wire and soldered it to what I thought was a suitable ground.
Wrong! That connection didn't work at all - it must have been a noisy digital or power ground. In fact, I wasted another hour tweaking the servo adjustments and then ripping the player apart once again suspecting (incorrectly) that my efforts to attach the ground wire and clean the optics while I had the unit disassembled had damaged something else! All was not well (at least as well as it was before) until I removed my original ground wire completely. The player came back to life but as expected was just as noisy and tempermental.
If I had followed Rule #45123 - never change or fix more than one thing at a time without testing, I could have saved a lot to time and aggravation.
Finally, I came to my senses and connected a wire to the proper solder pad and - presto! - the audio noise completely disappeared and the RF test point now looked like a much more respectable eye pattern - quite nice in fact.
Obviously, the sheet metal of the optical deck cover was picking up all kinds of crosstalk from the electronics - perhaps even forming a feedback loop of sorts - and totally corrupting the RF signal (and who knows what else).
A little more tweaking to optimize the amplitude and appearance of the eye pattern (With the player in the upright position and the controls accessed from underneath - joy!) as well as adjustment of the PLL free-run frequency (according to the service manual, no less!) and I do believe the player is in pretty good operating condition. Since even the service manual doesn't provide procedures for adjusting focus and tracking gain, I left these at their midpoints. This may not be optimal but seems to be quite acceptable for all the discs I tried. (Gain of these servos affect mostly the performance with dirty, scratched, and/or warped discs.)
Comments: I still do not know if the original problem with the +5.4 V would result in a totally dead player. It seems to mostly feed the audio circuits and somehow also is involved in the selection of TEST mode. Maybe someday I will tweak it back down to 4.1 V and see what happens (yeh, sure). Perhaps it would totally kill audio or simply result in screwball behavior.
This is a case where the previous attempted repair probably resulted in this entire problem - no fault of Zev's). Without a mention in the service manual or schematic, it required a visual inspection to finally identify the missing shield connection. However, this does underscore the nature of possible difficulties in servicing equipment that has been worked on by others.
I have seen erratic behavior caused be a missing shield in CDROM drives (see Repair Brief #52: Aztech CDA-268-01A CDROM Drive - Drawer Continuously Closing.) In that unit, even audio play was noisy until a circuit board metal shield cover was replaced. Thus, whenever you repair a CD player, CDROM or similar device, pay attention to the ground strap, jumper, or spring clip when you remove the optical deck!
Symptoms: Totally dead.
Testing: Tried different outlets, nothing.
I didn't locate the circuit breaker until much later - probably just as well. Other components may have let out their smoke if I had pushed the button.
First, I searched for any fuses. I only found one on the mainboard and it tested good.
Then, I tested resistance to ground at HOT - dead short.
Removed HOT - tests good. Still dead short at socket.
Removed red wire (whatever that it) - still shorted at socket.
In order to get at the components on the HOT socket requires removing the HV multiplier/focus block (4 screws, 3 push-on connectors - better remember where they go!) and popping the socket from the heat sink where it snaps in place.
Once this is done, I unsoldered damper and snubber - these are shorted.
Removing the capacitor shows that the damper is shorted.
I tested other power semiconductors - a transistor near the main filter capacitor tests good. A T03 package device which turned out to be an SCR (probably part of power supply regulator) tests strange G-K low in both directions; A-K, high impedance in both directions. Maybe it is good. Perhaps, there is an internal resistor that is confusing my meter.
Before proceeding, I go get the Sams' Photofact from the library.
Unfortunately, this set is at least 20 years old and the Sams' folder is on microfilm - an actual spool! (Or so I was led to believe. A later visit resulted in the hard copy magically appearing from a back room. Grrr.) This was actually not too bad as the microfilm reader had variable zoom and pan so with the assistance of the person in charge, I could get exactly what I wanted (after waiting for all those other people to copy old newspaper and other articles). The bad part was that the copies were only marginally legible but probably good enough though some identifying numbers could only be guessed.
I decide to replace the HOT and damper with a transistor that has a built in damper diode. I keep some in stock for general replacement in TVs (though I would not do this for an SVGA monitor). One nice one is a 2SD871D. The advantage of this is that if there is still a problem, I don't have to take out the tripler and socket - just pop the transistor.
I will power it using a Variac AND series light bulb and check the HOT for excess temperature rise periodically.
However, first I will leave the HOT out entirely just to make sure the front-end of the power supply works.
I connect the the Variac to the output of my isolation transformer in series with the light bulb.
At first - nothing. Series light bulb remains dark.
Then, I found the circuit breaker and pushed the reset button. There was a satisfying click. :-)
Now, my series light bulb (100 W) glows brightly (degaussing) and then nearly goes out. This is the correct behavior with almost no load (horizontal deflection not running).
Checking voltage at the regulator with my multimeter - it doesn't come on at all until the Variac is 2/3 of the way up but then stabilizes close enough to what it should be - 110 V - that I feel confident in proceeding.
I pull the plug and set about installing my replacement HOT/damper combo.
At least the main filter capacitor bleeds off in only a few seconds. Just double check - no need to discharge it.
It is somewhat difficult to get at the pins to solder in the cramped quarters between the CRT yoke/convergence board. This is one of those TVs where there are zillions of convergence adjustments which I have no intention of touching!
Finally, it is done (so I think). Snap the socket back in place, install the HOT and tighten the screws securely. No heat sink compound was apparently used - perhaps before I button it up, I will add some if it seems to be needed.
Replace the HV multiplier/focus block. Oops, where did THAT lead go. Oh, but there are two pins, now who added that second pin? :-) I was just able to make out scrape marks on one and stuck the wire there. (It seems there are two possible locations for the focus wire, for whatever reason.)
All set?
Power - slowly ramp up the Variac. Light bulb glows brightly and then settles back to still glowing somewhat brightly though not full on (which would have indicated a short). The voltage on the power supply now reads 60 V.
I am not ready to try a larger light bulb - 100 W should work.
I try disconnecting that red wire - still don't know what it is - but that makes no difference. Removing the HV multiplier/focus block also makes no difference. Could the flyback be shorted?
There is one thing - my combination of the Variac powering the isolation transformer is not what I usually use so I put the isolation transformer first.
Now, for whatever reason, at nearly full voltage, I suddenly get a burst of static and a few seconds later, just a hit of a raster and picture - about 1/2 size and rolling.
I power down and check the HOT - cool as a cucumber.
OK, what about a larger light bulb?
I find a 150 W PAR floodlight bulb.
Now, I get something much closer to normal. A little squashed top and bottom but nearly or totally full width.
Go for it!
Leaving out the light bulb but still using the Variac, a not too terrible picture appears at about 90 V or so and is fairly independent of input voltage. An antenna helps quite a bit but the picture is still pretty ugly. The vertical is squashed top and bottom and pulsating apparently along with some hum bars rolling up the screen.
I let it run for a few minutes and pull the plug.
HOT is still cool. OK, so it, at least, is happy. What about that ugly picture.
Adjusting V-height and V-linearity are not able to get it full screen top and bottom simultaneously and there is still that pulsing behavior.
Well, probably a bad capacitor.. There are only about a half dozen electrolytics in the vertical output stage. Locating part numbers is a bit of a pain with the poor quality copies but the forth one I test reads way low on my capacitor checker (part of one of my cheap Radio Shack DMMs). It is a bypass cap on the collector of the vertical output pair (yes, discrete transistors).
Jumpering a good capacitor across this returns the vertical deflection to something respectible and the adjustments now are able to completely restore normal operation of the vertical.
Then, I notice a slight double wiggle moving up the screen. No obvious hum bars but just a 1/8" or so wiggle. I check the obvious - main filter capacitor (actually after the SCR regulator) and a couple of other bypass caps in the power supply but jumpering across them with good capacitors has no noticeable effect.
There is a linear regulator (called Automatic Picture Stabilizer - APS - or something like that) after the SCR regulator. The output of the SCR regulator according to the Sams' should have about 6 V of ripple. I check it and indeed, there is about 5 V of ripple. However, there is exactly the same ripple on the *output* of the linear regulator. As a matter of fact, the output of the linear regulator measures exactly the same as the input! I thought I checked that transistor.....
Testing on the circuit board, B and C are shorted. So, either it is now bad or some other component is shorted. It didn't take long to locate the problem. A zener diode apparently there to protect against too high a voltage drop on the transistor was a dead short. At first, I was not able to identify the part from its markings but a 5.1 V 1 W zener seems to work fine and ran cool. The wiggle is gone. Ripple on the 110 V output is almost undetectable on the scope. (Later, I went back to the library and confirmed that it was supposed to be a 15 V 1 W zener - which fortunately, Radio Shack stocks - and even a genuine Motorola part!
I was all set to return it to its owner when the next morning I noticed what could only be called an instability - for the first couple of minutes after power-on, the raster would tend to jiggle or perhaps change size and brightness erratically. After it warmed up, everything would be fine as though the TV was taunting me - "You think I am repaired. HeHeHe". I hate those sorts of problems! Not enough time to probe anything.
One reason I did not notice it before was perhaps that I had been switching power to the TV rather than using its on/off switch. This is one of those 'instant-on' TVs. The picture really does appear within 2 seconds of pulling its power knob as it keeps the CRT filaments hot at all times. Using an external power switch, of course, killed power to the filaments as well and thus the worst of the jiggling was probably gone before the picture appeared.
Only when I put the set on a Variac was I able to actually see the supply going into a low frequency oscillation (about 10 Hz) at high line voltage even after it warmed up (though it was less susceptible after warmup). And, I had actually seen some hint of it before on the scope but it went away quickly and there were no operational symptoms. Only when this added ripple really became large was there any evidence of it in the picture.
Assuming it was a bad capacitor, I systematically removed and tested each and every electrolytic in the power supply regulator. Well, it wasn't so bad - there are only half a dozen or so - except that since my photocopies of the Sams' sheets are almost illegible, it takes a little creative parts identification to find each one. Of course, it was the last one! A 1 uF, 150 V capacitor was reading between .01 and .3 uF depending on what capacitor range my meter was on. An organ donation of another dead set took care of that. Regulation stabilized throughout the relevant range of my Variac.
There is still a little bit of video noise - a slight pattern of vertical undulations - at the left side of the screen on some channels but I could spend the rest of my life checking capacitors in this thing. I suspect more are on their way out......
Comments: It could be that these four problems were totally unrelated though the zener probably failed at the time the damper shorted. Certainly, the bad capacitor in the vertical deflection just died of old age and the owner probably never noticed. If there was a cause for the failed damper diode in the first place, it could have been the bad capacitor in the power supply totally messing up the main B+ output. Perhaps, it really got out of control if the set were off for an extended period of time. In fact, the TV had not been used for about a month prior to its failure though I do not know if it died the first time it was turned on after its vacation.
Symptoms: While on and unattended, this monitor started making a high pitched whine with loss of picture.
Testing: Connections to the PC were verified and a substitute monitor worked fine on the PC. This is standard DOS boot and VGA on a nothing-to-write-home-about video card so there is no issue of incompatible scan rates.
Most often, a dead monitor emitting a high pitched whine indicates a short circuit in the secondary of the power supply, horizontal output transistor, flyback transformer, or one of its secondary loads. In many cases, this would also result in failure of the SMPS chopper and/or horizontal output transistor but not always.
This monitor has a separate switching power supply connected to the mainboard via a removable cable. Although no schematics were available, measurements were made of the voltages on this connector both with the mainboard connected and removed. On average, the values were about half the unloaded values when attached to the mainboard. The whine disappeared when the mainboard was unplugged.
While this most likely indicates a fault on the main board, it could also indicate a power supply that has (very) poor regulation.
A quick check was made of all the visible semiconductors on the mainboard including the horizontal output transistor (HOT), I did not locate any shorts. One diode that was initially suspect turned out to be in parallel with a 4.7 ohm resistor as part of the HOT base drive circuit.
Without schematics, there was no way of knowing the correct voltage values. I decided to do a little reverse engineering of the primary output of the switching supply - the one connected to the feedback optoisolator. This took roughly 10 minutes and revealed that the open circuit voltages were correct. The reference was supplied by a 6.2 V zener diode and a simple transistor controlling the optoisolator - turning it on when the output voltage exceeded 120 V. While the supply could still be bad, the probability of this is small based on this new information.
Next, the flyback transformer was removed from the circuit (after verifying that the CRT anode was discharged). Using my chopper based flyback tester, no faults were found. However, since this device does not test at full voltage so a breakdown failure was still possible.
Next, the flyback was connected via a pair of wires to only the HOT collector and B+ source to guarantee that no secondary loads were the source of the failure. Behavior in this case was unchanged.
Probing the collector of the HOT with a scope showed a grossly abnormal waveform. (Note that probing of the collector of the HOT is usually to be avoided in a working monitor or TV since the flyback spikes can exceed 1 kV. However, with the reduced power supply voltages due to the fault condition, this was considered safe). The 'on' portion of the waveform starts out near ground (correct) but starts ramping up toward the end of the sweep. The 'off' time shows a great deal of ringing. It was thought that this now pointed back to a bad flyback.
The base drive signal looked fine in terms of shape and levels. With normal drive signals, the ramped up 'on' portion of the waveform indicates a flyback of greatly reduced inductance and Q permitting excessive current to flow toward the end of the sweep - no doubt due to a short or internal arc.
Although the possibility of a bad HOT is small, it was an easy thing to substitute a similar transistor. There was no change.
At this point by the process of elimination, it was thought that the flyback transformer was the only other possibility. A closer inspection - actually a closer listening - revealed that in the instant that power is applied, there is a brief snap as though something is arcing internally following by a very faint sizzle indicating a continuous internal arc. Perhaps it was wishful thinking....
On the basis of this, a new flyback transformer was ordered. With great expectations, the new flyback is installed but what is this - no change. Same low voltage, same screwy waveform - darn. :-(
What next? Well, we have not tried substituting parts around the HOT. So, one by one, the caps and damper diode are removed. Using the Variac should be safe as an indication of a major improvement should be obvious before the HOT can be destroyed by lack of the snubber caps or damper diode. There, however, does not change in behavior in the least.
Give up for a while....
OK, there is only one more major item that has not been checked - the deflection yoke. A shorted yoke is always a possibility. How to test? Well, it is on a plug - remove it, no interlocks.
Running the voltage up on the Variac - poof. Oops, too late realizing that the parts around the HOT have not been replaced. However, this is progress. If there was no problem with the yoke circuitry, there should not have been a major change in pulling the yoke. Now, there was enough flyback kick on the HOT to have blown it.
OK, rummage around for a replacement. A BU508A should be an acceptable replacement for a BU508V at least for testing.
Replace all components and solder in new HOT. Monitor B+ while running up line voltage. B+ climbs nicely through the 60 V barrier and stabilizes at 120 V. While watching both front and back of CRT - after all there is no deflection and the screen can get a permanent navel quite quickly - there is now filament power with normal brightness of the filaments. This indicates that the flyback is probably running at a normal power level. Nothing on the screen yet. Maybe the monitor has a shutdown circuit that prevents anything from showing up without a video signal. Connect PC. Still nothing. Try user brightness and contrast. Still nothing. Finally, try the flyback screen knob. Now I can get a spot indicating that there is HV. Quickly turn it back down to protect CRT.
Next: deflection yoke testing. (Actually, about a year passed.)
So, how does one test a deflection yoke?
Here is a brief tutorial:
The deflection yoke consists of the horizontal coils and vertical coils (wound on a ferrite core), and mounting structure. There may also be some additional windings on the same assembly in some designs for various functions like pincushion correction and raster rotation. The following deals only with the actual deflection coils - the others can be tested in a similar manner.
If possible, compare all measurements with a known good identical deflection yoke. Of course, if you have one, swapping is the fastest surest test of all! Note: it doesn't have to be mounted on the CRT which would disturb purity and convergence adjustments but see the caution above about drilling holes in the CRT face plate!
The horizontal windings will be oriented with the coil's axis vertical and mounted on the inside of the yoke (against the CRT neck/funnel). It may be wound with thicker wire than that used for the vertical windings.
Typical resistance of the intact windings (at the yoke connector assuming no other components): TV or NTSC/PAL monitor - a few ohms (3 ohms typical), SVGA monitor - less than an ohm (.5 ohms typical).
The vertical windings will be oriented with the coil's axis horizontal and wound on the outside of the yoke. The wire used for the vertical winding may be thinner than that used for the horizontal windings.
Typical resistance of the intact windings (at the yoke connector assuming no other components): TV or NTSC/PAL monitor - more than 10 ohms (15 ohms typical), SVGA monitor - at least a few ohms (5 ohms typical).
In the case of this Emerson, the horizontal winding is actually 4 pairs of windings in parallel. It measures about .6 ohms. I use the first approach and unsolder the individual windings at one end to measure resistance. This is easy since the terminal block is at the top of the yoke under a plastic cover which snaps off.
Almost immediately, there is indication of a major anomaly: 4 of the windings measure about 4.7 ohms but the other 4 vary from 3.3 to 3.7 ohms. OK, so there ARE some shorted turns somewhere. Now, this is progress!
Since nothing is visibly charred on the outside, I draw a diagram of the precise position and orientation of the yoke and purity/static convergence magnet assembly and remove the yoke.
Wow! That is surely the problem. In one corner, where the windings are possibly near the tube DAG coating, there is a black charred spot. It seems to involve a number of individual wires.
Can I repair it? Possibly. With a pointy jeweler's screwdriver, I was able to separate approximately 8 or 10 wires from the windings that appear to have their insulation burned off. Oops! One broke - possibly due to excess force, possibly due to prior damage. Oh well, I will have to jumper that one.
Once they were all separate, I used a Q-tip and alcohol to thoroughly clean everything in the vicinity. There did not appear to be any other damaged wires. Then, I wrapped each one with a layer of plastic electrical tape. I repaired the broken wire with a piece of bare wire and then wrapped it with electrical tape. The repair is now well insulated though I do not know how well the plastic tape will hold up to heat, if any. I may go back and replace the tape in the future if this repair turns out to be successful.
Getting the yoke and magnet assembly back in place is no problem - there was some glue originally holding the yoke to the convergence wedges and the break in this showed exactly how it should be positioned. The magnet assembly is probably close enough. In any case, these can be adjusted later.
Ready? Power!
Guess what? No whine and big bright screen - way out of focus - appears almost immediately. Well, I don't know what it should do without a signal, so I move the whole affair over to the PC on which it was on originally.
Boot the PC, then power the monitor! Same behavior. Then, it occurs to me that the focus and screen (G2) pots on the flyback were never really adjusted after the initial test of the flyback because there had never been a raster with the replacement flyback.
Sure enough, a little twiddling and there is a picture. Then some fiddling with the yoke orientation to get it straight and the convergence magnets to eliminate fringing. Ouch! What was that? A stray wire bit me... It looks like one of those windings was never reconnected. (Maybe the picture was a bit narrow..) I will fix that and try to be more careful.
For the first time in a couple of years, this monitor is working - better than new.
Comments: Had a substitute flyback transformer been available, this process could have been shortened considerably. In this case the tester should have been believed.
One nice feature of the design of this monitor (whose specs are really nothing to write home about) is that the switching supply is fairly well short circuit protected and current limited. Therefore, it is probably virtually impossible for any fault to destroy the HOT through overcurrent (though apparently not through overvoltage) or other power components on the mainboard. Even with the shorted HOT, the power supply just whined a bit but was perfectly content despite that fact that the B+ line was dragged down to 3 V.
What caused the yoke to arc? There is no way of knowing but the location at a corner suggests damaged insulation. Magnet wire insulation is very fragile to begin with so any kind of scuffing during manufacturing is a failure waiting to happen. Perhaps it was bent too far at some point and then straightened out or scraped against something. Perhaps, expansion and contraction from thermal cycling caused it to rub against the CRT. Given the characteristics of magnet wire, it is quite amazing that these types of failures are not more common.
Symptoms: Pressing the power button results in a relay click and some evidence of high voltage (a bit of static on the screen) but no picture and only a slight hum from the speaker. Releasing the power button results in it shutting off. The standby LED is flickering.
Testing: No additional tests possible without getting inside.
When Frank asked me if I would take a look at a TV for him, I had no idea it was such a BIG TV. How will we put it up on the bench? And, for that matter, how will be hide it in the lab when those VIP types come around? After all, TV repair is not supposed to be our main occupation. (The latter problem was easily solved at least - it ended up in my office!)
Than I find out that it is Frank's landlord's TV....
This is most likely a problem in the standby power supply. Best to go get the Sams' Photofact before poking around. Checking the Sams' Technical Publishing (formerly Howard Sams') web site (http://www.samswebsite.com/, of course everything is done on the Internet nowadays even if checking the hard copy Sams' index is easier) reveals that there is no Folder for the KV-2675R. The closest is the KV-2670R. Well, that will have to do. Hopefully, the Sony engineers didn't get carried away with 'improvements' between those two models. I only photocopied the AC input/standby power supply and microcontroller pages assuming that since there were indications of HV, the deflection and signal circuits are probably fine. Hopefully.
First problem: how to get at the circuit board? Well, it isn't finding it or even the available free space around it - the cabinet is *mostly* empty space. Rather, working on the floor is just not convenient! So, Dave and I clear some bench space and man-handle this console up onto a regulation lab bench. I put some blocks underneath to prevent it from rolling off (it is on wheels). Now, it looks kind of strange but access is perfect. At least no VIPs are expected that day!
A couple of snaps, release a few cables, and the solder side of the mainboard is accessible. The components are even labeled.
Hey Dave, check the voltage on C114. "Uh, I don't see a C114". How about C115? "No, wait, yes. Around 1.5 V". It should be +5.1 V. OK, how about across C609? "Wait...... 47 V." Are you sure you are on C609? It should be 129 V. "Yep, 47 V." What is connected to it? "Just a sec.... From the plus side, D603 bar, C608, C114 plus,..." What about the minus side? "Let's see, L604, C114 minus,.." OK, that checks out. Here, I brought some caps just in case... Put this in place of C609. 10 uF, 150 V.
A couple minutes later. Ready, plug it in.
At once, there is lots of static on the screen and few seconds later, snow appears. As usual, reception even with our rabbit ears is terrible in the lab. We finally find a UHF channel that has a signal-to-noise ratio greater than about .1. A broken VCR (at least the blue screen wasn't broken) worked fine. Later, we would leave it on Channel 57 or something playing the usual afternoon cartoons.
I later tested the original C609 and found it to be totally open. Its rating was 10 uF, 250 V. A dead TV contributed one that was 10 uF, 200 V. That will have to do since Frank is leaving the country in a week (I wonder why!) to return home and there is no time for an MCM order. The maximum voltage on it should be less than about 160 V under any conditions so this should be fine.
At this point, the only remaining problem is that the TV seems to be finicky about powering on and off. Not due to any power supply problem but rather it appears to interpret the button press erratically. Suspecting contact bounce due to a dirty pushbutton switch, I had Dave swap two of the switches but this made no difference. Once it comes on, it is solid and once it goes off it is solid. Just, sometimes it will decide not to cooperate. This seems to be worse when it has been on for a while. Another capacitor?
I asked Dave to bring in a Sony remote control to see if it behaved the same way with that. I wasn't around when he did so but claimed that "it 'worked well enough for me' so I left it at that and told Frank to get the BIG TV out of the lab"! Well, at least Dave knows when to quit.
Comments: The flickering standby LED kind of guaranteed that it would be a problem with the standby power supply. Since there was some power, it had to be a simple problem like a dried up capacitor. Fortunately, this Sony was close enough to the model for which I has service data - most of the part numbers seemed to match - that finding the culprit was very easy. However, even if it had not been the case, some quick checks of the parts in the vicinity of the AC line input would have found the bad cap in short order.
Symptoms: Originally, colors were messed up across the screen resulting in areas of colors shifted between red, green, and blue. After the power surge, it was totally dead... I am not sure which was really the worse situation.
Testing: The front bezel was slightly cracked and there was an ominous rattle from inside. After the power surge, well....
When I first saw this disaster - the first time - the complaint was that all the colors were messed up. Once I was told the story, it was nearly certain that the cause was something mechanical - unfortunately likely to be in an inaccessible location inside the CRT.
First step: Remove back. Actually, let Tom remove the back. :-)
The only visible damage appears to be that the mainboard broke loose and is just sitting on the bottom of the cabinet. No real damage to the board itself or the circuitry.
Powering the TV reveals serious purity problems. A roughly vertical band in the middle has the correct colors which then transition in a rainbow pattern toward the upper left corner (red-green-blue). Similarly, toward the right edge, the colors transition once or twice. Not promising.
Manual degaussing does absolutely no good.
External degauss was attempted with power on to confirm that it was not a magnetization problem. Similarly, this does absolutely no good.
The yoke and purity magnet assembly seem to still be solidly locked in place and adjustment of the purity magnets has no useful effect.
The only conclusion can be that the shadow (slot) mask inside the CRT either deformed or popped loose due to the impact.
At this point, the TV was pronounced incurable and sent home to be used for video games hoping the kids wouldn't notice the weird colors or think that they were abnormal.
Six months later, a large truck hit a substation transformer. This apparently resulted in a 12,000 V feed falling across a low voltage line sending mucho excessive voltage to an unsuspecting neighborhood. It made the news in a big way.
Many many houses were affected with lots of blown stuff. Geez, if I could have driven around there for the next few weeks on trash days, I could probably have collected all sorts of late model electronics - much of it (as you will see) having easily corrected problems (as opposed to this TV).
Tom comes in one morning mentioning the power surge and I volunteer as usual. Sure, bring the stuff in (not really knowing what to expect).
So, this unlucky TV shows up again. This was a couple weeks after his toasted Panasonic VCR was brought in only requiring a new fuse.
In the case of the TV, it turned out that a fusable resistor sacrificed its life to protect the fuse. For testing, a jumper was used in its place but a proper replacement was ordered for the permanent repair. Sure enough, the set comes back to life. Unfortunately, the colors are still messed up...
There is one other possibility to at least reduce the severity of the color problem: refrigerator magnets. If a compensating magnetic field can be created, the beams might be convinced to hit the proper phosphor dots! The next day, Tom shows up with a bag of all sorts of small magnets and by the time I take a look, there are numerous warts pasted around the perimeter (as well as further back) of the CRT.
"Hey Sam, why do these magnets vibrate when they are brought near this thing on the tube"? This of course is due to the 60 Hz field current being pumped through the vertical deflection coils. The effect is very noticeable up to several inches from the yoke.
"Hey Tom, did I mention that the fat red wire here has about 25,000 V, this thing with the coils (the yoke) has 1,200 V pulses on it while the set is on, and that you probably don't want to let the TV fall over again with the picture tube all exposed like that?"
Well, Tom survived somehow.
However, poor Tom was only using a VCR's blue screen to position the magnets for a pure blue screen. What he didn't realize (and I forgot to mention) was that the geometry was being quite thoroughly messed up while the purity was being repaired. Thus, when we played an actual tape, the colors were now more or less correct but shapes were distorted. Oh well, you can't have everything. Tom will have to decide which will keep him (or his kids) happier.
Comments: On a 31 inch CRT, the shadow mask is a thin sheet of metal 2 feet across. Drop the tube on its face and it is likely to distort or pop free. This wasn't a slight bump as the bezel was cracked and the mainboard broke free. It has been suggested that in this case one should then drop the TV on its back to reverse the effects of the original fall. I don't think Tom is quite willing to try this....
Symptoms: One can just barely make out a dial tone - very faint. Buttons do seem to produce tones or pulses depending on the switch setting but these do not make it to the phone line. Side-tone does work.
Testing: Tried different cords (both base and handset), whacked and pounded it - no change.
Rich brought in both a Fisher VCR that eats tapes (boring - bad idler tire) and this cheapo phone. Well, it takes all types.... He said he was trying to determine why the phones in his house went dead and tried in the 'test' jack, wherever and whatever that might be. Then this phone stopped working everywhere else.
Indeed, plugging it into a known good phone line results in just barely being able to make out the dial-tone. Nothing else works.
I figure it is probably not worth spending a lot of time on this thing. After all, it is not what you would call valuable in any sense of the word. Check for bad connections, test semiconductors for shorts, clean the keypad. That is about it. Maybe I will get lucky. It has happened in the past.
First, the base unit. One screw to remove the cover. Not much in here. Just the bell (a real genuine gong, none of this piezo buzzer stuff). There is nothing here that is the least bit suspicious - the on-hook switch seems to be in good condition and does function even though you cannot really hear it too well.
The handset is more interesting. A bunch of transistors, diodes and rectifiers, other stuff, and a single chip.
Prodding the circuit board has no effect. Even my Magic Spit(tm) is utterly worthless - can you believe it?! No change except a couple of pops from the earpiece.
I check all transistors and diodes for shorts - none.
I remove the keypad rubber pad and check for stuck keys - none.
I was about ready to pronounce it dead-dead when a lone part on the bottom of the circuit board caught my eye. What is this? A blue diode? What sort of diode would dress up in *blue*. Checking across it reads about 50 ohms on my VOM. That doesn't sound right so I unsolder one end. Still 50 ohms. I can just make out the part number - ITT ZPD120. My ECG Guide shows this to be a 120 V 1 W zener diode.
For testing, I just leave it out since I don't expect any phone calls that might produce a ringing voltage (which is the only situation where there could be anything approaching 120 V outside of a lightning strike).
Sure enough, the phone now works perfectly.
I don't have anything like a 120 V zener in my junk box. However, a neon lamp would probably work in a pinch to protect against the ringing voltage or voltage spikes. An NE2 would have a breakdown voltage of about 90 V (and sustaining voltage of about 60 V) - close enough for now.
Later on I had second thoughts. Was that really a 120 V zener and not a 12 V zener? Unfortunately, I misplaced the bad diode on the basement floor and by the time I located it, the printing had been obliterated. Therefore, I did a little circuit tracing.
The zener was across the output of the bridge rectifier connected to the phone line. From the types of transistor (HV - 300 Vcbo sort of things) and high value resistors (100s of K ohms) I conclude that indeed the 120 V is probably correct. In fact, it would appear that a voltage divider is set up (100K/2K) such that one of the transistors would just turn on in response to the ringing voltage.
Just to be sure (well, for peace of mind - other parts would have blown if my conclusions had been incorrect), I dialed the phone from my computer line a couple of times to check that it rang correctly and didn't explode.
Comments: There is no way of knowing what caused the zener to go bad. Maybe ESD (Electro Static Discharge), maybe Rich's electrifying personality. Nah, forget that option! More likely he somehow managed to plug it into a power outlet.
The diode actually looks like an afterthought - mounted on the bottom of the circuit board across two pads with no component marking of any kind. The designers probably found out the hard way that such protection was needed!
Symptoms: Dead-dead-dead.
Testing: Not a cord or outlet problem.
Actually, Dave had been talking about buying a bunch of horizontal output transistors (as in 3 just in case) from MCM Electronics for several weeks. Seems this TV blew the HOT and a fusable resistor before I saw it. Finally, we placed the order....
The day after the parts arrive, he comes in. "Well, the flyback is arcing". So I asked him if he had tried taping over the location of the arc.
One week later. "Well, I put a bunch of layers of electrical tape over the cracked area of the flyback and then it started smoking".
OK, bring it in. Without knowing whether anything else has been fried by the bad flyback, it is probably not worth investing in a flyback. If the arc got into the signal circuits, anything could be fried.
The following week, the TV shows up. Without powering it up, I open it and then connect my series light bulb AND Variac gizmo. I really was just doing this for the entertainment value (not the shows) rather than seriously fixing the set. The friend of a friend of Dave who was our 'customer' had already decided at that point not to pursue a repair since there was no assurance that a new flyback would not be just the first of a long line of replacement parts.
My plan was to confirm that the flyback was beyond redemption and strip the carcass for parts (like the still surviving replacement HOT).
Now for the action! As the voltage is brought up, the light bulb glows brightly (from the degauss circuit) and then goes dim as it should but sure enough, the set starts smoking. Some closer examination shows that the smoke is not coming from the flyback but from somewhere *under* the mainboard. What do you know!? There are a couple 1/4 watt resistors tack-soldered in place. It looks like the location where a fusable resistor would live. What the heck. I remove the resistors and put in a jumper wire. As long as I use my series light bulb, it should not be a problem. And this is just for fun anyhow!
Now, no smoke, but there is indeed arcing under the bandage (electrical tape) Dave has installed on the flyback.
Now I cannot resist the challenge. I would really like to be able to get it working well enough to confirm that the rest of the set is undamaged. Well, first step is to rip off the tape and see what is actually there. Now, when power is reapplied, it appears as though the arcing is from within the area of the focus and screen pots.
I then unsolder the flyback from the set and pull off the jerry-rigged focus connection (no solder of course!).
So, I get out my hacksaw and Vise-Grips (OK, no Vise-Grips but a rather large screwdriver used as a pry-bar. You guessed it. I cut around the periphery of the focus/screen pot cover and pry it off. Interesting low cost design. The 'pots' are just screened on resistor material. The knobs just seem to have a sort of conductive plastic or rubber for wipers. Probably good enough.
After a little cleanup, I give it another try. Now, no arcing but of course, no picture either as the CRT screen (G2) is not connected. I can solve that! Some careful positioning of the focus and screen wire ends (hanging off of the CRT neck board) in contact with the resistor material on what is left of the flyback! This should work. However, adjustments will be really tricky. :-)
Sure enough, it is now possible to power up the TV and even tune in our favorite channel 57 broadcasting the afternoon cartoons.
I must have guessed pretty close - the focus isn't too bad and the brightness is about right.
Hey Dave, the TV is working... "Uh, yeh, sure." Really. Adjustments are touchy.... BTW, what was the value of that fusable resistor. "Probably 2 or 3 ohms." Why were there a couple of 22 ohm resistors installed? No wonder they smoked! "I noticed that.....a little too high, huh?"
Of course, Ed came over to watch all of the clowns at play (but from his usual safe distance, being a 5 volt TTL type).
As it turns out, the 'customer' reconsidered and has now decided that it would be worth springing for a new flyback now that we knew nothing else is broken.
Comments: No, I would not recommend this as a permanent repair. Even taping or insulating a flyback is somewhat risky if a new breakdown path develops. Had I known exactly where the arc was located, I probably could have done less of a hatchet job on the flyback retaining use of the focus and screen pots - knobs and all. The actual path of the arc seemed to be from a corner of the cover via the surface of the rest of the flyback to the core.
It was important to confirm that nothing else had been blown by the arcing (the original HOT and missing fusable resistor had been the first casualties). Having done this, one can confidently order parts knowing what to expect.
Symptoms: No reception. A/V input works fine.
Testing: Tried with antenna and output from VCR.
There apparently was a history to this set....
Ravi came in and said "I have a Sony TV that doesn't work."
Right, so what else is new? This isn't the same one Dave and I repaired before, is it?
"No, a friend had borrowed the TV and it broke about six months ago. He attempted to repair it by replacing the IF box, whatever that is."
How did he know to do that? Did he see it on the Net?
"Uh, perhaps. Now it doesn't work at all."
OK, bring it to the lab.
Sure enough, there is nothing when using the RF input. Connecting it to a VCR's RCA jacks results in a perfect picture. So, maybe the problem wasn't the IF box or maybe the repair wasn't done correctly. I, of course, expect that the original cause were the infamous bad solder connections Sonys are known for.
It didn't take long to determine the problem - nearly every pad to the IF box had been ripped off of the circuit board!
Hey Ravi, what did he use to repair this thing? A blow torch? I have never seen a worse soldering job. It took a minute or two, but Ravi finally realized what I was talking about. Hey Dave, you have to see this....
Hopefully, the new IF box wasn't actually damaged by the attempt or by being only partially connected (mostly not connected).
It required about 20 minutes to install jumper wires to the nearest component pins on each trace. Even where there was some sort of pad remaining, I added jumpers to be sure there would be no problems in the future. I just hope this IF box doesn't develop internal bad solder connections. Whoever ends up working on it will be in for a real treat. Guess who that might be? :-)
And, presto! Reception is now perfect - at least to the extent that can be tested in our lab which is to say, at least there is now snow and the VCR's channel 3 and 4 output works fine. Ravi later told me everything else was fine as well.
Comments: One assumes that those reading the repair guides have some minimal desoldering equipment. However, this episode prompted me to add a section on the need for proper tools to both the GE/RCA and Sony FAQs.
In this case, I am sure Ravi's friend didn't get his advice from the Net as there was a problem report form from "Tom and Joe's TV Repair" or some such place (hope not anyone reading this). So, the set was probably taken in for an estimate but Ravi's friend figured he could save some money..... Too bad I don't charge for this stuff - I could have cleaned up!
Symptoms: Dead as a brick.
Testing: Tried with and without a source of video. Of course, coming up with a CGA output was a bit of a challenge but a classic Toshiba laptop came to the rescue.
So I found this thing sitting in the middle of my office floor one morning. As usual, I just stepped over it and went on with my business until the donor came around to say something.
So Andy, what is this thing??? "A friend of mine was cleaning up and was going to throw it out. Of course, I said I knew someone who would probably take it. He thought it could be fixed." How? "I don't know and I haven't tried it."
Of course, Andy is a MAC person so the last comment, at least, is not at all surprising. :-)
The monitor is indeed very dead. Getting at the mainboard proves to be quite a challenge. There are many shields. Even just being able to probe the bottom of the mainboard requires 20 minutes to remove countless screws.
No fuses blown.
B+ appears to be present on the output of something that looks like a linear regulator. It is also present at the collector of the horizontal output transistor (HOT). Nothing appears overheated. Since there is absolutely no response of any kind - no initial static or even a tweet - it is not likely in HV shutdown.
Checking at the base of the HOT, there is no drive of any kind at any time.
To determine how base drive is obtained requires tracing back from the base of the HOT. This goes to the usual driver transformer. The primary side of the driver transformer appears to go to a multilegged chip - likely a combined H/V deflection processor.
There is nothing on the pin of this chip that goes to the driver transformer but there is apparently power to the chip. The output appears stuck low. Wait... There is just a hint of a pulse at the horizontal frequency (around 15.7 kHz) free running. What about on the supply side of the driver transformer. Is the chip shorted? I unsolder the pin. Still almost nothing on either the isolated pin or the transformer. That cannot be right - that transformer pin should now be pulled high. Double check - yes, there is power to the other side of the winding.
We have an open transformer primary!
Unsoldering the transformer (4 pins) and testing out of circuit confirms an open winding. So, how could that happen? It really could only be a case of a manufacturing defect. There are no signs of overheating or other stress.
Now for the repair.....
This is a simple straight core ferrite design so it is easy to get at the windings, at least.
The primary of the transformer is wound *under* the secondary. First, I peel off the mylar insulating tape and unsolder the start of the secondary. After noting the direction of the winding, I remove the wire saving it as I will just replace it when the primary is fixed. It is only about 20 turns.
I then peel off the mylar insulating tape between the two windings.
Fortunately, the break is just about at the terminal so that it is not necessary to unwind the entire primary (which has many more turns - the ration is probably at least 4:1, perhaps much higher.)
I inspect the other connection as well but it seems fine.
After unwinding one turn (no one will ever know) I carefully resolder the wire making sure not to nick or damage it.
Then, I replace the mylar tape, secondary winding, and outer insulation.
That should be as good as new.
Sure enough, the monitor comes back to life.
Just when I thought I was done and about to button up the case, I try is once more. What is this? No vertical sweep. OK, must be a service switch inside somewhere that got knocked to the service position. Yep, after a couple of minutes of panic, I find it toward the front of the mainboard. I probably bumped it when replacing the transformer from the top of the board. No, I really did not want to disassemble this thing again.
Comments: The only possible explanation for this sort of failure is that the wire was nicked during assembly and eventually, the small but persistent vibration of the transformer at the horizontal frequency and/or thermal cycling finally caused it to break free. Considering the wire size (probably #34 at least), such damage could happen quite easily. At first I was concerned about some cause like a shorted chip resulting in overcurrent but I do not believe this was such a problem.
Although this monitor is much much simpler than modern SVGA monitors, this sort of problem could occur with either.
Symptoms: Dead-dead. Not much info. "The computer doesn't work" is about as much as was forthcoming.
Testing: No response of any kind when plugged into computer or wall outlet.
I had put this state-of-the-art 386-20MHz system together from spare parts for my cousin Kathy's three kids (ages 8, 8, 9) to use. Kathy knows next to nothing about computers though she does somehow manage to use a Mac Plus for letters and rumor has it that she has even logged onto AOL at least once from the PC.
I originally found the Tatung monitor along the curb with some cast off Atari PCs and an EGA monitor. I grabbed the monitors, too bad about the computers! Both monitors worked fine - no Repair Briefs material at that time.
About 3 months after giving them the system, I get a frantic call from the oldest: "The computer doesn't work. The screen is dark but it makes some noises like it wants to work." Did you see what happened? "No, it just wouldn't come on." OK, I will be over. Just in case (actually a sure thing), I take a spare NEC Multisync II to be used in place of the likely dead monitor.
Sure enough, not even the power light is lit. Swapping the monitors makes the kids happy and Kathy as well since she doesn't need to keep hearing their whining.... I have offered repeatedly to give them another pair of computers but there really is no room......
Getting inside this monitor isn't too bad and the power supply is a separate unit which is easily removed - 4 screws or so and 4 or 5 connectors. It will also be possible to test the supply outside of the chassis which will be convenient.
One problem appears immediately - a blown fuse on the AC input to the power supply. Testing shows a dead short. The posistor is on a separate fuse and it is fine - darn, that at least would have been easy. :-(
It takes a few minutes of unsoldering various components to discover the problem - the main switching transistor of an STK7406 switching regulator is shorted. Unsoldering that single pin restores resistance to normal.
There are actually two virtually identical sections to the power supply board. Both use similar STK parts and have their own apparently independent feedback for regulation. However, only one of these is controllable via a signal from the mainboard - this is likely the deflection B+ which must vary based on scan rate. I considered swapping the STK7406 for its mate but decided that not only was that risky but I really would be sure of what I was seeing with only one side active.
So, I at least need to order a new STK7406 but what caused it to go bad?
This is where not knowing the actual events that led to failure will always leave a lingering doubt. There are no other obvious problems. Was it left on overnight? Perhaps, without video input? Would this matter? Did it overheat? Were the kids screwing around with Windows or switching screen resolutions? (The last one I rather doubt as they have strict instructions which appear every time the PC boots not to mess with it!)
I test nearly every electrolytic capacitor on the power supply board with an ESR meter - all appear fine. No bad solder connections are in evidence. There are no other shorted semiconductors.
OK, I will order the parts and just be very careful in the initial testing.
Three weeks later......
The new STK7406 and fuse are installed. I am going to start with a Variac and 100 W light bulb to be safe. The power supply board is propped up next to the monitor with suitable insulators to prevent shorts.
Power! The light bulb comes on brightly and then dims out as it should. There are some erratic flashes on the screen at around 100 V - jumpy vertical as the scan seems to start up and die. Well, that could just be too small a light bulb.
Next, I try a 150 W PAR floodlight. Not much different. At low line voltage, bulb glows quite brightly as though there is a bad region of input voltage where excessive stress may exist. It doesn't seem to recover at normal line voltage.
I will give it one more chance before declaring there to be other problems. Now, with a 300 W light bulb, there should be no excuses! Hear that?
Sure enough, bringing up the voltage slowing results in the bulb glowing brightly at lower voltage but it recovers when full line voltage is applied and a normal raster appears. Watching the glow of the bulb is instructive as my test PC boots - it increases in brightness just a bit. Then, when switching into Windows at 800x600, the brightness increases another notch. Still just barely glowing.
I put a clip-on AC ammeter in the line circuit but this really doesn't show anything more than the light bulb. Current is well within specifications. Only a comparison with an identical monitor could truly show up any difference.
Removing the Variac and using the power switch results in no sudden increase in bulb brightness except due to the degauss coil (the first time after having been off for a while). Thus, it really doesn't like low line voltage. Could a brownout have been the original cause of the failure? How about flipping the power switch quickly off and on again?
Comments: This is a case where the failure is obvious but the cause may never be known. I am tempted to leave the light bulb in place all the time when it is used. Whether that would save the STK7406 from subsequent failure should the same conditions arise again I do not know. In the meantime, the kids are using the NEC which interestingly appears to use a very similar design as I found out when swapping a mainboard on one of these for my friend Bill. The external controls and internal construction are too alike to just be a coincidence. The Tatung is probably a reduced cost knockoff of the NEC MSII.
Symptoms: No response of any kind - not even the display - using the AC adapter.
Testing: The AC adapter tests fine. I even tried another one without any better success.
The first real test is to determine if the CD player will work from the battery input rather than the AC adapter. The normal battery pack is a 4 V rectangular lead-acid type.
Four volts is close enough to 5 V minus a diode drop so I connect the battery contacts to a logic supply in series with a handy diode I found sunning itself on the floor...
Sure enough, all functions are normal. Hey Arnold, it works fine with this nice 100 A power supply but it may be just a bit too heavy to carry around. :-)
So, the problem is in the power circuitry. I suspect that the AC adapter output is supposed to be converted to 4 V from which all the CD players circuits operate.
The bottom comes off after removing just a few micro-screws but this is one of the all metal super thin Sony Discmen - and impossible to access for repair.
The power input/regulator/converter is all crammed on a 1/2" x 3/4" circuit board with lots of very very tiny surface mount parts. Only the solder side is visible. Thus, the surface mount parts cannot be probed without additional disassembly. There are no obvious cold solder joints or other evidence of bad connections. The DC jack seems in good condition and checking voltages with a multimeter reveals that power is making its way onto the board. Something is faulty in the power conversion circuitry.
So, I have two choices:
                 D1          I +-------+ O          D2
    Vin (+) o----|>|---+-------| 7805  |-------+----|>|----o Vout (+)
               1N4007  |       +-------+       |  1N4007
                       |           | C         |
   Sony 9 V          +_|_ C1       |          _|_ C2     Battery
   adapter            --- 10       |          --- 1 uF   terminals
                     - |  uF       |           |
                       |           |           |
    Vin(-) o-----------+-----------+-----------+-----------o Vout (-)
An aluminum plate (a piece of roof flashing) was attached to the regulator to
serve as a heat sink. D1 provides reverse polarity protection. D2 reduces the
output of the 7805 by one diode drop. This produces about 4.3 V under load
which is close enough to the output of a fully charged batter pack.
Wires were soldered directly to the DC jack and routed into the battery compartment. The original connections to the internal voltage converter were cut.
OK Arnold, it seems to work fine. "What do I owe you?" Only charge is that if you ever decide to dump it, send it to me. It is a nice example of Sony equipment when the Sony name meant something. "Sure."
Comments: I could have made this into a major time consuming repair or opted for a short cut. Since the battery was never used, why spend a lot of effort when a simple regulator could replace the functionality of the defective circuitry? In principle, the original wiring could be restored - and then the original problem could be remedied. For now, it works fine as far as I am aware.
Somehow I don't think I will ever see this player again as Arnold has since moved to Japan. :-)
Symptoms: Fuse blew. Of course, what did I do? Put in a larger fuse! Then other stuff blew.... I just figured it blew due to the overload, not to its parts shorting out. Right. :-(
Testing: It doesn't take a series light bulb, Variac, or rocket science to now see that this is a very blown power supply with a dead short on the power line!
OK, so this was from my younger days and was the first switchmode power supply I had ever attempted to repair other than bad connections and the like. It was also the first (and hopefully, last) such supply that I blew so completely and in such a spectacular manner! (I won't mention that other one that billowed smoke from its main filter/doubler caps after blowing the switchmode power transistor due the slip of a scope probe....).
The original problem was a result of miswiring of the power inputs to the radio/cassette: a clip lead was shorting +12 to ground. No problem - these supplies are short circuit protected, right? WRONG! Or, at least, not entirely. I may have been operating it on a Variac and increasing the voltage gradually without realizing that there was no voltage across the power inputs to the radio/cassette. At some point - POW, the fuse blew with a bright flash. It was all down hill from there!
This is a really cute little cased switcher which is the only reason I spent several hours and $10 or so for parts to repair it. It was more a challenge than anything else. I may never use this supply for anything again before the Sun becomes a red giant. :-)
Known casualties in the parts department:
I suspect that only a couple of parts blew at first but the rest of the components let out their smoke when powering up for the second time. There is no way to know for sure at this point and I am not about to recreate the disaster!
All the fried discrete semiconductors were dead shorts so it just was a matter of checking each with a multimeter. The HA17339 wasn't totally shorted but had a low resistance on its power-ground pins so I guessed that it, too, was bad.
I traced out the entire circuit which wasn't fun or quick. It took a while to determine that the HA17339 was just a common LM339 clone - Internet search engines didn't exist back then.
I replaced the HA17339 with an LM339 in a socket. Removing the original part wasn't easy even with my SoldaPullit - I damaged a couple of pads which needed to be jumpered.
For testing, I substituted a BU406 which I had handy from a long stripped video display terminal.
Using a Variac (no light bulb at that time), the supply came up properly and ran without smoking. I then installed the proper transistor. Next power-up it worked fine but when I removed the Variac and plugged it directly into the wall, it was lifeless again. I feared the worst but as it turned out, only an underrated resistor had opened (the fusable resistor I had temporarily replaced with a 1/4 watt film type). After installed the proper resistor, it seemed happy as before. I just will now know not to attempt to drive short circuits!
Comments: This was my first exposure to SMPS repair and also to 2S part numbers. When I first ordered the 2SD467 it was a guess - that the part in the MCM catalog was really what I wanted. Well, everything has to have a first time. If this weren't such a cute little supply - and I wasn't to angry at myself for blowing it up, the time and effort would not have been justified. In fact, it was relegated to the scrap bin until I saw the light with respect to parts identification.
Many SMPS designs are robust only near full line voltage. At lower voltage, the pulse width modulator struggles to achieve regulation and succeeds or kills everything unless the designers specifically took these conditions into account and provided appropriate current limiting. Just claiming that a supply is short circuit or overload protected is not enough. This is one reason brown-outs can be hard on equipment.
Symptoms: The right channel is stone dead. No hum, no noise - not a thing.
Testing: Double checked inputs and tried several, whacked it (to wake up any speaker relay) or bad connections, switched input selector back and forth. No effect of any kind.
With absolutely no hum or noise on the dead channel, the problem is probably not in the input circuitry or preamps. There would be some evidence of life in those cases - some low level hiss at least.
The nice thing about stereo equipment is that there are two of nearly everything. Thus, comparing signals, voltages, and resistances can be effective even without a schematic.
Unfortunately, these assumptions led me astray......
Big audio amps are often designed along the lines of power operational amplifiers. They have several voltage gain stages and a final power/current gain output driver - with negative feedback around the entire thing. One implication of such a design is that intermediate signals may look strange even when the unit is operating properly.
In this case, the intermediate signals on the good channel looked like hum and noise while the similar signals on the dead channel appeared to be normal audio.
Among the problems found were bad solder connections on the pre-driver transistors due to their running hot (no heat sinks) but repairing these had no effect on the original problem.
Fuses were all good. Checks of major power rails showed them to be healthy.
Finally, I was convinced that the most expedient approach would be to swap the finals - STK0080 hybrids. There is always a slight chance that swapping power components can blow the previously good part but since everything else appeared normal, what the heck. They are only 10 pin devices and less than $20 in any case.
Five minutes later, sure enough, the right channel seemed to be working normally and the left channel - was, well, missing a hybrid!
However, now there appeared to be some noise and erratic behavior when powering up. One or both channels would not come on as soon as the speaker protection relay clicked but at some random time later. The input signal source selectors did not appear to have any effect on the noise but tapping the relay revealed that it was at fault. Fortunately, the top poped off easily and some contact cleaner and burnishing restored it to health at least temporarily.
Comments: As noted, most stereo equipment has a distinct advantage when troubleshooting in having duplicates of nearly everything but the power supplies. Therefore, it is pretty easy to locate obvious shorted discrete parts by simple comparison measurements. Even testing of the hybrid modules may have been possible in this way though I did not think to try. However, with a design depending on a closed high gain feedback loop around nearly the entire system, actually looking at signals can be misleading unless you are aware of the possible implications of what is being observed. In this case, the power supply rails had substantial hum (normal) and signal points did not have anything resembling a signal on the working channel - rather it was just low level noise and hum. Buried in there somewhere was the actual signal. The similar test points on the bad channel had a reasonable audio waveform because without proper feedback they were operating at a much higher level than was normal. It was probably highly distorted but was more recognizable as an audio signal.
Symptoms: Powering without keyboard or mouse seems to result in attempt to boot from diskette which is stuck in the internal drive. However, without a keyboard or mouse, it is not possible to attempt to eject from software. The paper clip in the eject hole doesn't work either - it is jammed. The hard drive does not spin up.
Testing: I borrow a mouse and determine that the computer itself seems ok except for the uncooperative diskette drive. The hard drive remains dead.
This poor little Mac was sitting by itself along the side of the driveway at this garage sale that also had other interesting items but the Mac seemed almost useful. I probably would have gone higher than $25 but wasn't about to argue. (Recently I picked up a Mac Classic at a flea market for $5 but that is another Repair Brief!) They did say the hard drive probably didn't work either....
In fact, it came in handy when my cousin was given a Mac Plus system with a dead flyback. A flyback transplant confirmed that nothing else was broken and got her up and running nearly instantly. :-)
First step is to see what is wrong with the diskette drive.
Of course, opening any of the single piece Macs is always a joy unless you have the proper foot-long Torx (or hex) wrench to get at the two screws under the handle. I did not and so was forced to improvise. I ground down the end of a triangular metal file to a shape approximately a Torx. As they say "If it works, use it." And, no, you don't need an Apple approved 'case splitting tool' to get the back off. With care, a pair of wide flat blade screwdrivers work fine without damaging anything.
With the cover removed, it is a simple matter to remove the diskette drive. A close examination reveals that a little bracket that is part of the eject mechanism was somehow bent out of shape - short work for my needlenose. The grease - a common problem with older Mac diskette drives - appears to be in as good as new.
It doesn't appear to be defective or weakened in any way. My guess is that someone attempted to pull a diskette out of the slot by using a pair of pliers rather than the paper clip or software. I cycle it a few times using the slightly abused but still serviceable diskette and a paper clip - as good as new!
After replacing the diskette drive I confirm that it will boot with a known good system disk. It even ejects on command. What more can you ask?
Next, the hard drive. There seems to be no sign of life from this. The power switch does nothing as far as I can tell. Possibly the ready light flashes on momentarily, but that is about it. No spinup sounds at all.
After removing the cover it is necessary to blow out several years worth of accumulated dust before checking anything electronic. The controller and drive itself do appear to be receiving power - the chips get warm at least. :-)
Could it be sticktion? This system probably has not been used in a quite some time. Fortunately, this is one of those drives ('some user serviceable parts") where the spindle motor flywheel/magnet is readily accessible once the drive is removed from its mounting.
The flywheel is quite stiff. Actually, this is probably not actual sticktion where the heads glue themselves to the platters but just dried hardened grease. I spin the flywheel back and forth a few times by hand. This seems to loosen it up considerably. I then reinstall the drive on its mounts.
Sure enough, it now spins right up and the Mac even boots - slowly but what do you expect? - revealing some useful word processing programs, tons of games, and a database of horticultural information. Not bad for an hour's work.
I can hear you all saying: "Joy, a computer with the power of my digital watch and the features of a boat anchor!".
Sure, but (1) this was a few years ago and (2) this became the one of the Macs for my cousin's three kids (who now have a state-of-the-art 386-20 as well)! I still have the hard drive but really don't know the location of the system unit as we have played musical chairs with the Macs several times at this point (but I would have heard if it stopped working).
Comments: Whether you like Macs or not, one cannot deny that the Mac Plus was a cute little computer that could do useful work and had a user interface that surpassed anything from Bill Gates at the time - perhaps even today. Most of the time, problems with these computers were easily diagnosed and easily repaired - burnt Molex connector pins and blown flybacks are two popular failures.
I have not had a reoccurrence of either the diskette or hard drive problem despite it not being used all that much but I guess 'not all that much' beats 'not at all' by a wide margin.
Symptoms: Goes through all the motions but nothing appears on the paper. Cleaning/priming doesn't help. Both cartridges are not likely empty!
Testing: I use the built-in test initiated by holding down the FONT button while powering up. Nothing on the paper.
So Joe comes by and mentions that this printer has been acting up for several months now. This is on his son's computer so I imagine Joe is not that eager to have it working properly - considering the high cost of color cartridges.
He did tell me that he called some place and got a flat quote of $140 to repair it excluding any needed cartridges.
"OK, drop it off but I don't know when I will get to it."
The printer shows up a few days later - no scrap paper to test it with. At least he provided the power pack!
Fresh from my experience with my DeskJet, it takes about 30 milliseconds to locate one problem: the rubber boot that seals the priming station is nowhere to be found. I am not at all surprised that printing is erratic without this. Priming would be useless without the suction seal. Now, I wonder where it went.....
As with the original DeskJet, the top pops off after releasing 4 catches near the corners. Ah ha! There it is... Shading itself on the mainboard! Did some overzealous manual cleaning cause it to pop free? Nah, I doubt anyone in that house would realize that such things need cleaning. It may have just popped off from one of the automatic cleaning cycles - it does seem a bit lose. However, in all my subsequent activities, it stays put just fine.
I clean the contacts on the cartridges and the ribbon cable as well.
Since this hasn't worked for a few months, I clean the cartridges by hand just to be sure - some warm water, patted dry with lint free paper towels. A little blowing in the vent hole on top of the black cartridge, no vent holes visible on the color cartridge.
Ready?
Sure enough, the basic test patterns come right up. Only a couple of nozzles not firing. More cleaning, blowing, priming. OK, now B/W seems to be fine but there is only a hint of color - maybe yellow.
Even when executing the ALIGN command, almost no color (magenta) shows up.
I try more washing of the color cartridge. Now, there is a hint of the magenta alignment marks but they are spread from here to kingdom-come. In other words, a vertical line prints as a scatter diagram of dots!
I try some cleaning cycles. These prime the cartridge and then should print stripes of each color. At first, only yellow shows up. After 4 or 5 attempts, there is some evidence of cyan (blue) and magenta (red) appearing at the start of each line but they then tend to die away.
OK, that could just be an empty cartridge. Yellow seems to be fine and there really isn't anything different about it. (This is not surprising as yellow is the least used color.)
So I call Joe: "You know how they were going to charge you $140 to service the printer (hint hint - never works with him! Maybe if I didn't make it sound so easy....), well it appears to just be that a rubber part popped loose and the color cartridge appears dead." You mean it prints in black? "Yep, as good as new."
Two hours later, a new color cartridge shows up.
And, sure enough, this works just fine out of the box.
I recommend that he obtain replacements for the two rubber boots, at least, as they do seem to be on their way out.
Comments: Once again, a simple cause with dramatic consequences. I am still amazed that ink-jet technology works at all given the simplicity of these printers. Of course, that simplicity masks some very sophisticated and precision technology that goes into the cartridge/nozzle construction and controlling firmware.
Nothing serious ever seems to go wrong with these older DeskJets. Now all I need to do is locate a parts source for the plastic guide bar that broke in the DJ855C at the office!
Symptoms: Although there is plenty of gas in the fuel tank, it will not start and shows no signs of even wanting to start.
Testing: Doesn't start at all - no way, no how. There is no sign of even a weak attempt at turning over.
The seller mentioned that all it needed was to have the carburetor cleaned. This made sense though I wouldn't have trusted him as far as I could throw him. :-)
After yanking on the starter cord for a while, I removed the spark plug - dry as a bone. Squirting a couple teaspoons of gas in through the spark plug hole, replace the plug, then crank - and it will sputter to life and run for a couple of seconds. So, the carburetor is a good bet.
Removing the float carburetor on a Craftsman engine is a simple matter - two screws, the fuel hose, and the throttle/governor linkage.
Before taking it inside, I unscrew the bolt at the bottom and drain the remaining gas in the float bowl.
On the bench (actually, on top of a wad of newspapers on top of the washing machine), I disassemble the carb. What a mess! This must be 10 seasons of neglect - icky disgusting green caked on muck. After removing the rubber gasket (as it may be damaged by harsh solvents), liberal use of carburetor cleaner and a roll of paper towels are able to remove most of the build-up. I recall that there are critical holes - orifices - in that bolt. Using some wooden tooth picks, I am able to clear it down to the shiny brass.
There, that should do it.
Reassembly is straightforward - or should be. Now, which hole did that throttle governor wire go into???? Well, that one looks correct but I wonder...
Tighten the screws, replace the fuel hose. Ready?
Wow, that started right up. Might it be running a little fast?
A quick check of the oil. Maybe a bit low. Let me test the mower a bit. Then I can change the oil and check out the air filter, spark plug, etc.
So I mow the back yard. This is a self propelled but the drive engage-lever doesn't seem to stay in the selected slot. Well, something else to take care of later.
Is it running fast??? Even on slow speed, it sounds more like my other mowers on fast. Try fast. That isn't right - sounds more like a 2-stroke. Back to slow.
Bang! Ding! Clunk! Arggggg! Ever get that sinking feeling? Well, I got it.
Something bad happened. Or, as Luke Skywalker liked to say in Star Wars "I have a really bad feeling about this." Or was it C3PO. Well, no matter.
After checking for something under the deck (I didn't really expect to find anything), I had to come to the conclusion that there was a major mechanical failure inside. :-(
That is when I took a closer look at the oil level. Dang - it was much worse than I thought at first. In fact, one could say that all that was left really was the sludge! Geez, what a disaster.
Without even moving it from the spot on the lawn where it died, I start to do the disassembly (or perhaps, autopsy would a more accurate term).
Off comes the cylinder head. Rotating the blade or flywheel no results in no movement of the piston and it is not possible turn it through a complete revolution. I never did find one of the head bolts amongst the weeds....
Unbolting the engine and taking it into the basement:
Off comes the blade. As expected, the blade shear key is broken. Later I discovered that the flywheel shear key was also - sheared.
To remove the front wheel drive pulley requires some careful filing of the burrs on the keyway slot. This will also prevent damage the main bearings when the crankcase (sump) cover is removed. At least I as thinking rationally enough to take these precautions.
Unbolting the cover and a little tapping - darn, the gasket tore. Oh well, it probably would need to be replaced anyhow.
The extent of the damage is now clearly evident (amid the icky disgusting dripping black sludge). Maybe more newspapers would be nice.
The connecting rod is partially broken off from the cap. One bolt is still hanging loosely but the other bolt is laying in the bottom of the crankcase. There is a chunk of the rod laying there as well and a big ding has been taken out of the soft aluminum of the crankcase when the broken end impacted (but that is just cosmetic damage).
Arggggg. This won't be cheap.
Was it lack of oil? Was it the apparent overspeeding? Was it both?
Close examination of the broken parts reveals:
Probably about $25 was the closest they would come. Though, I wasn't exactly sure they even knew what a connecting rod was! Fan belts was more their speed.
Well, I am not going to spend $25 on a $10 lawn mower.
I also tried a lawn mower repair shop. They were even worse (still would't give me the time of day) but quoted $45 anyhow.
That evening I emailed to a fellow Netter among other things that I was thinking of writing a lawn mower FAQ (not actually describing the disaster of the afternoon).
"Speak of the devil.... I swapped cranks in an 'Eager-1' (Craftsman) mower this weekend for a friend. His wife ran into the curb and, well, the shaft was about 9 degrees bent. :-/ He picked up another mower that was 'stripped' but the crank was there... So, it was pretty simple actually. Started the first pull too. :-)"Hey, where did you get the replacement? What did you do with the rest of the carcass? You wouldn't happen to have a connecting rod by any chance???
"I'll check. Does it have a slant gate or a perpendicular to rod? I ask because there are two types, the straight and the slant type."Thanks. It is the slanty type. Here are the dimensions....
"I got the piston+rod for you. The part # is 25-0-25 (rod), 30-0-?4 (cap), 5-0-66 (piston, includes shaft but not clips, sue me. :-) It's the slant-gate one. Let me know if the numbers jive..."Perfect. The '?' in the 30-0-?4 even matches. The piston isn't the same but my piston is fine (send the piston along anyhow, though, you never know when these things will come in handy.
Well, that wasn't so bad. The price was right - just shipping.
The parts that arrived were in perfect condition!
Hey, how many hours on that mower?
"Only about 25 hours before the incident with the curb. :-("I did some rough measurements of clearances using the new rod+cap on my beat up old crankshaft. The crank pin clearance is marginal (large) but no way I am going to hunt down a new crankshaft. It will have to do.
In order to assure that no metal chips are hanging around anywhere, I completely strip my engine, wipe down the inside of the crankcase, and blow out the oil passages, etc.
Everything goes smoothly until I realize that I didn't make note of which way the piston goes (there is a right way and a wrong way) but the Chilten small engine manual comes to the rescue. (Pistons are not symmetric - the piston pin is slightly off-center to account for the direction of crankshaft rotation and the direction and center of force. If it is installed the wrong way, at the very least, there will be excessive piston slap; at worst, parts will just bind outright.
Tightening the rod bolts - the most critical as far as proper torque is concerned - is always fun. It is just possible to get my torque wrench with a 3/8" to 1/4" adapter and a 1/4" socket in place into the confines of the crankcase with the crankshaft in one particular position and alternately tighten the bolts to specification.
All the other parts go together easily. I obtained new gaskets (actually bought them at that lawn mower repair shop) but reuse the old head gasket until I am sure everything inside is fine. Later, I will install a new one.
Timing is obvious since there are marks on both the crankshaft and cam gear.
To assure that the oil pump passages are clear and the pump is working before total reassembly, I add a little oil to the sump, remove the test port screw, and frantically crank the engine with no spark plug installed. After what seemed like the 199th or 200th pull, I realized the darn thing had electric start. Plug it in, push the button, oil starts trickling out of the hole almost immediately. I then replace the screw and then tighten the sump bolts.
I also repair the front wheel drive shifter while I am at it - mostly some careful rebending of the sheet metal but getting to it meant drilling out some rivets and that was not fun.
I replace the carburetor now actually comparing it to one of my other mowers (what a concept) to determine which hole the governor linkage goes in. What do you know, it was the OTHER hole. :-(
Total damage: Broken rod and cap, broken blade shear key, broken flywheel shear key, gasket set, bruised ego.
Finally, I top off the oil.
Now for the test: Not too shabby. It started on the second pull. It seems to run fine (now at a more normal speed) without any excessive vibration or noise. Only time will tell.
Comments: Whether it is a lawn mower or an automobile engine, oil is its life blood. That is why even if you don't do any sort of maintenance on your car, at least you should check the oil periodically and head the oil idiot light should it even come on - pull over, stop the engine, get a tow. Running without oil for a couple of minutes can ruin the engine. Ever seen that TV ad where they drain the oil and then run a bunch of engines till they seize? And, no, synthetic super-duper oil won't save you.
This whole episode was likely preventable if I had actually taken the time to check the oil and had realized that the overspeeding was a danger sign.
How long will it run? I don't know. If it weren't for that clearance on the crank pin, it would be as good as new.
In the end, there was some benefit to this whole affair. It was the stimulus to write Notes on the Troubleshooting and Repair of Small Gasoline Engines and Rotary Lawn Mowers.
Symptoms: Burnt out Stereo Beacon(tm), noisy left channel, weak right channel, tuner stuck on one station, intermittent stereo reception, erratic controls (not all at the same time).
Testing: Where applicable, checked multiple audio sources or stations.
This receiver is from the days when one could buy stereo equipment at record stores (yes, records, vinyl, remember those?). Yes, it is solid state. :-)
Fortunately, Harman Kardon 25 years ago was willing to sell service manuals. I do not know what their policy is today. And, even in 1970 dollars, it was cheap - $3 including postage!
This series of problems occurred over the course of 25 years or so - it isn't as though the whole thing turned to you-know-what one day. :-)
Problem 1: Stereo Beacon(tm) doesn't work.
This one is easy - the usual underrated incandescent lamp has bit the dust. Rather than replacing it with (1) an overpriced part from Harmen Karden that will (2) burn out in a couple of years, I locate a bright LED and 220 ohm resistor. Since this actually runs on DC of about 5 volts from the stereo detection logic, no additional components are needed. The LED will last well into the next century.
Problem 2: Noise on FM only, left channel.
This took a bit little more work. Since only one channel is affected but no other audio sources, this limits the possibilities greatly. It cannot be in the tuner itself nor in anything common to Aux/Phono/Tape inputs. However, it appears as though there is a clump of circuitry unique to FM mode just beyond the tuner. It is apparently an amplifier between the tuner and the source select switch. Why would they need an additional amp? I have no idea but in any case, it is only 4 or 5 components for each channel. The active element, a transistor marked with an HK house number, seems to be sensitive to vibration. At that time, I was more conservative than I am today (and didn't have an ECG cross reference book either) so I actually ordered the exact replacement. Can you believe it? Problem solved.
Several years later, a similar problem developed with the other channel (or maybe it was the same channel - faulty replacement) and guess what? I just threw in a 2N4401 or something like that. Indeed, it sounds every bit as good!
Problem 3: Weak right channel.
This one developed over the course of several months and affected all audio sources but not the Tape Out suggesting a fault in the power amp. The fact that it didn't happen suddenly meant it was probably something like a dried up electrolytic capacitor. Since there were only a few of these in each channel, I simply jumpered across each with a known good cap until the problem went away. (Actually, I picked the big ugly one first - which happened to be the culprit!)
Problem 4: Tuner stuck on unknown station.
While just about to settle into the Evening Concert, what happens? Reception of my classical station is lost and some rock station replaced it. In fact, the tuning knob had no effect whatsoever.
My initial thought was that the tuner was hosed which would be bad news since I really don't like troubleshooting tuners! The service manual does include actual tuner schematics. Since other audio sources work just fine, this would point to the FM tuner.
However, first things first: check power supply voltages. It turns out there is one that is unique to the FM tuner. And sure enough, what should be 10 V reads 0 V!
Well, this isn't anything fancy: resistor->10 V zener->capacitor filter. The zener is a dead short. The resistor doesn't look so healthy either. In fact, while it tests within tolerance, it would appear to have seen better days being somewhat discolored. There are signs of long term overheating on the circuit board as well.
Since nothing else really seems faulty, I replace the zener and resistor with ones rated at twice the power just to be safe. Like the Stereo Beacon(tm) light bulb, these appear to be somewhat underrated as well. I wonder how many cents they saved!
Problem 5: Intermittent stereo.
At first I thought the station I was listening to was not broadcasting in stereo for some reason but after checking a few others dial locations, it would seem that the stereo selection circuitry in the receiver wasn't working. However, prodding and pressing of components on the MPX circuit board resulted in the stereo coming back and staying there. As best as I can determine, this turned out to be a polystyrene capacitor with an intermittent internal connection. Pulling on this component only resulted in restoring correct operation the next time the stereo dropped out.
Problem 6: Erratic volume, mode, speaker select, etc.
Another easy one: contact/control cleaner in the various pots and switches.
Comments: If you get the idea, this receiver has been a problem, you would actually be wrong. It dates to 1965 and has been in continuous daily use since then with no plans for early retirement. While not trouble free, name something you could buy today that would have a 30+ year service life with so few problems and no major failures? My total cost of maintenance over the years has totaled less than $10.
Yes, new audio equipment tends to have control panels that would look more at home in the cockpit of a 777 but that really doesn't make the music sound any better. This receiver is a case study in simplicity and I would be happy to have something modern which is as easy to use and maintain. Speaking of which, my Yamaha R8 now has a case of amnesia - forgetting its settings when powered off. Probably a bad SuperCap but that is for another Repair Brief!
Symptoms: Pickup of handset results in static rather than a dial tone. Repeated attempts may result in dial tone eventually.
Testing: Tried replacing cords and using different phone jack - no change.
This rather nice full featured phone was given to me by the original owner in working condition - this wasn't a problem originally. (The owner, a typical CEO type, isn't happy if his toys are more than 6 months old. OK, he probably didn't actually pay for it either). However, the erratic behavior developed over a period of a few months (a couple of years later) to the point of the phone not being usable.
No doubt a bad connections problem somewhere but where?
Internally, there are several small relays as well as leaf/microswitches for on/off hook. It didn't take long to determine that one of these microswitches was at fault.
Under the lever operated by the handset is a bank of 3 separate microswitches. Two of them seem to be fine but the other would appear to have burnt contacts.
In an ideal world, I would hunt up a replacement - and of course there would be a service bulletin on a modification to prevent the same problem from reoccurring - but this was not to be.
Instead, I carefully unsoldered a pair of the microswitches from the circuit board and popped the top off of the bad one. After cleaning the contacts as best as I could, I replaced the original switches swapped in position. (Unfortunately, I also ripped a couple of pads off with the switches so this complicated the reassembly slightly.)
This did restore operation for a couple of years. I knew I shouldn't have passed up the same model phone at that garage sale! It would have yielded two good microswitches - no doubt the reason it was being sold was this same problem.
I still use the phone for its autodialer and clock but have another (ATT) phone on the same line to grab the dial tone! :-)
On a separate note, interestingly, the phone's instruction manual recommends replacing the NiCd battery pack used for memory and clock backup every two years. That same battery pack has been just fine for the last 13 years!
Comments: This isn't rocket science but how many phones are cluttering up land fills due to just these sort of simple problems? In this case, it is almost certainly a design fault - there is nothing funny about my phone lines. Since the problem didn't occur suddenly, it is also not due to a lightning strike or other one time event. Just, gradual deterioration of an underrated set of switch contacts.
Symptoms: The cat did it! Fell off window sill. The cassette works fine but there is absolutely no sign of life from either band of the radio.
Testing: Sure enough, not even a peep (or meow) out of the radio on AM or FM.
Jeff comes by my office: "Wanna fix a boombox." This isn't that Aiwa disaster is it? (Repair Brief #65: Aiwa CSD-707 Boombox CD Player - Doesn't Recognize CDs). "No, this is mine. Fell off a window sill. The radio doesn't work." OK, sure bring it by.....
So, a couple weeks later, Jeff walks in with this vintage boombox. You really want to fix that thing? It is also an Aiwa, but probably at least 15 years old. "Yep, I opened it up but didn't see anything wrong." Sure Jeff, open it up again. "A couple of the screws are missing and one of the plastic post thingies broke off in the fall." Right.....
At first, there didn't appear to be anything obviously broken so I decide to power it up (after all, Jeff had already done this so the additional risk is minimal). Fortunately, it can be powered easily with the two halves of the case separated.
Sure enough, the radio is dead as a brick. Pressing and prodding produces absolutely no change.
Then I notice something... Uh oh, it looks like the corner of this circuit board is cracked off. OK Jeff, you will have to remove it and it doesn't look like fun as the dial cord seems to run from the main case to the variable capacitor pulley on the circuit board. Better make a detailed diagram of exactly the way this is run so that we can replace the string if it pops loose. "Yeh, sure."
I come back 5 minutes later to find the board removed. "No problem, the dial cord didn't need to be disturbed." Chalk one up for Aiwa - intelligent design. It turns out that the pulley engages a keyed shaft so the string and all the other dial cord stuff remains in place.
With the board removed, the extent of the damage is evident - not really that bad, just two traces that run around the corner of the board. These are easily jumpered from wider expanses of copper near their destinations.
Then, Jeff notices that the other corner is also broken - another pair of traces, possibly extensions of the same ones.
Inspecting the remaining two corners indicates that these survived intact.
Power! Sure enough, the radio now appears to work fine.
Jeff, close it up.
"Sure boss. :-)"
Five minutes later: "I even managed to anchor one of those corners with a the broken piece so that at least 3 of the corners are attached AND I won't let the cat near it again!"
Comments: It could have been much worse - many fine traces run really close to the corners but they were spared. A better mounting arrangement to reduce stress on the circuit board could have been designed (either by Aiwa or for the repair) but these things are only supposed to be subject to reasonable bumps - not total abuse.
I don't know about Jeff. A while ago, there was another boombox - or maybe a clock radio - that had been dropped with similar consequences.....
Symptoms: About half the buttons on the touchpad are dead and even when it is started, there are normal sounds but no heat.
Testing: Not much more can be done without removing the cover.
As usual, the cover comes off easily. It is somewhat gunked up from lack of cleaning but not excessively so. There is a schematic of the microwave generator but as expected, not of the controller.
Since the unit is not totally dead, the main fuse must be ok.
A quick examination of the power circuitry reveals the likely cause of the no-heat problem: a deteriorated lug and terminal on the filament of the magnetron. This likely occurred over time as a slight resistance due to corrosion or the lug just being a little loose resulted in heating and eventual failure.
Rather than attempting to install another FastOn(tm) type lug, I elect to drill a hole in the tab on the magnetron itself and then use a ring lug, nut, and bolt, to attach the wire. There is ample metal for this and once filed clean, it results in a secure connection to a magnetron that would otherwise require replacement.
I inspect the other connections to the magnetron and high voltage transformer (secondary and primary sides) but they appear to be fine.
A quick test with a cup of water shows that the microwave generator is now functional.
To prevent accidental operation of the HV circuits while testing the touchpad and controller, I unplug the connector for the AC input to the HV transformer from the controller board.
Now, for the touchpad. This is not going to be nearly as easy. In order to determine if the problem is in the touchpad (as expected) or the controller (which would be bad news), I need to reverse engineer the touchpad matrix.
For some unfathomable reason, manufacturers never seem to like to use a nice orthogonal logical layout. Each 'row' or 'column' line snakes its way all over from here to yonder. Of course, there is also printing or other opaque paint in random locations to further stymie this activity.
However, there do appear to be two distinct sets of buttons with different behavior when pressed:
To confirm the diagnosis (though I am pretty sure at this point), I go back to the ribbon connector and use a 10K resistor to manually jumper a row and column pin that correspond to one of the bad buttons. Sure enough, that function now responds.
The touchpad is only available from Sears parts at a cost of about $30 but the 'customer' is quite happy to pay this even when informed that the magnetron may be on its way out of this world in the not too distant future. (As it turns out, I have not heard of any problems with this oven and it has been a couple of years now.)
Comments: I have not really figured out the sequence of events accounting for these failures. Perhaps, the no-heat symptom occurred first and the user attempted to convince the oven to cooperate by whacking at the touchpad. If the touchpad problem happened first, the entire oven would have been virtually useless as some of the numbers and other functions were affected.
Symptoms: No air flow at all. This vacuum really doesn't suck.
Testing: The official Corn Flake test is not required to evaluate this one!
"Sam, do you want to look at a vacuum cleaner.". Sure, what is wrong? "It doesn't seem to pick up the way it used to." OK, maybe it is just a belt or clog. "OK, it is in my car. I will get it later."
Trying the vacuum on Paula's office floor, it indeed really doesn't do much of anything. The brush does spin - so the belt is good. The bag is not full. In fact it has nothing in it. The air passages appear clear. So much for those theories.
This will require some disassembly.....
Removing the bottom (or was it top?) cover doesn't reveal anything new. For all intents and purposes, it would appear that while the motor makes the normal very impressive 'mega horsepower' sound, there is no airflow - zero, zappo, nadda.
Naturally, Hoover uses Torx screws for all internal parts. At least it is modular and easily disassembled - two screws to remove the entire motor unit and four more to remove the blower cover.
Ah Ha! Paula, Paula, where are you? Look at at this: The blower wheel has come loose from the motor shaft and indeed is not spinning at all despite the motor noise.
"Can you fix it?"
I can attempt to reattach the blower to the motor but eventually, a new blower will probably be needed - I have no idea how much that would cost.
So, I pile the remains of the vacuum in a corner of Paula's office and will take the motor/blower unit home to work on it. Unfortunately, since the Hoover isn't in any condition to do its thing, the pile of dirt and dust dislodged during disassembly will have to be cleaned up the old fashioned way. Is there a broom in this place? :-)
Well, I thought it was just the plastic blower. Wrong! After some additional disassembly of the motor itself, it would appear that the bearing at the blower end of the motor has entirely disintegrated - balls, race, covers, everything. This was likely the actual cause of the blower failure causing it to rub and then bind resulting in its loosening and becoming detached from the shaft.
Well, I don't keep a collection of ball bearings for nothing!
Rumage..rumage..rumage.... Ah, here is one that has the correct ID and OD but it is sealed on only one side. Oh, well, cannot have everything. I locate a metal washer and file out its hole so it will fit the shaft and protect the bearing - somewhat. I orient it so that this improvised shield in toward the inside of the motor - hopefully, a less hostile environment. I check end play (because of the additional washer) to be sure that there is adequate clearance - there is.
Now for the blower. Due to the effects of the shaft spinning inside the stuck blower, the mounting hole is totally distorted. Therefore, I use a reamer to enlarge it symmetrically and then make a bushing out of some roof flashing to center the blower on the shaft. It was mounted by a nut and this will still work but for good measure, I drip some windshield sealer (similar to Duco Cement) into the assembly to prevent the assembly from working free and then tighten the nut securely. Then some more adhesive to seal the nut.
After allowing this affair to dry overnight, I am ready for the big test!
Using a Variac, I can run the speed up from 0 through normal line voltage to the 140 VAC limit of the Variac with no obvious problem and no excessive noise (well, in a relative sort of way) or vibration. The air flow is really quite impressive!
A few days later when I return to reinstall the motor: Paula, I think it will work for a while - have no idea for how long. If it dies again, we will need to order the proper part. "Great! Now I can clean my apartment."
After putting everything back together, I then proceeded to vacuum up the new pile of dirt and dust dislodged during reassembly as well as my office which was in much worse condition! :-)
This vacuum really sucks now!
Comments: At first, I was going to blame the excessive use of plastic for this problem. However, it would actually appear that the cause was the failure of the blower-end ball bearing. This, then caused the blower to bind and be literally ripped from the motor shaft.
How could a ball bearing fail? This isn't subjected to excessive loads of any kind and I doubt that the vacuum had seen that much use - it just isn't that old (no reflection on Paula's housekeeping). I have a 45+ year old Filter Queen (well, they haven't existed for decades - built 'em to last!) that still runs fine. Ball bearings do not fail that often! Thus, one can only assume that either the bearing was defective or its seals permitted dust to enter.
The much greater use of plastic in modern appliances has indeed reduced weight and cost (or boosted profit margins depending on your point of view). In this case, flimsy plastic probably wasn't a factor but one can point to many instances of parts being under designed for the application resulting in premature failure.
Symptoms: Reception would come in and out. Paul noted that BIG bumps seemed to affect the radio. Also problems with rear speakers.
Testing: No BIG bumps handy. Tapping it didn't seem to do much.
Paul had been bugging me for several weeks to look at this problem. In general, I don't like dealing with car stereos as removal is a pain, powering on the bench is a pain, and reinstalling is a pain. The key work here is 'pain'. :-)
However, I reluctantly agree to at least take a look at this one.
The first step is to figure out how to remove the radio (I tend to call anything in a car dash a radio even if it will mix drinks and is DVD-ready). Fortunately, the 'radio' is held in by four Philips head screws. On the first go-around, that is far as I got. For whatever reason (I don't recall exactly), I was unable or unwilling to take it to the lab (perhaps, the connectors weren't obvious or there were no connectors).
At the same time I took a look at the rear speakers which Paul had also been complaining about. The right speaker was kind of mushed with a damaged cone. I asked Paul if he wanted to repair or replace it. "No, as long as it makes some sound." (He wanted to sell the car eventually.) I kind of unmushed it but don't expect any crystalline highs. The left speaker seemed to have become detached. Paul, exactly what kinds of bumps have you been going over lately? Pushing the connectors back in place restored its sound.
This doesn't cure the main erratic problems so inspection of the interior of the radio is next on the agenda.
The next week, we are prepared for action. I have Paul park the car near our rear exit for convenience if tools or parts are needed. Then, I remove the radio again from the dash and pull off the top cover. Nothing is immediately visible but touching some vertically mounted daughter boards results in the sound coming in and out.
Sure enough, a careful inspection of the solder side of the main board from the bottom reveals some hairline cracks in the connections between one daughter board and the main board. How the manufacturer expected something like this to survive road bumps and potholes escapes me. However, it would seem that this sort of construction is used in many types of equipment subject to mechanical shock. (I will tell you about the Tandy multi-band radio with the erratic volume control someday.)
OK, so I go back into the office, fetch our Weller soldering station and a pair of 50 foot extension cords...... It doesn't take long to touch up the two rows of pads.
That did it. The reception is now solid and totally immune to as much whacking and wiggling as I could provide. This was actually a lot less traumatic than I had expected.
The clock in this car developed a bad connection problem several months later but that, alone, would not qualify for a Repair Brief though it did take a couple of attempts before the actual problem was found - a corroded cold solder joint that required removal of the old solder, scraping of the pin and pad, and new solder to repair.
And, yes, Paul did unload the car, mushed left rear speaker and all!
Comments: As noted, car radios are not my favorite repair activity. Perhaps they just don't have that entertainment value in addition to being difficult to service - did I mention how everything about them is a pain? :-)
Aside from road bumps and potholes, the electrical system in an automobile is prone to dips and spikes - some quite spectacular. The environmental conditions may be horrible - from arctic to tropical temperatures. There can be condensing humidity and tobacco smoke as well.
Thus it comes as no surprise that many common failures with car radios relate to mechanical problems and to a lesser extent, electrical abuse. In some cases, locating the cause is easy. In others, it can be very frustrating as Dave is currently finding out with a friend's car radio. Stay tuned (perhaps) for a report on that one in the future.
Symptoms: Rising temperature in fresh food compartment. Frozen food may be softening up also but this is not as obvious.
Testing: Checked that compressor was running (continuously). Condenser coils (underneath) have been cleaned. They are moderately warm.
Some possibilities for inadequate cooling:
With the compressor running and clean condenser coils, there isn't much else that is external to the sealed system.
The most common type of defrost system on a no-frost refrigerator or freezer usually consists of:
                     Black (4)
    Gray (3)      /o---------o Normal position - Compressor, evaporator fan.
H* o-----+------/
         |         o---o Blue (2)
       Timer           |         Defrost heater  Defrost Thermostat
       Motor (3180     o------------/\/\/\------------o/o----------+
         |    ohms)                 31 ohms          32 F          |
         |                                                         |
         | Orange (1)                                              |
         o---------------------------------------------------------+--o Common

   * H is the Hot wire after passing through the main thermostat (cold control)
     in the fresh food compartment.
The entire timer unit is readily accessible once the kick plate is pulled off.
By turning the finger access shaft in the defrost timer, I was able to get the reassuring click indicating the start of the defrost cycle. Sure enough, this was followed a couple minutes later by a variety of melting and sizzling sounds. These are normal as the ice melts and parts expand. Then, a steady trickle of water could be found dripping into the pan below.
I also noted that the timer motor did not seem even moderately warm as it would normally be - running as it should about 90 percent of the time. Could the motor be bad?
Two screws and the timer assembly comes free. After writing down the positions of each of the colored wires, I disconnect them and take the timer to a more convenient location for inspection. The motor is stone cold....
The timer assembly consists of two parts: A synchronous gear motor and a plastic housing with the cam and contacts. Two more screws and the cover to this part comes free. Initially, nothing looks amiss but then I notice a wire just hanging in mid-air. And, it is one of the two wires powering the motor!
Apparently, the wires were tack-welded to the metal strips with the contacts on their end. And, guess what happens when something flexes even a small amount a few thousand times? It breaks!
A quick soldering job and we are back in business.
Once reassembled, I force several consecutive defrost cycles (until no more water comes down into the drip pan) to assure that all the built up ice is gone.
Five years later:
Guess what? Same symptoms. Now, the diagnosis is even quicker. This time the wire broke near my soldered connection. To make sure this doesn't happen in another five years, I solder the wire to a location just behind the outside terminal - a place where there is no movement of any kind!
(The built up ice did a number on the styrofoam insulation between the bottom of the freezer and evaporator compartment but there is no way I am going to pay GE $75 for a 50 cent sheet of styrofoam! A little universal mending material, a. k. a. duct tape, takes care of that!
About 5 years later, 1 week after an extended power failure (1-1/2 days! At least it was the dead of winter).
Same symptoms. However, this time the motor is warm so my previous repair is still intact. :-) The motor is receiving power but nothing visible is turning as confirmed by rotating the cam by hand to the defrost position - where it would happily remain indefinitely.
Upon removing the cover of the gear reducer, the cause is obvious - a split plastic gear hub most likely due to gummed up grease (it hardened after cooling off while power was off) caused excessive stress when restarting.
Well, bite the bullet. Calling in a serviceman would result in a $135 bill. Our local appliance store had the timer assembly for about $30. Just after this episode, MCM Electronics started carrying universal defrost timers for about $12.
Comments: A properly designed and manufactured refrigerator or freezer is a very reliable appliance. The hermetically sealed compressor and coils can last virtually indefinitely as long as they are not abused (like using a sharp instrument to pick ice off of the soft evaporator coils!). There have been instances of early failures (and possible recalls) of some models but in general, several decades is not an unusual life span for the refrigeration components.
The defrost system is another matter. Its parts are exposed to the elements and get a workout several times a day. However, diagnosis and replacement is usually straightforward (except, that is, for finding a place for a freezer full of thawing food!). With luck (of sorts), the timer is the problem and this is a 5 minute repair if you are willing to just replace it.
Symptoms: Just blinking --:--. No response to any front panel buttons or remote control.
Testing: Nothing much without going inside.
This should have been a 15 minute repair (if you don't count gaining access to the power supply):
The blinking --:-- with no response to any buttons is a classic symptom of a power supply problem. In the case of Panasonic PV48xx and other models using similar power supplies, the culprit is usually C21 or C16 (though not all may use the same numbering), or some other electrolytic capacitor in the secondary side of the switchmode power supply. In fact, this turned out to be the case: C16 showed high ESR and I should have found that in about 2 minutes but did not and was led on a wild goose chase.....
Anyhow, back to the story.
With the cover off, the power supply connector is readily accessible. Although there are a number of variations on the power supplies used in the various models, all should show a couple of pins with a voltage of around +5 VDC.
Probing carefully reveals a bunch of much higher voltages (which are expected) but two pins have something around +3.6 to +4 VDC. Checking my reverse engineered Panasonic power supply schematic, these pins should have the +5 V.
No problem I say, remove the power supply, check C21. It should test with high ESR or low uF, replace, and be done. (Actually, the common failure with C21 is to have excessive leakage but no matter, I would just try replacing it anyhow.)
Removing the power supply module in these VCRs isn't too bad (as opposed to some older Panasonics which have apparently been designed specifically to make this difficult). A bunch of well marked screws holding the main board, lift free, unbend and unsolder a couple of tabs. Then unbend a couple of tabs on the sheet metal cover and - presto - access to both sides of the power supply circuit board.
To fully appreciate what is going on in the discussion below, it is recommended that you refer to the typical Panasonic VCR power supply schematic which may be found at Various Schematics and Diagrams.
Here is the important part:
  T1     D8                (+3.6)                   L3 ::::   ICP1 _
     +---|>|---+--------+-----+---------+----------+---^^^^---+---_ ---o +5 Out
  ::(          |        |     |         |          |          |
  ::(     D11 _|_.  R14 /     \ R17   __|__ IC1  +_|_ C16   +_|_ C17
  ::(    5 V '/_\   220 \     / 10K   _\_/_ Opto  --- 330 uF --- 1000 uF
     +--+      |        /     \         |   LED  - |  6.3 V - |  6.3 V
       _|_     |   C21  |     |    Q4 |/ E        _|_        _|_
        -      | 1 uF +_|_    +-------| 2SB641     -          -
               |  50 V --- Q3 |(+2.8) |\ C (PNP)
               |      - |   |/ C        |
               +--/\/\--+---|  2SD636   / R22
               |  R15 (-1.5)|\ E (NPN)  \ 220
               |  220         |         /
           R16 \         (-.7)+----+   _|_
          5.6K /              |   _|_   -
               \          R18 /   /_\
               |          18K \   _|_
               |              /    -
               |              |
 -V source o---+--------------+
Note: Measured voltages shown in ().
C21 does show slightly high ESR, so I find one in my stock and replace it.
No change. In fact, if anything, the output voltage has *decreased* slightly. (It turns out that the replacement cap had lower ESR and actually would be expected to make the problem worse given the actual cause.)
Next, I check all caps in the vicinity with the ESR meter. I even specifically checked C16 which would result in excess ripple and this would feed through C21 if C16 had high ESR. Apparently, I missed it - probably ignoring the absence of the huge decimal point thinking it read .20 ohms when in fact it actually was 20 ohms.
Next, I figured, "Well, maybe my replacement C21 was bad as it wasn't a new cap". So, I removed it entirely for testing.....
Now, C21 serves at least one function I know of and that is to limit the rise in voltages as the power supply is powered up. It couples any AC component of the +5 line back to the regulator to reduce output if there is excess ripple or if the voltage is increasing rapidly. With C21 removed, this protective function is not present......
But I realize this and put the supply on a Variac so I can increase the input slowly and avoid any problems. Right. :-(
Guess what? As I am increasing the input, I hear that high pitched whine indicating an excessive current fault somewhere in the power supply.
Well, maybe it is just the absence of the cap (not really thinking it through). Replace it.
No change.
OK, what happened? Is the supply now badly fried? Could the VCR have been affected as well? Well, at least the latter is unlikely.
It would appear as though something has shorted. Not the main switchmode power transistor as that would blow the main fuse and really mess up my day.
Well, I got lucky - at least in the time to locate the problem. Measuring across the first part I tested - a big fat diode - showed 0 ohms. Unsoldering it made no change but unsoldering a nearby zener diode (D15) showed that it was shorted. D15 is on the +15 V output and protects (by sacrificing itself apparently) against overvoltage since it does not really conduct during normal operation. (It is an 18 V, 1 W zener as I found out later).
Fortunately, I had a replacement known to be good which was removed from a similar supply when I installed a rebuild kit.
After the zener is installed, we are back to square one - 3.6 V on the 5 V line.
With the caps supposedly eliminated, that leaves the feedback network.
A bit of analysis shows that regulation is accomplished by feedback from the +5 line through a 5 V (approximately) zener (D11) to the base of a transistor (Q3). When the output exceeds 5 V, this transistor turns on which turns on another transistor (Q4) which supplies current to the LED of the optoisolator. Its photodiode then conducts and reduces the pulse width of the switchmode power transistor. Got that?!
Checking at the base of Q3: -1.5 V which is nicely .7 V more negative than the emitter. Q3 should be solidly off. However, its collector reads about .8 V less than its supply... Hmmmmm. I replace Q3.
No change. In fact, I replaced Q4, the optoisolator, AND D15 for a second time after I experimentally shorted the input to the optoisolator to confirm that it was capable of increasing the output - it was :-( and D15 blew again.
Not knowing the rating of D15, I replaced it with a 1N4742A, 12 V zener. However, this caused the +5 to read +4.1. At first I thought this was a clue but then realized that it simply was allowing more drive by sucking some of the power by conducting. Installing a 15 V zener remedied that. Back to square one again. (18 V is the correct value but at least the 15 V zener isn't loading the circuit.)
Finally, I do what I should have done early on - turn on the scope! Looking at the base of Q3 it is now obvious that I must have missed something in checking the caps. As the input voltage is increased, a very significant pulse waveform can be seen riding on top of the +5 V (now +3.6 V) output. This is coupling enough signal to the feedback circuit to reduce the output voltage. Since C21 has been eliminated as a possible suspect, the only other possibility is C16. Sure enough, a quick test with the ESR meter and - what do you know - 20 ohms. That is over 100 times what it should be!
Installing a replacement and all is well - only a couple hours more than it should have required!
Frank Fendley identified the correct value for D15 - 1N4746A, 18 V, 1 W but to top it all off, our local electronics distributor is out of zener diodes! Some prototyping house bought up their entire stock or so the story goes. And, Radio Shack only goes up to 15 V! I will obtain an exact replacement rather than cobbling something together from two lower voltage zener diodes since D15 does serve as protection and I don't want to affect that.
Comments: This repair should have taken about 15 minutes. I have no idea now I missed the ESR reading on C16 as I specifically went to that cap as it is one of the two most likely causes of this problem. I guess we all have bad days. On the plus side, the confusing situation forced me to analyze the operation of the power supply in more detail. I even found a couple of errors in polarity on the schematic. (It has only been available for the entire world to see at the Sci.Electronics.Repair FAQ site for about 3 years now. You would think someone else might have noticed!)
In the end, the only damage was about 40 cents worth of blown zener diodes and my ego in return for a little knowledge gained.
Symptoms: Does not spin in either direction on either speed.
Testing: Spinning the blades gets it going a bit but it never reaches anything approaching normal speed and makes a clicking sound.
This is my cousin's fan and has been in use during the summer months for the past 15 years. I had lubricated it once before but never really properly disassembled it entirely. (That was after the floors had been refinished - the sanding dust didn't help matters any.)
Everything structural in this fan is made of plastic except for the motor, and speed and thermostat trim plate.
Eight screws must be removed to take off the rear grill.
Ah - now that is a problem.... It seems that the blades in this are molded as a single unit with a section on the shaft for the clamp. Well, that section is totally broken off so even if the motor wanted to get up to speed, there is nothing holding the blades to the shaft! The clicking sound was probably the result of the shaft slipping inside the hole.
However, first the motor must cleaned and lubricated (at least) as it seems tight. Disassembly requires the removal of a front cover plate with the controls (speed and temp.) and then 4 nuts holding the motor itself. Then, 4 long bolts which clamp the motor halves together.
The closed-end seems fine - adequate lubrication and no damage.
However, the open-end is dry. It appears to be in basically good condition so a thorough cleaning and then some electric motor oil on the bronze bushing and the felt oil reservoir would appear to do the trick. I add a few drops to the other end as well just to be safe. Testing shows that the motor works as well as the day it was built.
Now for the broken blade problem.....
Repair with adhesive is not possible as the broken pieces could never be reliably reattached. Sears doesn't stock a replacement blade for this model (can you believe it?) and it would probably cost more than the entire fan if they did. So, I will have to improvise.
At first I figure on finding something in my junk boxes that would fit the shaft and screw or clamp to the hub portion of the blades. However, nothing seems to fit or lend itself to modification.
Therefore, I decide to fabricate a mounting assembly from some sheet aluminum and a hose clamp.
This consists of 3 strips of aluminum stock about 3/8" x 2" x .050, bent over 3/8" at almost a right angle at one end. Holes are drilled near the opposite end which will be used to screw these to the hub of the blades.
The source of this material was a long ago cannibalized HDS video terminal keyboard cover plate. You probably already know that I don't throw away much - somewhat less than gets wasted from a typical cow - never mind. :-)
The right angle portions were then attached to the shaft with the hose clamp and while in position, holes were drilled through the hub of the blades (a roughly flat portion about 5 inches in diameter. Screws, nuts, and washers made from the same material were then added and the entire affair was tightened in position.
Since only the clamp portion of the blade hub was missing, there was still a reasonably tight hole for centering and a layer of tape removed any sign of movement. However, a bit of adjustment was needed to correct a slight wobble. Translation: I rotated the blades and noted the high side - and then pressed down on it!
Now, the fan runs smoothly at both speeds in both directions though I will recommend using low as much as possible.
Comments: This represents yet another case of an appliance snatched from the jaws of the dumpster and land fill. There is nothing high tech about either the problem or the repair but these projects are much more satisfying than simply going and buying a new fan. Cheaper as well - $0 in parts at least. How long will it last? The motor is as good as new. The blade mount seems at least as sturdy as the original - only time will tell.
Where the nights are cool, an exhaust fan is a much more energy efficient solution than either window air conditioners or central air conditioning. The fan sucks out stale house air which is replaced by outside air through any open windows.
We still use an all metal window exhaust fan - it is just about 45 years old at this point and runs fine. A few drops of oil every so often (though I must admit to being negligent in this department of late) and it keeps chugging along.
Symptoms: Single horizontal line - video appears to be present.
Testing: External whacking has no effect, no service switch. Flexing the mainboard, however.....
Dave had been talking about this TV for a couple of weeks. So, finally, I found it with the back off on the bench in the lab. I wander over. Of course, there is just a dim horizontal line (Dave DID turn down the brightness). Naturally, I cannot resist a little exploring...
I flip a switch on the edge of the board that could have been a service switch but it had no effect (I later found out it was the CATV/TV/ANT/etc. switch).
Tapping and whacking don't do anything.
However, pulling up on the mainboard in the vicinity of the flyback transformer results in momentarily restoring a full raster.
DAVE??? Do you know that flexing the board has an effect?
"Um, yes, I think."
OK, let's put the board up on its side - can you do that so it doesn't short out?
"Sure."
So, I rummage around for something insulating - a flux removal brush would seem to be appropriate.
Dave, you watch the screen while I run this over the pins. Oh, I see you have touched up a few joints, huh?
"Just a few."
OK, here goes....
First, I attack the area of the flyback on the chance that the bad connection is for the power to the vertical circuits which probably are scan-derived.
No change.
Next, the area of other power semiconductors - hopefully one of these is the vertical driver.
Still no change.
Finally, just systematically over the entire board.
"STOP - there was something".
Backup, slower this time.
"Ooooo - you had it. Gone now".
This? "No." This? "No." This? "No." This? "No." This? "Wait, yes. Good. Bad... Bad... Good.. Bad... Good."
It is an IC. Let me try each pin....
"Bad. Good. Bad. Bad. No effect."
Pin 2 of this chip. Let me try to locate the crack. Is there a magnifying glass in this place? It took very close inspection but there was a definite crack that would widen as the pin was pressed to one side.
Dave, on Pin 2, jumper a wire to another pin on the same trace. Also, touch up all the other pins on this IC.
"I guess I wasn't forceful enough."
Five minutes later:
"They were all somewhat short of solder - what was there kind of disappeared when I touched them with a soldering iron but I think they will be fine now."
What is the chip ID? 'Uh, IC421, LA7838.' LA7838 is a vertical deflection processor. Pin 2 is 'Vertical trigger in'. Yes, that would explain a lot!
Sure enough, the TV is now solid.
Comments: There was no evidence of heating or other damage. With the meager amount of solder present, just the very slight effects of thermal cycling were likely enough to cause this failure in set which is something like 2 years old.
Dave's neighbor was about to toss the set because someone else had told him it was likely a bad picture tube! Simply amazing. :-)
Symptoms: Dead on both AC and rechargeable battery power.
Testing: Not applicable - done via email. :-)
I was contacted about this rig via email and attempted to walk Stan through the diagnostic and repair process. With such an old device, any rechargeable battery was almost certainly dead and any electrolytic capacitors would also be highly suspect.
Since the unit acts totally dead both from its battery as well as the AC adapter, I first suggested replacing the NiCd cells. Having accomplished this, and letting it charge overnight, there is now at least some quite whining to indicate that the inverter is running. However, the ready light still does not come on even after several minutes (cycle time should be under 10 seconds).
I next suggested that Stan should attempt to measure the voltage on the battery as well as the energy storage capacitor to determine how far - if at all - it is charging. I warn Stan to take extreme care around the cap - those can be lethal!
The report isn't promising. On battery alone, the battery voltage is stable at 2.45 VDC and the cap only charges to 48 VDC or so; on AC to 170 VDC. Even the latter is much less than the expected minimum of 300 VDC. What is going on?
Since Stan noted that the capacitors retain their charge for hours, it is unlikely that they are bad - leaky - but just in case, I suggest just replacing them with any sort of capacitor with similar uF rating and at least equal voltage rating (for testing only) - those from disposable cameras would be most appropriate and FREE if you know where to ask!
No change at all. At this point, Stan suggests that he is over his head on this one and is about to give up. So, I volunteer to look at the unit if he pays shipping both ways.
A few days later.....
The flash head itself is about as big as the entire camera with the power supply and charging adapter being somewhat larger. Actually, the power supply is a lot larger. I don't suppose spies generally like to use electronic flash in covert operations too often anyhow!
My first step is to reverse engineer the circuit. I don't expect anything particularly unusual but this will make any troubleshooting a lot easier (also available in GIF format as Minox ME1 Inverter and Energy Storage Capacitors):
                                                                       J2-2
                                             +--------------------------o HV+
                                             |  S2 Flash +-----------+
      P1-1  S1 Power            o  T1        | Intensity |     R2    |
   BT- o---+---/ --+-------------+     o     |      High o   330,2W  |
           |       |              ):: +------+-+-------+->o---/\/\---+
           |       /        D 15T )::(         |   Low | o     R3    |
           |    R1 \          #20 )::(         |       +--+---/\/\---+
           |   150 /   +---------+ ::(         |          |  10K,1W  |
           |       \   |           ::( O 1950T |          |          |
           |       |   |        o  ::( #46     |      C2 _|_     C3 _|_
           |-      +---|---------+ ::(         |   260uF ---  260uF ---
     BT1   _       |   |          )::(         |    350V  |    350V  |
    2.4V  ___      |   |    F 15T )::(    D1   |    D2    |          | J2-1
    Sub-C  _       |   |      #30 ):: +---|<|--|-+--|<|---+----------+--o HV-
     NiCd ___      |   |     +---+       BAY90 | | BAY90
           |+      |   |  Q1 |                 | |
           |       |  C \|   |                 | |
           |  C1 -_|_    |---+                 | |  O = Output
           | 47uF --- E /| AD136               | |  D = Drive
           | 10V + |   |   (PNP)               | |  F = Feedback
           |       |   |                       | |
      P1-2 |       |   |                       | |
 COM  o----+-------+---+-----------------------+ |
                                                 |
      P1-3                                       |
 CCAC o------------------------------------------+
Note: The BAY90 rectifiers cross to 1000 V, 2.5 A general purpose diodes.
The Flash Intensity switch, S2, selects between 12 W-s and 24 W-s. There are actually three positions. Apparently, you are supposed to pause in the middle one called "Hold 1 Sec" when switching between power levels for at least 1 second (surprise, surprise!) to allow the capacitor voltages to equalize! I would assume that the reason for this is to prevent damage to the switch contacts.
The flash head is separate from the power supply and appears to be very much like any of the other strobes. However, note the adjustment for the ready light!
I was not willing to completely disassemble this unit so some of the actual components and wiring were guessed (also available in GIF format as Minox ME1 Ready and Trigger Circuits).
         P2-2
      HV+ o---+-------------------------------------------------+
              |     R4                                         +|
              +----/\/\-----+---+--------+                     _|_
                   4.3M     |   |        |                    | | |
                            /  +++ IL1   |                   ||   |
                Ready R5 +->\  |o| NE2   |       Trigger     ||   |
                 Cal. 5M |  /  |o| Ready |          T2 +-----||   | FL1
                         |  \  +++       |          ||( o    ||   |
                   R6    |  |   |        |  C4      ||(      || _ |
              +---/\/\---+--+---+        +--||----+ ||(       |_|_|
              |   4.3M                   | .1uF    )||(         |
              |               Shutter o--+ 250V  o )||(        -|
              |                 Cable o--+      +-+    +-+      |
         P2-1 |                          |      |        |      |
      HV- o---+--------------------------+------+--------+------+
The wall adapter/charger provides both the current to charge the 2 cell NiCd
battery and a high voltage AC output (CCAC) to power the flash when plugged
into an outlet regardless of the state of the batteries. When operating from
the wall adapter, D1 and D2 in the power supply unit in conjunction with C4
form a voltage doubler that takes the 130 VAC (>80 V peak) output of the
adapter and produces over 300 VDC to charge the energy storage capacitors
(also available in GIF format as Minox ME1 AC Line
Circuitry).
                            T3     C5  J1-3
                               +---||----o CCAC (Capacitor Charge AC)
                  H o-----+ ||(   1 uF
                           )||(   350V
                           )||(
                110VAC     )||( 130V
                           )||(
                           )||(        J1-2
                           )|| +---------o COM
                  N o-----+ ||( 3.3V   J1-1
                               +---|<|---o BT-
                                   D3
Some interesting features I was not aware of previously - which might have
helped to narrow down the problem (and possibly give up - as you will see):
There is only one other thing that can prevent the capacitors from charging from the AC adapter - an open inverter transformer secondary. This would not be fun. Indeed, all efforts check its resistance failed. The transformer is bad. Can it be repaired? I don't think so - not unless the break is at the end of the winding on the outside. No such luck. In fact, after unwinding all 1,950 turns of #46 wire, I never did find it - probably one of the 50 or so times I thought I broke this super fine wire in the process, it was already broken. :-( No way to get that back together anyhow and the ferrite core was in several pieces as well....
So, go to plan B....
I tell Stan to see if he can locate another similar unit at auction or elsewhere to use for parts - even if it doesn't work. Within a half hour, he replies that an eBay on-line auction lists an identical model - with the identical symptoms - and it was still available at $37. No way I said, it may have the same problem as well and thus not be repairable! (That unit finally sold for $83 - Yikes! - and it could be a dud.)
So, I volunteer to perform a transplant......
There is nothing particularly unusual about the requirements - charge some large caps to around 300 VDC. Any vanilla flavored pocket camera needs to basically do this. However, just any unit would not necessarily work:
A simple test jumpering 4 wires confirmed functionality. The actual inverter portion of the Keystone flash occupies a volume of about 1" x 1-1/4" x 3/4" or just slightly more than that of the original dead inverter transformer! Some quick action with a hacksaw and nibbling tool resulted in a cute little circuit board that could be tucked into the available space. Some electrical tape assured that there would be no nasty short circuits. The chopper transistor was left exposed so any heat from it would have somewhere to go.
The excised circuit was attached to the positive terminal of the battery, the negative (center) at the switch, and the two secondary leads of the inverter transformer, taking care to get the polarities correct (the waveform out of the inverter is asymmetric and it would not work well if reversed). Except for T1 (dead) and C2 which I removed, all other components were left in place since they shouldn't affect anything.
It seems to work fine on both power settings and on battery or AC. The voltage on the energy storage capacitors stabilizes at about 315 to 325 VDC in all cases. The battery charges fine. What more can you ask? :-)
At first, I thought there was one slight problem: When plugged into an AC outlet with the power switch in the 'on' position (meaning the inverter is also running - the flash operates from AC with this switch off), I was afraid the voltage will eventually climb beyond the safe limits of the capacitors. Then, about 3 AM the next morning I realized there was a missing plastic piece that Stan had not sent me to prevent the switch from being moved into the 'on' position with the adapter plugged in (or vice-versa).
Comments: There is no doubt this unit would have hit the land-fill had it not been for my curiosity in determining what exactly was wrong - since the behavior didn't make sense given my (initially incorrect) understanding of the basic design. Once the nature of the AC adapter was revealed, everything fell into place. Had stand tested the transformer and found it to be open, I would have probably just suggested a nice funeral. :-(
Fortunately, the original inverter was so huge compared with the replacement that space was not a problem. I also believe that the cycle time is now about half of what it was originally so that is an added bonus. I bet the unit will produce more shots on a single charge as well.
Virtually all small battery powered electronic flash units use circuit designs that are very similar. Over the years, parts - particularly the chopper transistor and transformer - have improved greatly, thus the decreased size and increased efficiency.
-- end V2.00h --
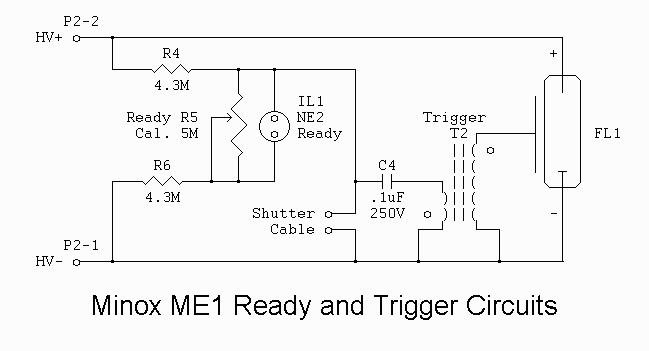
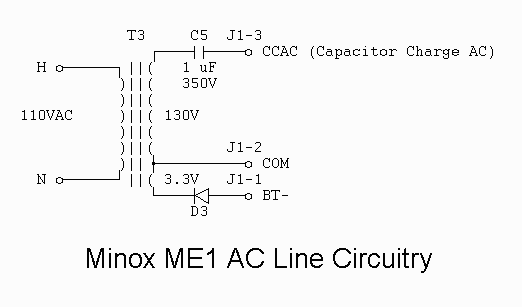